Detailed explanation of the key points of hotbed chives cultivation and management techniques
Hotbed chives are blanched garlic chives produced by hilling soil and covering to block light during garlic chive cultivation, causing them to soften and turn yellow in a dark environment. They not only taste better than garlic chives, but their price is also several times higher. So how should hotbed chives be grown? Follow the editor to take a look at the cultivation and management techniques for hotbed chives.
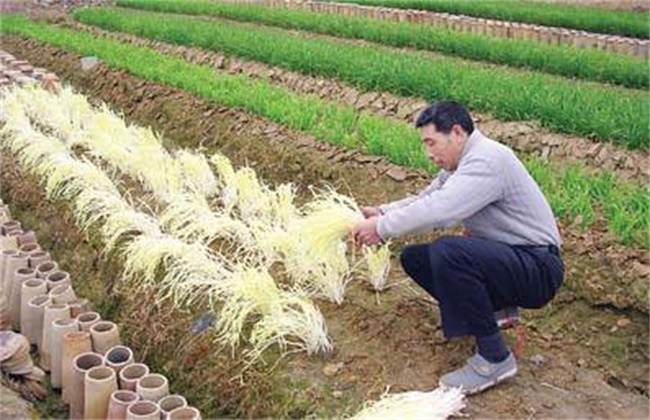
1. Variety selection
There are many varieties of hotbed chives. According to maturity time, they can be divided into early-maturing varieties, mid-maturing varieties and late-maturing varieties. Therefore, before choosing to grow hotbed chives, you must first understand their yield, growth speed and disease resistance, then choose the variety suitable for your own cultivation according to local conditions and your own management ability.
2. Deep plowing and land preparation
First, deep plow the soil. Hotbed chives can be harvested for many years after one planting, so the soil needs to be deeply plowed before planting. Only in this way can the root system of hotbed chives grow downward during growth, laying a solid foundation for future harvests. Second, choose sandy soil. Hotbed chives have relatively high requirements for the cultivation soil. They should be cultivated in soft sandy soil, which is conducive to irrigation and spraying as well as looseness and air permeability, and is of great help to the growth and development of hotbed chives. Third, open trenches and make beds. This is to facilitate drainage and irrigation. In plots with higher terrain, a drainage ditch can be opened in the center to help drainage.
3. Sowing
Hotbed chives can be sown directly or raised as seedlings and transplanted. The planting time for hotbed chives is March-April or September-October each year. For direct sowing, first spread a layer of fine sand on the leveled plot, then evenly broadcast the seeds in the trenches. Generally, 2 kg of seed is used per mu, and the row spacing is about 30 cm. After sowing, spread another layer of fine sand. After that, apply decomposed farmyard manure. If organic fertilizer or farmyard manure is insufficient, compound fertilizer can be used instead. The second method is transplanting. The trench spacing is also 30 cm. Plant the prepared seedlings directly, mix soil with fertilizer, place it into the trench and hill up soil around the young seedlings.
4. Building greenhouses
Hotbed chives need shade during cultivation. If light is not properly blocked, they will turn into garlic chives. So if you choose greenhouse cultivation, you can directly shade the outside of the greenhouse. If cultivating in the open field, you can use bamboo poles and opaque plastic to build a shade greenhouse, and then control the temperature and humidity inside the shed. It is best to keep the temperature inside the shed at 25 degrees. If conditions are relatively simple, keeping it at 15-25 degrees is also feasible.
5. Fertilizer and water management
Hotbed chives have relatively high requirements for fertilizer and water during growth. Improper fertilizer and water management will directly affect later returns. For fertilizer and water management of hotbed chives, remember the principle of “needs water but does not retain water, much fertilizer but not excessive.” This means that during the growth of hotbed chives, irrigation should be timely, but they must never be flooded and cause waterlogging damage. During the growth of hotbed chives, a large amount of nitrogen fertilizer is needed, and calcium fertilizer should also be appropriately maintained. When fertilizing, choose the method of applying small amounts multiple times.
The above is an introduction to the cultivation and management techniques for hotbed chives. We hope it can help you. To learn more related knowledge, please keep following us.