A Detailed Explanation of Jerusalem Artichoke Planting Methods and Key Technical Points
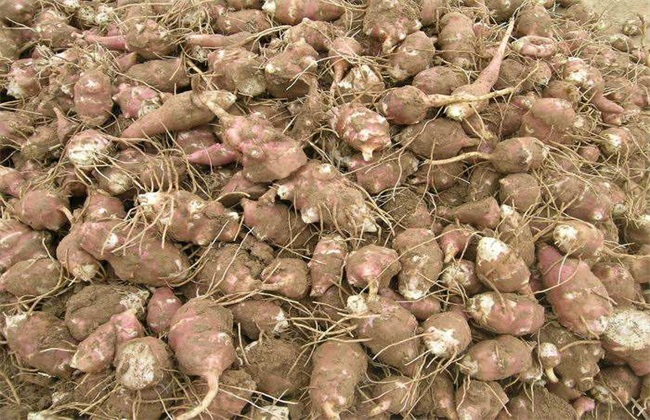
Jerusalem artichoke is a perennial herbaceous plant with persistent roots, and it is grown on a very large area in China. Its main edible part is the underground rhizome, which can be boiled or pickled, and can also be dried into Jerusalem artichoke slices; it is very popular in China. Jerusalem artichoke also has relatively high medicinal value, as it can treat unidentified swelling and toxin-related sores, mumps, and other conditions. So how should Jerusalem artichoke be planted? Below, the editor brings you the planting methods for Jerusalem artichoke. Let's take a look together!
1. Environmental Requirements
Jerusalem artichoke likes to grow in a cool and dry environment and has strong cold and drought tolerance. At a temperature of around 5°C, the tubers begin to sprout, and at around 10°C they can emerge. Jerusalem artichoke has relatively strong adaptability to soil, but if you want to increase its yield, then you should try your best to ensure soil quality. The soil pH must not be too acidic, and the soil should be ensured to have strong permeability, be soft, and have good drainage and irrigation capacity. Then, the soil should be well prepared. If the soil is of high quality, it is very beneficial to both the yield and quality of Jerusalem artichoke.
2. Seed Preparation and Sowing
The main propagation method for Jerusalem artichoke is tuber propagation, and Jerusalem artichoke is generally harvested in autumn and winter each year. After the tubers are harvested, tubers weighing about 22 g should be selected as seed tubers and stored in sand for seed preparation. It is also possible to wait until the soil temperature rises in spring and then select tubers of suitable size for sowing. The sowing time for Jerusalem artichoke is generally best in spring, and the sowing method is hole sowing or furrow sowing. When sowing, the sowing density should be well controlled, with plant and row spacing controlled at about 50 cm. After loosening the soil, apply an appropriate amount of base fertilizer; the base fertilizer should not be excessive to avoid fertilizer damage. Then sow at the appropriate time. Do not sow too deeply; keep it at about 10 cm. After sowing, cover with fine soil and level the sowing holes.
3. Field Management
Jerusalem artichoke emerges relatively quickly. Generally, it can emerge about one month after sowing. After the Jerusalem artichoke seedlings have all emerged, pay attention to watering and fertilizing, strengthen intertillage and weeding, and then build low ridges in the field. If the soil moisture content is suitable and it is not very dry, then there is no need to water again. Continue until the tuber expansion stage, maintaining the soil in a state of alternating dryness and moisture. If the stems and leaves of the aboveground part grow too vigorously, then topping should be done to concentrate nutrients in the tubers and promote expansion.
4. Timely Harvesting
Jerusalem artichoke has very strong disease resistance, and diseases rarely occur during its growth process, so basically no pesticides are needed. However, it is occasionally harmed by aphids; after aphids appear, spraying water can eliminate them. The harvest time for Jerusalem artichoke is generally after the autumn frost each year. When harvesting, directly dig out the tubers, then wash the soil off the tubers thoroughly and they can be sold on the market. If seeds are to be retained, then during harvesting, select and keep some small tubers and bury them in the soil. They can emerge the following year, and then thinning and replanting should be done well.
The above is a brief introduction to Jerusalem artichoke planting methods. That is all for today's introduction. This article is for reference only, and I hope it can help everyone!