Detailed Explanation of Management Techniques After Transplanting Celery
Celery likes a cool, moist climate. Now is a good season for growing celery, and the transplanting period for pest control is coming soon. If you want to grow high-quality, high-yield celery, what should you pay attention to when transplanting, and how should you manage it after transplanting? Let's take a look together.
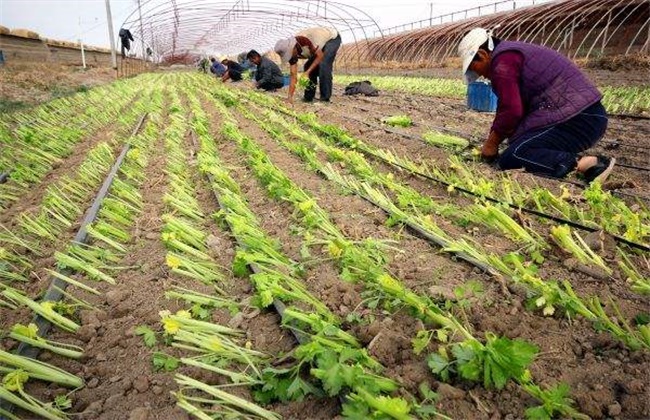
1. Transplanting
Before transplanting, water the seedbed thoroughly, then dig out the seedlings with roots and soil. When taking out the seedlings, cut the main root at about 4 cm so as to encourage the vegetable to sprout a large number of lateral roots and fibrous roots. Celery transplanting should be classified by size and transplanted separately, so that the seedlings grow uniformly, making management and harvest easier. The transplanting depth should be just enough to bury the root crown of the seedlings. Transplanting too deeply can easily cause the heart leaves to be buried in mud and lead to seedling death. The resulting plant and row spacing is generally 12-15 cm, with 2-3 plants per hole, or single-plant transplanting with a plant and row spacing of about 10 cm.
2. Watering and Fertilizing
After watering enough transplanting water, it enters the late transplanting stage. At this time, water generally once every 4-5 days. During the slow seedling stage, avoid high temperature and drought or water accumulation in the furrows, so as to prevent root rot and seedling death. After the slow seedling stage, control flooding irrigation, keep the soil alternately moist and dry, and promote root growth. About 20 days after transplanting, carry out intertillage and weeding and properly restrain seedling growth. This makes the roots grow downward, accelerates heart leaf differentiation, and inhibits excessive leaf stalk growth. One week into restraining seedling growth, combine watering with one fertilization. At this time the temperature is suitable, and topdressing can make celery grow rapidly.
3. Putting Up the Shed
By mid-to-late October, the shed can begin to be put up. At this time, temperatures in many places begin to drop, with the lowest temperature in some areas reaching 2-5 degrees, and celery grows slowly, so the shed should be put up to keep warm and promote growth. When putting up the shed, choose windless weather or weather with very little wind, and repair the greenhouse frame. Do not water for 3 days before putting up the shed, so as to avoid wet and sticky ground that makes the work difficult. Spray a pesticide for disease and pest prevention once before putting up the shed, because spraying is inconvenient after the shed is put up. When the temperature is below 0 degrees, add straw mats, roll them up during the day to increase light and raise the temperature, and put them down at night to keep warm.
4. Ventilation
After putting up the shed, pay attention to wind protection, especially in mid-to-late October when the temperature is high and light is strong. At noon, the temperature can reach as high as 30 degrees, so attention should be paid to ventilation. Lower the shed temperature to below 20 degrees and the humidity to below 80%, because a high-temperature and high-humidity environment can easily cause celery to grow excessively, weaken its disease resistance and cold resistance, and seriously affect yield. When the temperature drops in December, pay attention to freeze prevention. The nighttime minimum must not be lower than 6 degrees, and proper ventilation can be carried out during the day.
The above is an introduction to management techniques after transplanting celery. I hope it can help you. To learn more related knowledge, please follow us.