Detailed Explanation of the Key Technical Points of Goji Berry Cutting Propagation
Goji berry (Lycium barbarum) is a plant in the Solanaceae family, and the goji berries we eat in our daily lives are all the fruit of the plant. Goji berries are grown on a very large area in China, mainly concentrated in the northwest region of China. When growing goji berries, the most important thing is to do a good job of raising seedlings, and the common method of raising goji berry seedlings today is mainly by cuttings. So today I have brought you the cutting propagation technology for goji berries, let's take a look below!
1. Collecting Cuttings
Before cutting, you must first do a good job of collecting the cuttings, and there is a certain amount of care to be taken with the timing of collecting the cuttings. Generally, collection is carried out during the period from when the sap begins to flow until before budding. It usually starts around Qingming Festival, and first you should select healthy, high-yielding goji berry trees as mother trees. Then, on the mother trees, select thick, pest- and disease-free branches with a diameter of about 8mm, preferably water sprouts, as the cuttings. Cut them at a position where the cutting is about 16 cm long, then divide them into several cuttings, and make sure each cutting carries about 4 buds. Cut the top flat, then cut the inserted part into a slanted surface.
2. Treating the Cuttings
After preparing the cuttings, you also need to treat them properly. First, before cutting, apply an appropriate amount of rooting agent to the part of the cutting that will be inserted into the soil. First dissolve the rooting powder with alcohol, then pour in clean water. Then place the lower part of the cutting in the rooting agent to soak, keeping the soaking length at about 5 cm. The soaking time is best kept at about 20 hours, and when the soaking is complete, observe the condition of the cuttings. If there is nothing abnormal, then according to the actual situation, you can control the timing well and cut at the right time.
3. Cutting at the Right Time
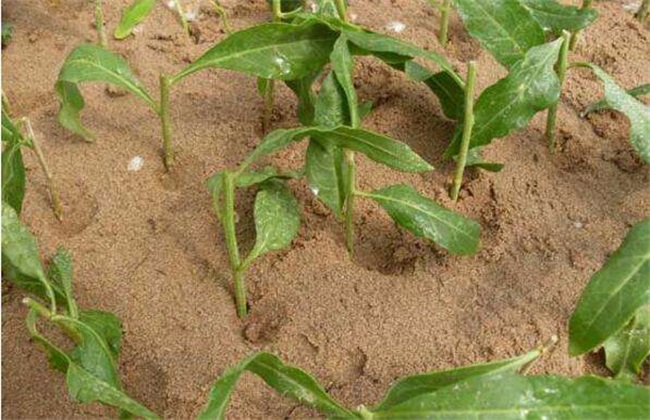
The timing of goji berry cutting should be determined according to climate and other environmental conditions, and it is usually best to cut as you collect, with good control over the interval between cutting the cuttings. The cutting time is generally around April 20. First, control the plant and row spacing well by opening furrows on the cutting bed, then pour an appropriate amount of water into the furrows before cutting. This can not only increase the soil moisture content and promote rooting of the cuttings, but also improve the survival rate of the cuttings. After cutting, cover with soil and press down gently. And in order to increase soil temperature and the survival rate, a layer of plastic film should be covered after cutting, and once budding occurs the film can be removed.
4. Strengthening Management
After the cuttings have successfully rooted and begun to sprout, you should break the film in time to prevent excessively high temperatures from burning the seedlings. After breaking the film, promptly press the film down with soil, which can also play a role in keeping warm and moist, and can also inhibit the growth of weeds. Then, when the seedlings have grown to about 30 cm, select the main trunk and cut off all the rest. And do a good job of bud removal. In the early stage of seedling raising, pay attention to controlling the amount of watering to prevent excessive water and waterlogging from causing the cuttings to rot. Watering should mainly be small-drop drip irrigation, and the water amount should not overflow the ridge surface.
The above is a brief introduction to goji berry cutting propagation technology. After about one year of raising goji berry cuttings, when the seedlings are about 60 cm tall, they can be transplanted at the right time. When raising seedlings, you must be sure to do a good job of management, especially disease prevention and control, to ensure the growth of the cuttings. That's all for today's introduction. This article is for reference only, and I hope it can help everyone!