Autumn Planting Time and Key Techniques for Sponge Gourd (Luffa)
When autumn-planted sponge gourd is sown from mid-to-late July to mid-to-early August, its growing and fruiting period coincides with a season of high temperatures, temporarily scarce rain, and gradually rising autumn winds. This very easily leads to weak vine growth, few fruits, many pests and diseases, and low returns. Therefore, the following points should be noted in cultivation and management: 1. Cultivate strong seedlings and ensure a full stand. (1) Seed selection. Choose early-maturing...
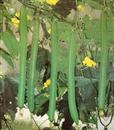
When autumn-planted sponge gourd is sown from mid-to-late July to mid-to-early August, its growing and fruiting period coincides with a season of high temperatures, temporarily scarce rain, and gradually rising autumn winds. This very easily leads to weak vine growth, few fruits, many pests and diseases, and low returns. Therefore, the following points should be noted in cultivation and management:
1. Cultivate strong seedlings and ensure a full stand. (1) Seed selection. Choose sponge gourd varieties that are early-maturing, suitable for close planting, disease-resistant, high-yielding, resistant to aging, good in market quality, high in early yield, and long-club-shaped for planting. (2) Seed treatment. Soak the seeds in 30°C warm water for 3 hours, remove them, then soak them in 0.1% potassium permanganate solution for 30 minutes to disinfect, then rinse them clean with clear water, and place them under ventilated conditions for natural germination. Sow after the seeds show white sprouts. (3) Sowing and seedling-stage management. Raise seedlings in nutrient cups. Mix thoroughly matured soil with a small amount of high-quality chicken manure, fill the cups, arrange them, and drench them with water. Sow 1-2 germinated seeds per cup, cover back with a small amount of fine soil, then spray with 1000-fold dexon solution. Then cover the seedbed with a covering to prevent scorching sun and heavy rain damage. During seedling raising, keep the seedling soil moist, but not overly wet, so as to avoid leggy growth. 7 days before transplanting and setting out, spray 1-2 times with 2% monopotassium phosphate to promote deep green leaf color, thick stems, and well-developed roots in the seedlings.
2. Setting out and field management. (1) Land preparation and fertilization. 10 days before setting out, combine land preparation with applying 1500 kg of decomposed chicken, duck, and pig manure, 100 kg of cake fertilizer, and 50 kg of compound fertilizer (NPK) per mu as base fertilizer. (2) Setting out. When the seedlings reach 4-4.5 leaves, promptly set them out in the field. Use close planting: make beds 2 m wide, plant 2 rows per bed, with a plant spacing of 25-30 cm, planting 2200-2500 plants per mu. (3) Trellising and pruning. Sponge gourd is a climbing plant, so a flat trellis must be set up before vines begin to run. If using bamboo poles, set each plant with one slanted pole paired with an opposite pole in the bed to form a slanted trellis about 2 m high, then at the top of the trellis tie bamboo poles, plastic woven straps, or iron wire lengthwise and crosswise into a net. After the sponge gourd vines are released, guide them onto the trellis in time and tie them to assist climbing, so that the vines and leaves are evenly distributed on the trellis. All side vines should be removed before they climb the trellis. For side vines that have climbed the trellis, pinch off the growing tips promptly when 2-3 flower buds appear; also cut off excess male flowers. After that, keep 2 side vines at the upper end of the main vine and remove the rest. When these 2 vines grow to about 10 leaves, also pinch off the growing tips and remove male flowers, and be careful to remove some old leaves on the lower part of the main vine to reduce nutrient consumption and ensure ventilation and light penetration in the field. In addition, frequently adjust the fruits so that the heavy gourds hang and grow inside the trellis. Plant adjustment work should be done on sunny afternoons to avoid damaging vines and leaves. (4) Fertilizer and water management. After the seedlings recover, drench once with dilute manure water to promote seedling growth and new root growth. After the first female flower is pollinated and fruit set occurs, open holes about 30 cm on both sides of the root zone, and apply 20 kg of urea, 50 kg of cake fertilizer soaked for more than 3 days, and 25 kg of compound fertilizer (NPK) per mu as fruit fertilizer to promote fruit enlargement. After the first batch of gourds is harvested, apply 15 kg of urea per mu as a relay fertilizer, or combine foliar spraying with monopotassium phosphate, Yemianbao, and other nutrient solutions while spraying pesticides to control pests and diseases. During the full fruiting period, every 1-2 harvests, apply manure water about once every 7 days; in the human manure and urine water, add 100 g of urea per 50 kg of manure water. If deformed fruits are found, water promptly to keep the soil moist and prevent increased deformed fruits caused by rain after drought, which affects market returns.
3. Timely harvesting in batches. Sponge gourd is eaten as a tender gourd, so the suitable harvest window is relatively narrow. From flowering to marketable gourd maturity generally takes 10 days. In production, it can be harvested when the fruit stalk is smooth, the fruit has slightly changed color, the fuzz has decreased, the peel feels soft to the touch, and the tender gourd surface is glossy. If not harvested in time, not only will the sponge gourd fibers age and lose edible value, but it will also affect later fruit set. When harvesting, it is best to cut off the fruit with scissors at the fruit stalk in the morning.
4. Pest and disease control. The main diseases of sponge gourd include viral disease, downy mildew, and powdery mildew. When they occur, spray with metalaxyl and triadimefon for control, once every 7 days, for 2-3 consecutive sprays. The main insect pests are aphids, gourd borers, and squash beetles. For control, spray with 800-fold dimethoate solution and 1000-fold 5% Cascade solution.