Detailed Explanation of Soil Cultivation Techniques for Giant Pumpkins
I. Seedling Cultivation: 1. Nutrient bag seedling cultivation: Seeds are sown in the greenhouse 6 weeks before planting. Step one: Put the seeds into 60°C hot water and stir for 15 minutes until the water temperature drops to 35°C, then stop and soak for 12 hours. Step two: Put the soaked seeds into a hotbed for germination, which takes 24 hours. During the 12 hours in between, wash the about-to-sprout seeds with 20°C warm water. After 24 hours, the seed coat splits open and a 1cm-long sprout grows. At this point, the nutrient bag seedling cultivation stage begins. To ensure seedling quality, organic fertilizer can be mixed with soil in proportion and placed into nutrient bags. Because the weather was very cold at the time and the temperature was low, 30°C warm water should be used when watering the base water. After the base water is fully watered, place the sprouted seeds into the nutrient bags, about 0.5CM into the soil, then cover with 2CM of fine soil, cover with plastic film, and emergence is expected in one week. By the fifth day, some had already emerged. At this time, the ones that emerged first and those that had not yet emerged should be cultivated separately to facilitate temperature control. Ten days after all seedlings have emerged, carry out low-temperature seedling hardening.
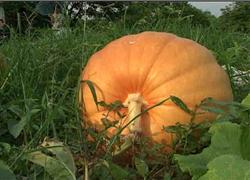
I. Seedling Cultivation:
1. Nutrient bag seedling cultivation: Seeds are sown in the greenhouse 6 weeks before planting. Step one: Put the seeds into 60°C hot water and stir for 15 minutes until the water temperature drops to 35°C, then stop and soak for 12 hours. Step two: Put the soaked seeds into a hotbed for germination, which takes 24 hours. During the 12 hours in between, wash the about-to-sprout seeds with 20°C warm water. After 24 hours, the seed coat splits open and a 1cm-long sprout grows. At this point, the nutrient bag seedling cultivation stage begins. To ensure seedling quality, organic fertilizer can be mixed with soil in proportion and placed into nutrient bags. Because the weather was very cold at the time and the temperature was low, 30°C warm water should be used when watering the base water. After the base water is fully watered, place the sprouted seeds into the nutrient bags, about 0.5CM into the soil, then cover with 2CM of fine soil, cover with plastic film, and emergence is expected in one week. By the fifth day, some had already emerged. At this time, the ones that emerged first and those that had not yet emerged should be cultivated separately to facilitate temperature control. Ten days after all seedlings have emerged, carry out low-temperature seedling hardening.
From seedling cultivation to transplanting must not exceed 45 days; the optimal time for transplanting seedlings to the field is at 35 days. When the seedlings grow to 4-5 leaves, transplant them to the field. Dig a pit with a diameter of 1 m and a depth of 60CM, then fill the pit with decomposed farmyard manure and soil at a 1:1 ratio, water the base water thoroughly, cover with 5CM of soil, plant the seedling on top, then use fine bamboo poles to build an arched small shed and cover with plastic film. Pay attention to ventilation when the midday sun is sufficient. One plant per pit, with a plant spacing of 3-4.5 m. Because the vines grow very quickly, sufficient space is needed to facilitate their growth.
2. Direct seeding method: Dig a pit with a diameter of 1 m and a depth of 60cm, then fill with decomposed manure and soil at a 1:1 ratio to 3CM below the ground surface. Dig a small pit about 3-4CM deep, sow 1-2 seeds per pit, cover the seeds with loose soil, mounding 2CM above the soil surface, with a sowing spacing of 3-4.5 m. Then use fine bamboo poles to build an arched frame and cover with plastic film. This ensures both light duration and temperature while preventing wind damage. Ventilate regularly when the midday sun is sufficient. When the seedlings grow 4-5 leaves, remove one of the weaker plants. When the daily minimum temperature stabilizes at around 12°C, remove the plastic film.
II. Field Management:
1. Properly secure the vines and prevent wind damage. In spring, northern regions have strong winds, and southern regions often have typhoons. Giant pumpkins have large leaves and brittle, easily broken stems. To prevent the vines from being blown over by wind, first use a small shovel to loosen the soil under the vines, make iron wire into an inverted "U" shape, and secure the vines to the ground surface. After the vines take root, remove the iron wire. It is best not to use soil to press down the vines to prevent rot. Second, build a 60CM-high windbreak cover around each pumpkin using bamboo poles and waste agricultural film.
2. Timely pinching, pollination, and retention of the main vine. Remove the first female flower and the tendrils before it; after side branches grow 2-3 leaves, pinch them; when the main vine grows to about 10 m, pinch it. In early July, two types of flowers form, namely male flowers and female flowers. Male flowers appear first, followed by female flowers. Pay attention to observing when female flowers appear. Female flowers are easy to identify; each flower has a green spherical stalk at its base, and these spherical stalks are called ovaries. Usually remove the first female flower on each vine and retain the second or third female flower. At this time, the vine has grown to 2.5-3 m. Before 8 a.m., pick a fresh male flower, trim off the outer petals, and shake the pollen from the stamens onto the stigma of the female flower. All female flowers produced afterward should be removed.
3. When the young fruits of the second female flower and the third female flower grow to the size of a tennis ball, keep the largest pumpkin and promptly remove the other one.
4. The fruit-setting position should be leveled and slightly raised, and a 1 sq m space should be reserved. At this stage, the vines should be pruned. When the vines grow to 200 leaves, pinch off the new shoots at the top and sides to ensure that the nutrients on the vines are supplied to the pumpkin's growth. When the vines grow roots at the petiole of each leaf, break off the roots near the pumpkin to give the pumpkin growing space, and at the same time remove the remaining female flowers so that all nutrients are supplied to only 1 fruit's growth. At this time, the pumpkin will grow at a rate of about 9 kg per day. Third, increase water and fertilizer management. Because the pumpkin's leaves are large and numerous, apply organic fertilizer once every 5-7 days, 50-70 kg per plant, with 0.5 kg each of nitrogen, phosphorus, and potassium fertilizer.
5. When topdressing, at 1 m away from the vine, surround it, mix decomposed stable manure with water, add nitrogen, phosphorus, and potassium compound fertilizer, and pour it into the manure ditch. For plants with fast growth, thick vines, large leaves, rapidly expanding fruit, and the appearance of a pumpkin king, assign dedicated personnel to establish files, provide key protection, and carry out special cultivation. Fourth, timely prevention of pests and diseases. After entering July, the weather becomes hotter and aphids and powdery mildew are prone to occur. To ensure the quality of green food, choose biological pesticide preparations as much as possible once a week; for powdery mildew, use pollution-free pesticides triadimefon and Lubaoging for prevention and control.
6. During the rainy season, ensure good drainage around the vines to prevent pumpkin rot. At the same time, scatter rat poison around the pumpkins to prevent rats from damaging the pumpkins.
7. In dry environments, aphids and powdery mildew are prone to appear; use trichlorfon for prevention and control. If fusarium wilt occurs, use Lubaoging and Shiteling for prevention and control. Pay attention to grasping the patterns, strengthen ventilation, pay attention to weeding, water appropriately, and achieve timely treatment when pests and diseases occur and advance prevention when they do not, ensuring the healthy growth of the seedlings.