Key Technical Points for Multi-Layer Covered Seedling Raising of Cucumbers in Spring Greenhouses
I. Greenhouse Structure. The best span for the greenhouse is 6-8 m. Put on the greenhouse film in early November. Set up a 1.5 m low tunnel inside the greenhouse and cover it with 3 m wide greenhouse film. At night, cover the low tunnel with a thick straw mat, and add a layer of old greenhouse film over the straw mat, which greatly enhances heat preservation. After seedling raising, cucumbers can still be planted in the greenhouse. II. Nutrient...
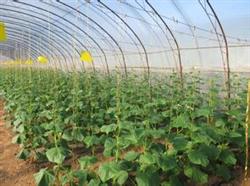
I. Greenhouse Structure. The best span for the greenhouse is 6-8 m. Put on the greenhouse film in early November. Set up a 1.5 m low tunnel inside the greenhouse and cover it with 3 m wide greenhouse film. At night, cover the low tunnel with a thick straw mat, and add a layer of old greenhouse film over the straw mat, which greatly enhances heat preservation. After seedling raising, cucumbers can still be planted in the greenhouse.
II. Preparation of Nutrient Soil. Take 60% fertile field soil that has not grown Cucurbitaceae crops and 40% decomposed organic fertilizer. For each cubic meter, add 15 kg of decomposed, finely crushed chicken manure, 3 kg of superphosphate, 2 kg of urea, and 1-1.5 kg of potassium sulfate. For each cubic meter of soil, 100 g of 50% carbendazim can be added. Mix well and set aside for later use.
III. Sowing
1. Seed Selection: Choose varieties with disease resistance, strong stress resistance, good commercial traits, and high yield. For winter-spring solar greenhouse cultivation, Jinchun No. 3, Jinyou No. 3, and Leiyu Baijintiao can be used. For spring open-field cultivation, Laoting Qiugua, Cuiyu, Tangshan Qiugua, etc., can be used.
2. Seed Treatment: Soak the seeds in 55°C warm water for 10-15 minutes, stirring constantly until the water temperature drops to room temperature, then soak for another 3-4 hours. Then rub and wash the seeds repeatedly, rinse the mucus clean with clear water, dry them, and promote germination. This can prevent scab, anthracnose, viral disease, and sclerotinia. Soak the seeds in 500 times diluted 50% carbendazim solution for 1 hour, then remove, wash clean, and promote germination to prevent fusarium wilt and scab. Wrap the treated seeds in a damp cloth and promote germination at 25-30°C for 1-2 days. When the seeds show white tips, place them at 0-20°C for another 1-2 days to promote germination.
3. Sowing: Sow when most seeds have germinated. For winter-spring crops in solar greenhouses, sow in early to mid-January; for winter crops, sow from late September to early October. For spring open-field crops, sow from mid-March to early April; for autumn crops, sow from late June to early July. One day before sowing, first water the seedbed soil thoroughly. Before sowing, thinly scatter a layer of fine moist soil on the bed surface, then mix in a little fine sand so it can be spread evenly. The sowing rate per mu is between 140-160 g. After sowing, cover the bed surface with 1 cm thick thiophanate-methyl medicated soil, then cover with plastic film to preserve heat and moisture.
IV. Seedbed Management
1. Seedling Management: After sowing, keep the low tunnel film tightly closed during the day. At night, cover it with a layer of thick straw and old greenhouse film. (Cover early and uncover late as appropriate.) During this period, the natural daytime temperature in the greenhouse reaches a maximum of 25-30°C, which is quite suitable, so ventilation is not necessary. After emergence, remove the plastic film. After sunrise during the day, remove the old greenhouse film and straw mat, then a little later uncover the low tunnel film to increase light. At 4 p.m., cover the low tunnel, straw mat, and old greenhouse film again. To prevent leggy growth, keep the temperature slightly lower after emergence, controlling it at about 20°C during the day and 8-15°C at night. Lower the temperature slightly 3-5 days before pricking out so that the seedling leaves are thicker, the leaf color is deep green, the root system is well developed, and the seedlings recover quickly after pricking out. When the seedlings grow to 2 true leaves, prick them out in time. Pricking out too early is inconvenient to operate, and too late tends to damage the roots when lifting the seedlings, affecting the survival rate after pricking out. Water the seedbed the day before pricking out. Lift the seedlings the next day, plant them separately into nutrient pots, and water thoroughly with thiophanate-methyl solution to prevent seedling-stage diseases.
2. Management After Pricking Out: After pricking out, to prevent seedling wilting, cover with the low tunnel for shade during the day. After the seedlings recover, uncover the low tunnel film during the day again, and at night cover the low tunnel film, straw mat, and old greenhouse film. At this time, keep the daytime temperature at about 28°C and the nighttime temperature at 10-18°C, and not lower than 8°C at the lowest. If the pot soil is found to be dry, water thoroughly in time on a sunny morning. When the seedlings are 40-45 days old and have three leaves and one heart, they can be planted.