Full Analysis of Key Techniques for Spring Asparagus Seedling Cultivation
Asparagus production generally uses seedling raising followed by transplanting. Centralized seedling raising and transplanting gives a high emergence rate, can save seeds, reduce costs, facilitate centralized management, and helps with pest and disease control and the cultivation of strong seedlings; it can extend the growing period in the planting year and increase the yield in the second year; during cultivation, seedlings can be planted in a directional orientation according to the growth direction of asparagus, which facilitates ridge building, spear harvesting and management operations.
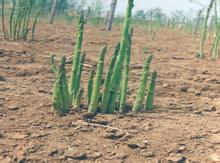
Asparagus production generally uses seedling raising followed by transplanting. Centralized seedling raising and transplanting gives a high emergence rate, can save seeds, reduce costs, facilitate centralized management, and helps with pest and disease control and the cultivation of strong seedlings; it can extend the growing period in the planting year and increase the yield in the second year; during cultivation, seedlings can be planted in a directional orientation according to the growth direction of asparagus, which facilitates ridge building, spear harvesting and management operations.
I. Cultivation season and sowing period
Asparagus is mostly sown in spring, but can also be sown in autumn. For spring sowing, sowing is generally done from February to April, and field planting from April to June, with spear harvesting beginning in the spring of the second year; for autumn sowing, sowing is done from August to September, and field planting from October to November, with spear harvesting possible in the autumn of the second year. The sowing period can be calculated based on the preceding crop and seedling-raising conditions, by counting back 60-80 days from the field planting period.
II. Selection of the seedling-raising site and preparation of the seedbed
The seedling-raising site should be selected as loam or sandy loam with loose texture, fertile soil and good aeration, with conditions for irrigation and drainage, and an open and ventilated environment. Since asparagus and onion and garlic vegetables are both crops of the Liliaceae family, in order to reduce the occurrence of pests and diseases, plots whose preceding crop was onion or garlic should not be used as asparagus seedling-raising or cultivation sites.
III. Seedling-raising methods and seedbed preparation
The main seedling-raising methods include solar greenhouse seedling raising, plastic low-tunnel seedling raising, cold-frame seedling raising and open-field seedling raising. The use of nutrient-pot seedling raising is advocated, as it causes little root damage during transplanting and gives a high survival rate.
1. Solar greenhouse seedling raising: Nutrient-pot seedling raising can be used. The nutrient pots should be prepared before sowing, and the diameter of the nutrient pots is generally 8-10 cm. The nutrient soil is mixed at 30% garden soil, 35% barnyard manure, 30% peat soil, 1.5% compound fertilizer, 0.5% urea, 1% phosphate fertilizer and 20% potassium chloride, sieved and put into pots, then placed in the beds. Before placing them, apply 4-5 kg of phoxim per mu of seedbed, mixed with an appropriate amount of sandy soil to make medicated soil, and scatter it on the seedbed to prevent underground pests. Cover with film and straw mats 10-15 days before sowing to increase temperature.
2. Low-tunnel or cold-frame seedling raising: The cold frame can be built before winter, generally made 1.5 m wide and 10-15 m long, with the north wall 10 cm higher than the south wall, as a sun-facing cold frame. Nutrient-pot seedling raising can be used, and the method of preparing the nutrient pots is the same as for the solar greenhouse. The prepared nutrient pots are placed in the cold frame or low tunnel.
3. Open-field seedling raising: Apply 3,000-5,000 kg of decomposed compost and 50 kg of Shakefu compound fertilizer per mu, spread evenly, deep plow 25 cm, and after fine soil preparation, make beds 1.2-1.5 m wide, level the bed surface so that the soil is fine and crumbly and the bed surface is flat. For growing white asparagus, use 60-70 g of seed per mu, occupying 20-30 sq m of seedling-raising land; for growing green asparagus, use 90-100 g of seed per mu, occupying 30-40 sq m of seedling-raising land.
IV. Seed soaking and germination acceleration
Asparagus seeds have a thick, hard coat and strong cutinization, making water absorption difficult and germination slow. To promote asparagus seed germination, germination must first be accelerated before sowing. Before sowing, the seeds can first be sun-dried for 1-2 days, then the shriveled seeds and insect-damaged seeds floated off with clean water, soaked in a 300-fold dilution of 50% carbendazim for 10-12 hours, then soaked in warm water at 30°C-35°C for 2 days, changing the water 1-2 times a day. Once the seeds have absorbed enough water, take them out and place them in a basin, cover them well with a wet gauze or towel, or wrap them well with a wet gauze or towel, and place them at 25°C-30°C for germination acceleration, rinsing with tap water 2-3 times a day, and sow promptly after germination.
V. Sowing
Before sowing, water the nutrient-pot seedling bed or open-field seedbed thoroughly. After the water seeps in, scatter a thin layer of soil. For the open-field seedbed, draw lines at a spacing of 10 cm between plants and rows, or cut soil blocks 10 cm square with a knife, take one germinated seed and sow it in the center of the square or the center of the nutrient pot, cover with medicated soil 2-3 cm deep, and cover with film after sowing. In the open field, broadcasting or drilling in furrows can also be used.
VI. Seedbed management
1. Temperature: The suitable temperature for asparagus germination is 25°C-28°C. For low-tunnel or cold-frame seedling raising, the daytime temperature should be controlled at 25°C-28°C and the nighttime temperature at 15°C-18°C. After emergence, keep it at 25°C during the day, with the minimum temperature not lower than 8°C and the maximum not exceeding 30°C; ventilate promptly when it exceeds 30°C. Gradually increase ventilation to harden the seedlings so they adapt to the external natural environment. When the seedlings have more than 3 aboveground stems, they can be field planted.
2. Water and fertilizer: Before emergence, the seedbed soil should be kept moist; otherwise, water promptly. After emergence, the seedling root system is weak and small, so water promptly when dry. When the seedlings are about 10 cm tall, apply a thin organic liquid fertilizer with the water, such as fully decomposed human excrement and urine or biogas slurry, or apply urea and potassium chloride, etc., with the water. Topdress 2-3 times during the seedling stage, so that the seedlings can fully accumulate assimilated nutrients in the later growth stage and be cultivated into strong seedlings.
3. Intertillage and weeding: After emergence, remove the plastic film immediately. For broadcast sowing, thin the seedlings after they all emerge, maintaining a seedling spacing of 7-10 cm. During the seedling-raising period, weed frequently and loosen the soil with timely intertillage. Earth up appropriately to make the bud scales develop thick and strong and prevent the seedlings from lodging. When the seedlings reach the standard for field-planting seedlings, they can be field planted. The field-planting standard is: seedling height about 0.3 m, with more than 3 aboveground stems and more than 5 underground storage roots.