Detailed Guide to Asparagus Seed Propagation Methods, Easily Grow Strong Seedlings
1. Choose good seeds: Asparagus is generally propagated from seed, so choosing good seeds is very important. Asparagus seeds can be stored for 3-5 years under good storage conditions, but in actual production, the effective limit is 2-3 years. If there is no sealed packaging and they are stored in a humid environment, the germination rate of the seeds will quickly be lost. To let the seeds...
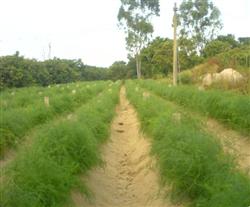
1. Choose good seeds: Asparagus is generally propagated from seed, so choosing good seeds is very important. Asparagus seeds can be stored for 3-5 years under good storage conditions, but in actual production, the effective limit is 2-3 years. If there is no sealed packaging and they are stored in a humid environment, the germination rate of the seeds will quickly be lost. Let the seeds fully mature before harvesting; generally, it takes more than 80 days from pollination to harvest. Seeds harvested in the same year can also be treated at a low temperature of 0-5°C to break dormancy and increase the germination rate.
2. Build a nursery: The following types of nurseries are relatively suitable in northern regions. ① Sunken hotbed: The sunken hotbed introduced here is an improved windbreak bed. When building a sunken hotbed, first build the bed walls, then set up the windbreak, and then cover it with plastic film. Straw mats can also be placed over the film, uncovered by day and covered at night. Cover with film one week before sowing to increase soil temperature. ② Small arched shed: A small arched shed is a small plastic shed with a relatively small volume and simple structure, made by bending bamboo strips or wooden sticks into an arched frame and covering it with plastic film. The supports for building the shed should be tough, with one placed every 50-60 cm, both ends inserted firmly, and then the supports tied together firmly with rope. After covering with film, press the edges firmly with soil all around to prevent the wind from blowing the film off. Straw mats, etc. can also be placed on top of the arched shed to increase soil temperature.
3. Prepare the growing medium: Preparing the growing medium is the foundation for cultivating strong asparagus seedlings. The nutrient soil must have good physical and chemical properties. The preparation method is as follows: 6 parts fertile soil (sifted), 4 parts organic fertilizer (manure, cow and horse dung, etc.), plus 15-25 kg of dried chicken manure or dried human manure, and 1-1.5 kg of compound fertilizer per cubic meter. Stir evenly and spread it in the sunken hotbed or arched shed to a thickness of 14 cm, level the bed surface, and prepare for sowing.
4. Make nutrient pots or nutrient bags: Nutrient pots or nutrient bags are cylindrical soil columns or soil bags 10-12 cm high and 8-10 cm in diameter. The upper center of the pot has a 1 cm square sowing hole. Nutrient pots are generally made with a pot-making tool. The nutrient soil used must be carefully prepared. The method is: manure, cow and horse dung : fertile soil = 3:7, mix and sift, add water to moisten. The standard for dryness and wetness is that it forms a ball when squeezed in the hand and breaks apart when dropped. Nutrient bags are cylindrical paper tubes made from waste newspaper, the same size as nutrient pots, and filled with the prepared nutrient soil.
5. Seed treatment methods: Asparagus seeds have a thick and hard seed coat and need a long time to absorb enough water, so before sowing the seeds must undergo necessary treatment to increase the germination rate and germination vigor. The seed treatment methods generally include the following: ① Sun-dry for 2-3 days (place on a tarpaulin in a 2-3 cm layer, turn 2-3 times a day, and dry continuously for 2-3 days). ② Rinse to remove impurities, remove shriveled seeds, and remove insect-damaged seeds. Store in sand before winter until sowing time. Before winter, dig a pit about 50 cm deep in a high, dry, sunny place, then store in layers with one layer of seeds and one layer of sand. The sand must have a certain moisture level, and the burial depth of the seeds should be no less than 20 cm. After spring begins, dig them out, sift out the seeds, and sow. Because the seeds have absorbed enough water, they sprout very quickly. Soak seeds in warm water. For seeds that have not been stored in sand, soak the seeds in warm water at 45-50°C before sowing. After the water temperature drops to room temperature, continue soaking for 2-3 days, changing the water 2-3 times a day, then remove the seeds and place them in a box.
6. Accelerating germination: Wrap the soaked seeds in clean gauze and place them under conditions of 25-30°C to accelerate germination. Rinse with warm water 1-2 times a day to wash away the secretions on the seeds and prevent the seeds from suffocating and rotting. When 10%-15% of the seeds have cracked their shells and shown white, they can be sown. If they cannot be sown immediately, spread the seeds in a ventilated, shady place to prevent the sprouts from growing too long and being knocked off during sowing.