Key Technical Points for Raising Seedlings of Pumpkin in Solar Greenhouses with Vertical Trellis Cultivation for the Winter-Spring Crop
①Determining the sowing date The sowing date is mainly determined by the heat retention of the solar greenhouse. A solar greenhouse with good light transmission and good heat retention can be sown and raised as seedlings in late November. The melons are harvested in mid-March of the following year. Otherwise, the sowing date can be postponed to January of the following year. With the above-mentioned solar greenhouse, sowing and seedling raising are generally carried out from late December to early January of the following year...
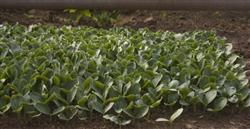
①Determining the sowing date The sowing date is mainly determined by the heat retention of the solar greenhouse. A solar greenhouse with good light transmission and good heat retention can be sown and raised as seedlings in late November. The melons are harvested in mid-March of the following year. Otherwise, the sowing date can be postponed to January of the following year. With the above-mentioned solar greenhouse, sowing and seedling raising are generally carried out from late December to early January of the following year.
②Preparation of the seedbed The seedbed should be set up in the middle of the solar greenhouse. It should be 1.5-2.8 m wide, and its length should be determined according to the actual number of seedlings needed. Use a heated brick bed or heating wire to control the ground temperature. Plastic pots are best for the nutrient pots. For the nutrient soil, choose sandy loam soil that has not been used to grow cucurbit crops and mix it evenly with decomposed farmyard manure at a ratio of 7:3, then add to each cubic meter of nutrient soil 50-60 g of 2.5% phoxim, 80-100 g of 75% dexon wettable powder, and 1000 g of potassium sulfate compound fertilizer (or 500 g of potassium sulfate and 500 g of diammonium sulfate). After sieving, mix thoroughly and put into nutrient pots with a diameter of 10 cm; or add only 270 g of multi-element seedling strengthener to each cubic meter of nutrient soil. The seedlings will be strong and uniform, and the effect is very significant, so it should be promoted. After the nutrient soil is put into the pots, arrange them neatly on the seedbed for later use.
③Seed soaking and germination acceleration Before soaking the seeds, choose fine weather and sun the seeds for two to three days, using the ultraviolet rays in sunlight to kill pathogenic bacteria on the seed surface; or directly use a 1% potassium permanganate solution, or a 500-fold dilution of 40% carbendazim, or a 100-150-fold dilution of 40% formaldehyde, soak the seeds for 10 minutes, then remove and wash them clean. Put them into warm boiled water at about 55°C, stir continuously until it reaches room temperature, soak for 4-6 hours, then wash thoroughly, remove and drain, and then wrap them well in warm gauze and accelerate germination at 28-30°C for 36-40 hours. Once the seeds show white, they can be sown? frame?
④Sowing and control of bed temperature The seedbed should be watered 2 days before sowing, and sowing should be done on a fine day. When sowing, place the germinated seeds flat in the nutrient pots; do not place them upright, so as to avoid the seeds emerging from the soil with their caps on. After sowing, cover with soil 1-1.5 cm deep, not too thick, so as not to affect emergence, then cover with plastic film, and then set up a small arch shed. If necessary, cover with straw mats at night to keep warm. Before emergence, the temperature should be controlled at 28-30°C. After emergence, remove the plastic film; the daytime temperature should be 22-25°C and the nighttime temperature 15-17°C. The seedlings will be robust and not prone to becoming leggy. However, the temperature should not be too low either; low temperature and high humidity can easily cause root rot and damping-off. After the first true leaf unfolds and the hypocotyl is relatively old and not prone to excessive growth, the daytime temperature can be raised to 25-28°C and the nighttime temperature to 16-18°C. When there is a relatively long period of cloudy and snowy weather, a 200-watt electric lamp can be installed per cubic meter to supplement light and increase temperature, which can avoid the harm of low light and low temperature. The bed soil should be kept at a degree of drying and wetting as it appears. Five or six days before planting, harden the seedlings at low temperature; the daytime temperature can be lowered to 20-22°C and the nighttime temperature to 10-15°C, and humidity should be strictly controlled so that the seedlings are hardened to adapt to the environment after planting.
⑤Planting at the right time The suitable planting stage is from 2 leaves and 1 heart to 3 leaves and 1 heart. Planting too late severely damages the roots, and plant growth recovers slowly. When planting, choose fine weather. After planting, do not flood-irrigate, so as to avoid the ground temperature being too low and causing root rot and dead seedlings. Usually, spot watering or light watering with a small amount of water is used, and a small arch shed should be put up in time to help raise the ground temperature and promote root development and seedling recovery.
⑥Planting method For pumpkin vertical trellis cultivation, use a north-south orientation and wide-narrow row planting, which is beneficial for ventilation and light transmission and convenient for manual operations. On the bed surface, the wide row spacing is 100 cm, the narrow row spacing along the ditch edge is 60 cm, the average row spacing is 80 cm, and the plant spacing is 35-45 cm, with about 1800 plants planted per 667 sq m. When planting, open holes 10 cm from the bed edge, 10 cm deep, and scatter 10 g of potassium sulfate compound fertilizer at the bottom of each hole; gently place the melon seedling with its soil ball into the hole, water thoroughly, and do not rush to close the soil after planting. Instead, at 2:00-3:00 in the afternoon, after the hole temperature has risen, close the hole with warm soil; after planting, cover completely with black plastic film and cut openings to let the melon seedlings out.