Cultivation Techniques for Interplanting Snap Beans in Greenhouse Tomatoes
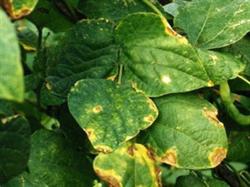
Symptoms: The disease can occur from the seedling stage to the mature plant stage, mainly affecting leaves, stems and vines, pods and seeds. The cotyledons of diseased seedlings show red-brown canker-like lesions, and lesions at the stem base encircle the stem, appearing as a red-brown canker, causing the seedlings to break and die. Control methods: 1. Implement a crop rotation of more than 3 years. 2. From disease-free fields...
 I. High-Quality and High-Yield Techniques for Winter-Spring Crop Tomatoes
1. Select good varieties. Choose the Mawa tomato bred by the Dutch company Rijk Zwaan. This variety is indeterminate, mid-season, with good yield potential; the fruit is oblate, bright red, colors well, tastes good, is a medium-to-large fruit, uniform, with a single fruit weight of 200-230 grams, good firmness, and stores and ships well, and is well received by buyers.
2. Sow at the right time. The nutrient soil is made by mixing 1/3 fully decomposed farmyard manure, 1/3 field soil, and 1/3 fully decomposed horse manure, sifting, and adding 5% soil starter. Based on local climate characteristics and market factors, the best sowing period is mid-October. Set up the seedling bed in an area with ample light, make a level bed running north-south, 4 m long and 1 m wide, dig 25 cm deep with a shovel, rake smooth, tread firm with flat-soled shoes, spread nutrient soil 3 cm thick in the seedling bed and tread firm again, scrape level with a flat wooden board, water thoroughly, and after the water seeps down, use a homemade "marking rake" to score small squares of 3 cm x 3 cm, with a depth of 3 cm. Sow dry seed directly, place the seeds in the small squares, press the seeds into the soil with your fingers, cover with nutrient soil 1 cm thick, cover with 1 layer of plastic film to keep warm and moist, and scatter poisonous bait made of cornmeal plus white oil plus an appropriate amount of trichlorfon around the seedling bed to prevent insect pests from gnawing the seedlings. Before emergence, keep 28-30 degrees C during the day and 18-20 degrees C at night. After sowing, 6-7 days later when seedlings are fully emerged, remove the plastic film. 3-4 days after emergence, when the cotyledons are flat, spray the leaves once with 72.2% Previcur 2000 times solution to control damping-off. After emergence, keep 24-26 degrees C during the day and 13-15 degrees C at night. To improve seedling quality and timely control pests and diseases, spray the leaves once with Magic Strong 300 times solution; to control American leafminer, spray the leaves with Agromectin 2000 times solution. When the seedlings grow to 2 leaves and 1 heart, transplant the seedlings with small soil blocks into seedling pots (8 cm x 10 cm, nutrient soil same as above), place them in the level bed, and water each plant thoroughly.
3. Seedling stage management. (1) Temperature: during the recovery period, 28-30 degrees C during the day and 16-18 degrees C at night; after recovery, 24-26 degrees C during the day and 13-15 degrees C at night, with the lowest temperature not lower than 10 degrees C. (2) Light: keep the greenhouse film clean and bright regularly, wipe once every 5-7 days, dust once a day, and uncover early and cover late with straw curtains when temperature permits. When the seedlings grow until the leaves overlap, expand the soil blocks once so the seedling spacing reaches 12 cm x 12 cm. (3) Fertilizer and water: about every 7 days, water thoroughly once and apply fertilizer once, each time applying humic acid organic fertilizer 300 times solution, watering each plant thoroughly. Spray the leaves with Magic Strong 300 times solution 2 times to improve seedling quality. (4) Pest and disease control: to control American leafminer, spray the leaves with Agromectin 2000 times solution; for late blight, spray the leaves with Kexu 800 times solution.
4. Land preparation and planting. First clear the residual branches and fallen leaves of the previous crop, dig high-yield furrows 40 cm wide and 30 cm deep on the previous crop beds and ridges at a row spacing of 1 m, spread fully decomposed farmyard manure in the furrows at a fertilization rate of 10,000 kg per mu, turn once with a shovel so soil and fertilizer are mixed evenly, rake level and open furrows 15 cm deep, dig holes at a plant spacing of 30 cm, apply 0.5 kg humic acid organic fertilizer and 0.3 kg diammonium phosphate per hole, and mix well with soil. On December 4, plant seedlings grown to 5 leaves and 1 heart in a single row at the plant spacing, and water thoroughly after planting. Cultivate once 7 days later, earth up the planting row level with the seedling soil block; about 10 days after planting, water to help recovery, and thereafter cultivate and earth up once every 5-6 days, for a total of 5 times.
5. Temperature management after planting. Keep 25-28 degrees C during the day and 13-15 degrees C at night, with the lowest temperature not lower than 10 degrees C. Cover the outside of the greenhouse with double-layer straw curtains to strengthen cold protection and heat preservation. When the greenhouse temperature rises to 28-30 degrees C, open the top vents to ventilate, remove moisture, and cool down, bringing the temperature down to 22-24 degrees C. In low-temperature seasons, insist on ventilating for 30-60 minutes at noon. After the fruit has fully expanded, control the night temperature at about 14 degrees C to promote reddening of the fruit.
6. Light management. Dust the greenhouse film once every 2-3 days and wipe it once every 5-7 days, keeping it clean and bright regularly. When temperature permits, uncover the straw curtains as early as possible and cover them as late as possible, and use a roller shutter machine to roll and unroll the straw curtains to increase light duration.
7. Fertilizer and water management. Keep the soil moist regularly. At the recovery watering, apply 12 kg per mu of humic acid tomato special fertilizer with the water. Thereafter, every 10-15 days, apply the same amount of fertilizer and water lightly once (that is, alternately water the furrows on both sides of the ridge), and combine with cultivation to return soil to the planting row and form ridges, which helps raise soil temperature and cultivate a good root system. In mid-February, the fruit enters the peak expansion stage; apply Magic Abundance 2 kg per mu with the water, then once every 7-10 days thereafter, alternating with potassium nitrate compound fertilizer 20 kg. If biogas slurry is available, it can be applied together until vine removal. To improve fruit quality, spray foliar fertilizers such as calcium nitrate king and liquid boron on the leaves.
8. Plant adjustment. Adopt single-stem pruning, leave 6 trusses of fruit and pinch the growing tip, leaving 5-6 fruits per truss, and promptly remove side branches when they grow to 5-10 cm. After each truss of fruit has fully expanded, remove the leaves below it, removing bottom leaves 4 times in total, which helps ventilation and light penetration. For flower dipping, use CPM Tomato Harvest Agent, adding 1 kg of water per tube and spraying the flowers.
9. Apply carbon dioxide gas fertilizer. In mid-February, apply 4-6 bags of carbon dioxide growth promoter per mu, once every 10 days, for a total of 4 applications.
10. Pest and disease control. To control bacterial diseases, use "Keshade 2000" 600 times solution or 1 tube of penicillin plus 45 kg of water to drench the roots 2 times. To control gray mold, promptly remove wilted yellow petals and fruit stalks, and spray the leaves with Hui'an 1000 times solution, once every 7 days, for a total of 4 sprays. For leaf mold, spray the leaves with 50% thiophanate-methyl suspension concentrate 600 times solution, once every 5-7 days, for a total of 3 sprays.
II. Cultivation Techniques for Interplanted Snap Beans
1. Sow at the right time. Choose the Dalian 923 variety, which has good market quality, high yield, and is welcomed by the market; it takes about 50 days from sowing to harvest. When the 1st to 3rd trusses of tomatoes have fully expanded and the lower leaves have been removed, sow in mid-to-late February, using direct sowing of dry seed, sowing 10 cm to the side of the tomato planting row. Between every 2 tomato plants, dig a 5 cm deep hole with a hoe, sow 2-3 seeds per hole, and cover with 3 cm of soil.
2. Reasonable pruning. After the snap beans emerge, cultivate 2 times along with watering the tomatoes. When they grow to 4-6 leaves, pinch the growing tip so side vines grow from below, and before pinching or after vines begin to run, promptly set up hanging strings (fishing net twine) for support, so the snap beans do not affect tomato growth. Before the final tomato harvest, field management is the same as for tomatoes, but when controlling leaf mold, try not to spray the foliar solution onto the snap bean plants. After the final tomato harvest, keep 24-26 degrees C during the day and 13-15 degrees C at night, mainly by opening the top vents, and regularly keep the greenhouse film clean and bright.
3. Other management. Apply humic acid organic fertilizer 12 kg per mu with the water, about once every 7 days, for a total of 8-9 applications. To prevent flower and pod drop, increase ventilation, mainly by opening the top vents. When the vines reach 2 m high, promptly pinch the growing tips, and thereafter remove newly emerging side vines at the top every 7 days to prevent "vine running." Control gray mold as above; for whiteflies, spray with Fenwisuqing 3000 times solution, once every 5-7 days, for a total of 2-3 sprays. Begin harvesting snap beans in late April and finish harvesting in mid-July.