What are the key techniques for growing kale in the open field?
How is kale grown in the open field? Please give a detailed introduction to the planting methods and management methods. For open-field kale cultivation, you can refer to the following methods: Growing season: generally, seedlings are raised under protection from late March to early April, transplanted to the open field in early to mid-May, and harvesting begins in early to mid-June. Sowing and seedling raising 1. Sowing: ...
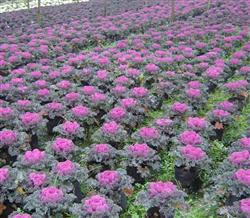
How is kale grown in the open field? Please give a detailed introduction to the planting methods and management methods
For open-field kale cultivation, you can refer to the following methods:
Growing season: generally, seedlings are raised under protection from late March to early April, transplanted to the open field in early to mid-May, and harvesting begins in early to mid-June.
Sowing and seedling raising
1. Sowing: For spring seedling raising under protection, use sterilized fertile garden soil as the seedbed soil, apply 500 g of Lvxinbao brand biological compound fertilizer or 5 kg of fully decomposed organic fertilizer per sq m, mix the fertilizer with the bed soil evenly and sieve it, then after watering to settle the soil, sow in rows or broadcast. For row sowing, open shallow furrows about 1 cm deep at a row spacing of 5-6 cm and sow; for broadcast sowing, make sure the seed is distributed evenly. After sowing, cover with about 1 cm of fine soil and cover with plastic film.
2. Seedbed management: After sowing, keep the soil moist and maintain the temperature at around 20°C. After emergence, remove the covering, keep the daytime temperature at 15-18°C, and the nighttime temperature not lower than 10°C. At the 2-3 leaf stage, transplant the seedlings into pots, with a growing space of 5-6 cm square; seedlings raised in nutrient pots do not need transplanting. When the seedling age is 30-30d and there are 5-6 true leaves, they can be transplanted.
IV. Transplanting: For kale cultivation, choose fertile loam or sandy loam plots, and before transplanting apply 30-45 t of fully decomposed organic fertilizer such as chicken and pig manure per hectare. After plowing and preparing the land, build ridges 50-55 cm wide or make small high beds 1.0-1.2 m wide. Cover with film and transplant by punching holes. For bed planting, plant double rows per bed; for ridge planting, plant a single row, with a plant spacing of 45-50 cm and a density of 37,500-45,000 plants/hm2. After transplanting, water thoroughly.
V. Management in the shed
1. Cultivation management: After transplanting and seedling recovery, cultivate and loosen the soil in time, which can raise soil temperature, reduce water evaporation, promote root growth, and eliminate weeds. Generally, cultivate 2-3 times before the plants close the rows, with a depth of 3-4 cm, and afterward pull weeds by hand.
2. Fertilizer and water management: Kale has strong adaptability. Generally, after transplanting and seedling recovery, carry out the first topdressing, applying 150-225 kg of urea or 15.0-22.5 t of decomposed human excrement per hectare to promote stem and leaf growth and improve yield and quality; afterward, after each harvest, apply about 150 kg of urea per hectare. Kale has a relatively large stem and leaf growth volume and consumes more water, so water should be applied after each topdressing, and the soil should be kept moist regularly, but the amount of water per irrigation should not be too much. In summer, when rainfall is concentrated, pay attention to drainage, and the field must not accumulate water.
3. Pest and disease control: Kale has few pests and diseases. The main pest is the cabbage caterpillar. If found, spray with 1500-2000 times diluted deltamethrin emulsifiable concentrate as early as possible.
4. Harvest: 25-30d after transplanting kale, when 7-8 large leaves have grown and new heart leaves have regenerated, the tender leaves can be harvested successively, once every 10-15d. In summer, when temperatures are high, the leaves are relatively hard, have more fiber, and taste poor, so the harvest interval should be shortened to reduce the degree of leaf aging. Generally, in early spring and late autumn, the leaves are crisp and tender and taste good.
Click to get more cabbage planting techniques
Click to get more vegetable planting techniques