A Detailed Guide to the Timing and Methods of Bud Grafting Cherry Trees
Cherries are a fruit we are all very familiar with. They are rich in nutrients and taste excellent, which is why they are so popular with many people. As a result, the area devoted to cherry cultivation is now fairly large, and when growing cherries, the main propagation method is bud grafting. So when should we bud graft cherry trees? And how should we do it? Below, the editor brings you the timing and methods of bud grafting cherry trees. Let's take a look!
1. Bud Grafting Time
When carrying out bud grafting, the grafting time is very important. The suitable time for bud grafting cherry trees is generally in the early and late stages of cherry tree growth. The early stage refers to mid-to-late March, lasting about 20 days in total. The late stage is in July-August, and if the environment is suitable, it can be extended into September, lasting about 50 days in total. Note that the grafting time should not be too early. If it is too early, the scion is very tender and the cortex is not thick, which will affect the growth of the grafted bud. However, grafting should also not be too late. If it is too late, most branches have already stopped growing, and the grafted bud is difficult to peel off.
2. Selecting Scions and Grafted Buds
When bud grafting, if the time differs, the selection of scions and grafted buds also differs. When grafting cherry seedlings and carrying out post-grafting management in the early stage, select vigorous branches and choose about 6 plump buds from the middle as grafted buds. Then, when bud grafting in the late stage, as long as they are buds on vigorous scions, all of them can be used as grafted buds except for the tip buds and autumn shoot buds. Finally, if bud grafting is carried out in September, then select plump buds from the water sprouts in the inner canopy as grafted buds.
3. Cutting and Removing the Grafted Bud
Before bud grafting, we first need to process the grafted bud. First, cut off the grafted bud, and make sure the bud plate of the grafted bud is kept as large as possible. Control the length at about 25cm and the width at 1cm. This can expand the contact area between the rootstock and the grafted bud, and the survival rate can thereby be improved. If the bud plate of the grafted bud is too small, then its survival rate is very low. Moreover, even if the rootstock and the bud opening can heal and survive normally, the grafted bud is also prone to bursting and lifting, leading to poor growth, and in severe cases, failure.
4. Grafting and Binding
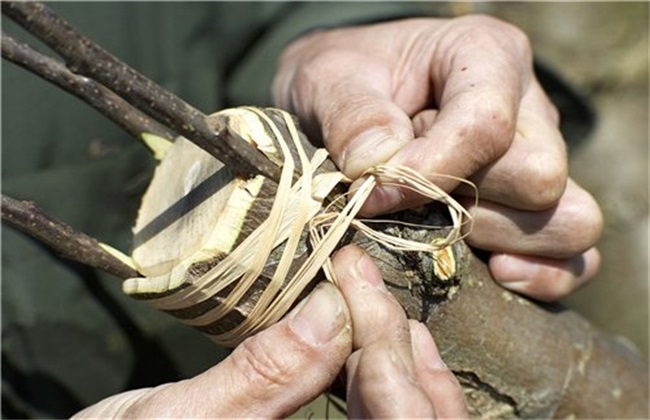
After cutting the grafted bud, make a horizontal cut on the rootstock seedling at a position near the ground, keeping the length at about 1 cm, until the xylem is exposed. Then, at the position of the horizontal cut, make a vertical cut downward from the middle, keeping the length at 2.5 cm, also reaching the xylem. Then, when inserting the bud plate, gently peel open the cortex on both sides, and then let the grafted bud naturally embed into the rootstock cortex. Do not push hard with force, otherwise gumming will occur, leading to a decrease in the survival rate. Then use polyethylene film of a suitable specification to tie the graft union tightly. After bud grafting, it will heal in about two weeks, and the film can be removed after three weeks. The survival rate can reach about 80%.
The above is a brief introduction to the timing and methods of bud grafting cherry trees. That's all for today's introduction. This article is for reference only, and we hope it can help everyone!