Detailed Explanation of Key Techniques for High-Yield Organic Chestnut Cultivation
Carrying out winter pruning of chestnut trees in the full-bearing period is an effective measure to extend the full-bearing period and prevent the occurrence of alternate bearing. 1. Pruning timing: The winter pruning period for chestnuts is best from half a month after leaf fall to half a month before spring bud break the following year, that is, from mid-December to early February of the next year, but when encountering ice...
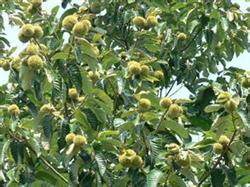 In addition to relatively high requirements for environmental factors such as air and water quality, organic chestnuts also have relatively strict management requirements. Its cultivation techniques mainly include the following aspects:
I. Orchard Establishment
1. Site selection. It is advisable to choose a site with a slope below 30 degrees, soil pH 5.5-7.0, groundwater level below 1 m, and sandy soil or sandy loam soil on a sunny slope, semi-sunny slope, hill, or riverbank flatland for orchard establishment.
2. Land preparation.
Horizontal trench land preparation: Suitable for hilly and mountainous land of 10-20 degrees. In the rainy season of the year before planting trees, according to the designed row spacing, build earthen trenches along the mountain contours, with trench ridges 30 cm high and 60-80 cm wide. The mountain surface soil below the trench should not be disturbed to prevent soil erosion. Water overflow outlets are left at both ends of the horizontal trench.
Pit-shaped land preparation: Suitable for sloped land below 10 degrees or flat land. Length x width x depth is 50-60 cm x 50-60 cm x 50-60 cm.
Fish-scale pit land preparation: Suitable for sloped land above 20 degrees. Length x width x depth is 50 cm x 40 cm x 30 cm.
3. Land preparation requirements. First, there must be a reverse slope, with the outer edge raised and the inner part holding water. Second, it must be level, with no unevenness. When there is continuous rainfall of 100 mm, there must be no phenomenon of trench collapse, dam damage, or seedling washout.
II. Planting
1. Seedling selection. Select healthy, vigorous seedling trees 1-2 years old, with a diameter above 0.8 cm, free of pests and diseases and large mechanical damage, uniform in size, and with main and lateral roots over 20 cm in length.
2. Planting. The initial planting density is 2 x 3 m spacing between plants and rows, 111 trees per mu. Later, as the canopy expands and closes, gradually remove every other tree and every other row.
3. Planting time. Plant in autumn and winter around Minor Snow before the soil freezes (early November to late November) or in spring before Qingming after the soil thaws (March 15 to early April).
4. Planting method. Before planting, use pruning shears to trim the roots of the seedlings, cutting off crushed and decayed wounds. When soil is filled to the root division point (the five-fork junction), pour water generously until the pit is full. After the water seeps in, fill firmly and tread solid, to the extent that an average adult cannot pull out the seedling with one hand. For one-year-old seedlings, the soil cover thickness should exceed the original soil mark on the seedling by 10 cm; for two-year-old seedlings, exceed the original soil mark by 20 cm. When planting in autumn and winter, seedlings must not be exposed at night to avoid bare roots freezing. After planting, seedlings should be pressed down for cold protection and completely buried in soil. Do not pile soil over only part of the seedling, to prevent exposed parts from drying out and dying. Spring planting should be covered with plastic film to increase temperature and retain moisture, promote seedling growth and development, and improve the survival rate.
III. Grafting
1. Variety selection. It is advisable to choose varieties with obvious resistance to chestnut pests and diseases, such as Yanshan Duanzhi as the main cultivar and Yanming as the pollinating variety, with a suitable ratio of 8-10:1.
2. Selection and storage of scions. Select scions with a diameter of 0.3-0.8 cm, vigorous growth, free of pests and diseases, from one-year-old fruiting mother branches (bangchui ma). Collect scions in winter (dormant period) and store them in sand in a cellar to keep the scions fresh and in a dormant state.
3. Grafting. Graft in mid-April to early May of the second or third year after planting. High grafting on large trees can continue until late May.
4. Grafting method. Bark grafting (insertion bark grafting) is preferable. Cut off the rootstock at 10-20 cm above the ground, and smooth and level the cut surface with a knife. Cut the lower end of the scion into a 3-4 cm long horse-ear-shaped slant. On the back side, make three reverse cuts on the left, middle, and right to form a sword-tip-shaped small slant, 0.2-0.3 cm long. On the upper part of the small surface and the corresponding part of the large surface, lightly shave off the epidermis with a knife to expose the green tender bark. After the scion is cut, hold it in the mouth until insertion. It is best for the scion to have 3-5 buds; it should not be too long. Use a grafting knife to make a vertical cut into the trimmed and smoothed rootstock, reaching the xylem. Gently pry open the bark and immediately insert the prepared scion, with the large slant facing inward and close against the xylem, leaving 0.2-0.3 cm of the upper part of the slant exposed. For rootstocks 2-3 cm in diameter, 2-3 scions can be inserted; for high grafting on large trees, more scions can be inserted. Bind tightly with elastic plastic strips about 3 cm wide, wrapping to 3-5 cm above the rootstock cross-section in a cylinder shape. Put a handful of soil into the hollow cylinder and press firmly by hand; the soil thickness inside the cylinder should preferably be 2-3 cm. To prevent insects and retain moisture, a plastic bag can also be placed over it, with the lower opening tied tightly with fine string. After the scion buds sprout and leaves unfold, promptly puncture holes or tear open the bag.
5. Post-grafting management. After the scion survives, promptly remove sprouts on the rootstock below the graft union. When new shoots from the scion grow to 30-40 cm, promptly pinch the tips. For secondary new shoots, leave 6-8 leaves and pinch the tips a second or multiple times. About two months after grafting, loosen the plastic strips according to growth conditions, then wrap them back around the graft union to protect the scion.
IV. Training and Pruning
1. Tree form. Use a low-trunk, short-crown open-center form, with trunk height 30-40 cm, crown height 2.5-4 m, 2-3 main branches, not exceeding 4 at most, main branch base angle 50-60 degrees. On each main branch, 1-2 lateral branches may be retained or fruiting branch groups may be directly attached.
2. Pinching. In the first and second years after grafting, summer pruning is mainly pinching. Pinch when the trunk or main branch extension shoots reach the target tree form length. When other new shoots reach 20 cm, pinch off the tips. Later, when the second and third shoots grow to 20-30 cm, leave 6-8 leaves for the second and third pinching. Stop pinching in mid-August.
3. Bud removal. When buds begin to sprout, select and retain 4-5 large buds on the upper outer side of strong branches, and retain 1-3 large buds on moderate branches; remove the rest. The principle of bud removal is to remove small ones and keep large ones, remove lower ones and keep upper ones, thin out dense ones and keep sparse ones, remove weak ones and keep strong ones.
4. Winter pruning. Moderately cut back or renew the extension shoots of scaffold branches such as main branches and lateral branches. The severity of cutting back is determined according to differences in variety, tree vigor, tree age, and space. Remove vegetative branches with no space; cut back vegetative branches with space to train them into fruiting branch groups. Remove as few as possible and cut back as much as possible. On the same branch, if there are many fruiting mother branches, heavily cut back or remove the strongest terminal ones, keep moderate and thick fruiting ones, and remove the thin and weak lower ones. When 3-4 strong branches occur in parallel, forming three-pronged or four-pronged forks, use the method of removing 1, cutting 1, and leaving 1 unpruned, or removing 1, cutting 1, and leaving 2 unpruned. Remove thin and weak, pest-damaged, overlapping, and overly dense branches, as well as chicken-claw branches, fishbone branches, and some strong vigorous terminal branches. Renew long, thin, and weak fruiting branch groups back to lower branching points. In densely planted high-yield orchards, retain 10-12 fruiting mother branches per square meter of canopy projection area; in hilly and mountainous areas with poorer site conditions, retain 6-8 per square meter of canopy projection area.
V. Pest and Disease Control
Choose varieties with strong resistance to chestnut pests and diseases. Scrape bark in early spring and burn it in a centralized manner. Before bud break, spray the entire tree with 3-5 degrees Baume lime sulfur mixture. In special years, when pests and diseases occur severely, refer to and select the methods recommended in GB/T19630.1-2005 and the plant-source, mineral-source, or microbial-source plant protection products or preparations in Appendix B for control. In late autumn, collect fallen leaves and destroy them in a centralized manner to eliminate overwintering pest and disease sources.
VI. Flowering Period Management
1. Boron spraying. During the full bloom of female flowers (mid-June), spray 400-times diluted borax solution before 10 a.m. Spray once more after an interval of 7 days. It must be dissolved in boiling water to prevent recrystallization. Spray evenly on both the front and back sides of female flowers and leaves. If rain occurs after spraying, re-spray promptly.
2. Male flower thinning. When male inflorescences of the main cultivar grow to about 2 cm, remove them. Leaving 2-3 male inflorescences below mixed inflorescences is sufficient to meet pollination needs. The characteristic of mixed inflorescences is that the tip is slightly purplish-red and suddenly becomes shorter compared with the male inflorescences below; they must be retained. Do not thin male flowers of the pollinating variety.
VII. Fertilizer and Water Management
1. Loosen soil, expand holes, and apply base fertilizer. After fruit harvest, expand the holes by digging inward from areas with few roots outside the canopy toward areas with more roots, guiding the roots outward, with a depth of 60-80 cm. Expand one to two sides per year and complete gradually over the years. When backfilling, first fill the base fertilizer into the trench, then fill topsoil, and cover with subsoil on top. After deep digging and hole expansion, water thoroughly with water whose quality meets the requirements of GB5084. Generally, apply 25-70 kg of organic fertilizer per tree for newly fruiting trees, and 80-150 kg for trees in full bearing period, or apply at a fruit-to-fertilizer ratio of 1:5-10. Appropriate amounts of natural (or obtained by physical methods without added chemically synthesized substances) phosphate rock or potassium rock powder may also be mixed in, as well as slow-release farmyard manures such as pen manure, stable manure, human excrement and urine, compost, green manure, and cake fertilizer.
2. Dig tree plates and press in green manure. Dig tree plates in spring, summer, and autumn. Spring digging should be shallow to avoid damaging roots; autumn digging should be deep. When digging, it should be shallow on the inside and deep on the outside, generally about 20 cm deep. In summer, digging tree plates can be combined with pressing in green manure, with 500-2,500 kg of green manure per mu.
3. Watering. Depending on drought conditions, generally no fewer than three waterings per year in spring, autumn, and winter are preferable.
4. Soil boron application. Before soil freezes in late autumn and early winter, or after soil thaws in spring and before bud break, apply 25 g of borax per square meter of canopy projection area.
VIII. Timely Harvesting
After chestnuts mature and split open, pick up naturally fallen fruits twice a day, in the morning and evening. In mid-to-late September, when chestnut burrs change from green to yellow and 2/3 of the burrs have split, begin harvesting. Harvesting immature nuts is strictly prohibited.