Detailed Guide to Seed Treatment Methods Before Sowing Melons
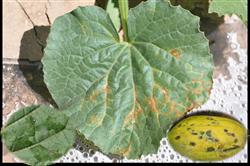
■Symptoms: The symptoms of bacterial fruit blotch on the leaves of common melons and Hami melons are similar to those of angular leaf spot of cucumber on cucumber leaves, but this disease infects the leaf veins and spreads along them. Leaf spots are round to polygonal, with the edges initially V-shaped and water-soaked, later becoming thin in the middle, and the spots dry up. The underside of the spots...
 Greenhouse melons grown in winter and spring crops are generally sown in November to December each year. To ensure full emergence after sowing and uniform, strong seedlings, the seeds need to be pre-treated before sowing.
Seed selection: Take the seeds out of the packaging drum or bag, place them on a clean wooden board or tabletop, and select them by hand. Through selection, remove seeds that are deformed, moldy, damaged or insect-eaten, and keep plump, uniform seeds for later use.
Sun-drying the seeds: Spread the selected seeds evenly on clean paper or a straw mat, and dry them in sunny, windless weather with plenty of sunlight. During drying, turn them once every 2 hours so the seeds receive sunlight evenly. Sun-drying promotes after-ripening of the seeds, enhances seed vigor, and improves germination energy and germination rate; at the same time, the ultraviolet rays in sunlight and the relatively high temperature can kill some of the pathogens carried on the seeds, reducing the occurrence of diseases spread through seeds; moreover, sun-drying the seeds can increase their water absorption rate, which is beneficial for seed germination.
Disinfection: Generally use the warm water disinfection method. Add water at 55°C-60°C to a clean porcelain or glass container, with the amount of water preferably 5 times the volume of the seeds. Put the sun-dried seeds into the hot water to soak, while stirring gently and constantly in the same direction with a glass rod or wooden stick. As the temperature gradually drops, add hot water to the container at any time to maintain a temperature of 55°C-60°C for 20-30 minutes, so that the seeds are fully heated and heated evenly. Then stop adding hot water and continue stirring until the water temperature drops to 28°C-30°C, then remove the seeds, drain the water, and prepare for soaking.
Soaking the seeds: Put the disinfected, drained seeds back into the original container, pour in warm water at 28°C-30°C, and thereafter frequently add hot water to maintain a temperature of 25°C-30°C. After soaking for 6-8 hours, pour the seeds into a larger container and gently rub and wash them by hand to rub off the mucilage on the seeds (because the mucilage contains substances that inhibit seed germination, rubbing it off clean is beneficial for seed germination). After the mucilage is rubbed off clean, rinse the seeds thoroughly with clean water.
Germination promotion: Drain the soaked seeds, wrap them well in clean wet gauze, and then wrap the gauze with a clean wet towel to prevent water evaporation. Then spread the seeds flat on the bottom of a prepared container, insert a thermometer in the container near the seeds, use a heated kang, electric blanket, etc. to raise and maintain the temperature, and check the thermometer reading frequently, keeping the temperature between 25°C-28°C. During germination, turn the seeds frequently to remove carbon dioxide and respiratory heat produced by seed respiration, exchange fresh air, and supply oxygen. Under suitable temperature conditions, sprouting can occur in about 24 hours. When the seeds just begin to show white, they can be sown. During germination promotion, try to keep the sprouts within 0.5 cm to prevent them from growing too long; if the sprouts are too long, they are easily broken when sowing, reducing the emergence rate.