Detailed Explanation of Key Techniques for Eastward Cultivation of Hami Melon
Tests on the eastward cultivation of Hami melon show that growing Hami melon around Beijing is very easy. It has low requirements for soil; sandy loam with a pH of 5-9, a salt content below 1%, and organic matter above 1.5% is best; areas with temperatures of 28-38°C, relative humidity of 15%-70%, light of 30,000 lux (more than 8 hours per day), an altitude below 4000 m, and sufficient light in the half month before ripening can all produce Hami melon of excellent quality.
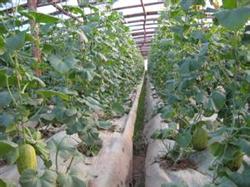
Tests on the eastward cultivation of Hami melon show that growing Hami melon around Beijing is very easy. It has low requirements for soil; sandy loam with a pH of 5-9, a salt content below 1%, and organic matter above 1.5% is best; areas with temperatures of 28-38°C, relative humidity of 15%-70%, light of 30,000 lux (more than 8 hours per day), an altitude below 4000 m, and sufficient light in the half month before ripening can all produce Hami melon of excellent quality.
Hami melon has a short growing period. In the Beijing area, seedlings raised in early spring and then transplanted take 82-85 days to mature, while seedlings raised for the autumn crop and transplanted take 65 days to mature. Plant 600-700 plants per mu, with each plant bearing 1 melon weighing about 4 kg. It can be interplanted with strawberries and vegetables. If the greenhouse has heating facilities, it can be produced all year round. In the southeastern area of Beijing, greenhouse cultivation produces 2-3 crops per year. A solar greenhouse can grow 3-4 crops, with a yield of 1800-2200 kg per mu per crop. Single melon weight is 3-4 kg (medium-sized melons), with a central refractometer sugar content of 14-15 degrees; large fruits are 5-6 kg, with a central refractometer sugar content of 13-14 degrees. Hami melons planted in 2007 in Caochang Village, Tongzhou District, were picked on June 5, weighing 3.5 kg, with a central refractometer sugar content of 14.5 degrees.
1 Variety Selection
Varieties suitable for protected cultivation should be selected, such as Queen, 8601, 86-1, Xiyu No. 1 (white flesh), disease-resistant 9288, Hongmicui, Xiangfeimi, Jinlong, Jinfenghuang, and Jiashi melon. The disease-resistant Jiashi melon and 9288 can also be cultivated in open fields.
2 Seedling Raising
2.1 Seed soaking and sprouting Hami melon seeds have a 1000-grain weight of 35-50 g, and 50 g of seed is needed per mu. Pour the seeds into boric acid water diluted 500-1000 times (water temperature about 50°C, with the boric acid fully dissolved; it is best to use a wide-mouthed glass bottle for the boric acid water) for disinfection and sterilization. Alternatively, according to local common diseases, use formalin, potassium permanganate, carbendazim, procymidone, and thiophanate-methyl respectively to disinfect and sterilize the seeds. Soak in boric acid water for 4-5 hours, then remove and drain the water, and soak a small towel or cloth in the boric acid water for disinfection and wring it dry. Wrap the drained Hami melon seeds well, put them in a plastic bag, and place them in a constant-temperature chamber or beside a modified electric mosquito heater or stove (be careful to avoid light). The best temperature is maintained at 30°C. They can also be wrapped around a person's waist, but the temperature must not be higher than 32°C or lower than 28°C; keep a constant 30°C, and new seeds will show a 2 mm white tip in 15 hours, while old seeds will show a 2 mm white tip in 17 hours. Every 4-6 hours, open the towel to ventilate and turn the seeds so the temperature is even. If the moisture is insufficient and the seed coat is drying out, spray a little water as appropriate. When more than 80% of the seeds show white tips, put them in a plastic bag and place them in the refrigerating compartment of a refrigerator, maintaining a low temperature of 0-5°C for 1-2 days of low-temperature hardening; the seedlings can then resist cold, and the melons mature 1-2 days earlier.
2.2 Sowing To achieve rapid emergence, choose the sunny side inside the greenhouse, 1-1.5 m from the greenhouse film, and lay 0.01-0.012 mm thick agricultural film on the ground. Lay an electric blanket flat on the agricultural film, lay old agricultural film on the electric blanket, and spread 2 cm of sieved sandy soil with high sand content on the old agricultural film, then spray one of carbendazim, thiophanate-methyl, or procymidone at 1000 times dilution, spray the sandy soil wet and thoroughly, and sow. Each seed occupies 2 square cm, placed flat on the sand surface; after sowing, cover with 1 cm of sandy soil and spray water, then cover with 0.012 mm thick film. Seeds can also be sown in seedling trays with an electric blanket underneath. The soil temperature should be kept at 28-32°C. During the day, when the temperature under the film exceeds 35°C, remove the film promptly, and cover it again at night when the temperature is low. When the sandy soil is dry, spray water appropriately. When the greenhouse temperature is above 35°C, check the soil dryness and moisture once every 2 hours. Two days after sowing, most seedlings push through the soil; when 80% have emerged, remove all covering film, spray water once, and gently remove the seed coats still attached to the seedlings while they are wet. Control the greenhouse temperature at 22-25°C and at night at 15-18°C, strictly control watering, and prevent the occurrence of leggy seedlings.
2.3 Pricking out of seedlings The materials for building a heated seedling bed are: 1 heating wire 120 m long made in Ningbo or Shanghai or Beijing, 1 knife switch of 10 amperes or 1 ground leakage fuse of 10 amperes, 25 bamboo sticks 20 cm long and 1.5 cm thick, and 1400 plastic nutrition pots 10 cm x 10 cm. Inside the greenhouse, choose the sunny side, 1 m wide from the greenhouse film (or inside the seedling greenhouse), and build a geothermal seedling bed 1 m wide and 10 m long. At both ends, across a width of 1 m, drive in 12 bamboo sticks 20 cm long, driven 15 cm into the soil. The spacing between sticks 1-4 is 8 cm, between 4-9 is 10 cm, and between 9-12 is 8 cm. Lay 12 heating wires and pull them straight, fix both ends of the heating wires onto the bamboo sticks at both ends, and connect them to the power knife switch. Note that the heating wires must not coil, and the spacing between wires should be greater than 3 cm, otherwise short circuits and fires are likely.
Nutrition soil formula A conventional nutrition soil formula for melon and vegetable seedling raising can be used. Fill plastic nutrition pots with sieved nutrition soil and place them on the heating wires in a three-star arrangement; 132 nutrition pots of 10 cm x 10 cm can be placed per square meter. After all are filled with nutrition soil, spray water repeatedly. Add carbendazim, thiophanate-methyl, or procymidone at 1000 times dilution and urea at 2000-3000 times dilution and potassium dihydrogen phosphate at 1000 times dilution to the water. Slightly softer soil is beneficial for pricking out seedlings.
3-4 days after sowing, once the cotyledons have basically flattened, lift the seedlings and place them in a fungicide solution at 1000 times dilution, rinse the soil off the roots, arrange them neatly, and be careful to damage the seedling roots as little as possible.
Use a bamboo strip to make a seedling-pressing board 16-18 cm long, 1.6-1.8 cm wide, with a front end 0.2 cm thick, semicircular, smooth, and free of burrs.
Insert the seedling-pressing board into the middle of the nutrition pot to a depth of 4-5 cm, tilt it to one side to form a deep hole, then pull out the seedling-pressing board, place the melon seedling into the hole, use the seedling-pressing board to smooth the seedling roots downward, and fill the soil level. The stem below the cotyledons should be 2-3 cm above the soil.
2.4 Seedling management After all pricking out is completed, set up a bamboo arched shed over the seedling bed. During the day, keep the soil temperature at 25-30°C; when the shed temperature exceeds 35°C, open the shed for ventilation. At night, keep the soil temperature at 15-18°C. Before sunset, be sure to cover the small arched shed with plastic film, and use a temperature controller as appropriate to regulate the ground temperature. After 5 days, check the dryness and moisture of the nutrition pot soil; in principle, slightly drier soil is better, and if individual pots are too dry, water them appropriately with a watering can. Place the nutrition pots flat and swap the positions of the large seedlings in the middle that develop quickly with the small seedlings at the edges that develop slowly. About 5 days after pricking out, the cotyledons can grow to 3 cm long and growth points begin to appear; in the following 5 days, 1 true leaf can emerge. The leaf bud of the first true leaf also begins to form; when it grows to the size of a grain of rice, use an ear scoop to remove the leaf bud at any time. When the third true leaf reaches 2 cm in diameter, pinch off the growing tip. When removing buds and pinching tips, both the hands and the ear scoop must be disinfected once. Use 84 disinfectant at 300 times dilution or soapy water for disinfection.
2.5 Prevention and control of diseases and insect pests during the seedling stage During the seedling stage, the main disease is damping-off. The main causes of the disease are low temperature, moisture, and lack of light. Spray 80% mancozeb at 600 times dilution once every 5-7 days for prevention; after the disease occurs, spray 20% metalaxyl at 800 times dilution or 50% procymidone at 1500 times dilution. Remove individual diseased seedlings.
The main insect pests in the Hami melon seedling greenhouse are aphids, thrips, broad mites, and red cotton spider mites. When insect pests are found, choose appropriate pesticides for control. Thrips and mites in old vegetable fields have very strong pesticide resistance, so 40% methidathion emulsifiable concentrate can be sprayed.
3 Transplanting of Seedlings
3.1 Building a plastic greenhouse Build a north-south oriented greenhouse, 50-60 m long, 12 m wide, and 2.8 m high. The greenhouse roof can be opened with a seam, there are side seams on both sides, and doors are set at the north and south ends.
3.2 Land preparation and application of base fertilizer Leave 3 central parallel walkways in the greenhouse from north to south for melon ditches, watering, and fertilizing; the parallel distances of the walkways from the greenhouse film are 2 m, 6 m (the central walkway of the greenhouse width), and 10 m. On both sides of the 3 parallel walkways, dig fertilizer trenches 80 cm wide and 20-25 cm deep. Apply 800 kg of high-quality farmyard manure (farmyard manure containing a large amount of chlorine cannot be used) into each fertilizer trench, or choose one of sesame paste residue, soybean cake, cottonseed cake, and rapeseed cake at 120 kg. At the same time, evenly scatter 6 kg of urea, 15 kg of diammonium phosphate, 10 kg of potassium sulfate, and 15 kg of Shuangxiao microfertilizer produced in Shandong. After fertilizing, use a three-tooth rake to rake the soil and fertilizer, then cover the soil back in place. With the central walkway as the center of the melon ditch, dig a water ditch with an upper opening width of 50 cm, a lower opening width of 30 cm, and a depth of 30 cm. Spread the excavated soil evenly on both sides of the ditch, rake it level, and compact it. The water ditch should be level and straight, and water can also be released to check the level. Lay 1 m wide plastic film 0.008-0.015 mm thick on both sides of the water ditch.
3.3 Insect killing, sterilization, and disinfection in the greenhouse One day before transplanting the seedlings, after sunset, close the greenhouse, place 5-6 porcelain basins at equal distances along the central walkway in the greenhouse, put in 0.1-0.2 kg of sulfur powder and ignite it to produce sulfur dioxide, which both sterilizes and kills insects. Transplant the next morning.
3.4 Transplanting of seedlings On both sides of the water ditch, use a hole punch to make a transplanting hole every 50 cm, with the hole 6 cm from the edge of the water ditch. Transplant about 660 melon seedlings per mu. When transplanting, pay attention to the depth of the hole; if the hole is too deep, add some soil as appropriate. After placing the melon seedling, water each hole with 200-250 g of water, adding thiophanate-methyl or mancozeb at 600 times dilution to the water, then cultivate soil around it. Note that soil cracks in the hole must be filled and compacted, the cotyledons should be exposed 3 cm above the soil surface, and the plastic film must not leak air. After all transplanting is completed, promptly apply 1 root-setting water; note that the water must not run onto the melon beds.
4 Field Management
4.1 Temperature From seedling transplanting to melon maturity, a daytime temperature in the greenhouse of 35-38°C is most suitable for Hami melon growth; when it exceeds 40°C, open the top seam, and later open the side seams. In the early stage, do not open the greenhouse seams. At night outside the greenhouse, the temperature should not be lower than -2°C; if it is lower than -2°C, heating measures must be taken from the latter half of the night until dawn. The greenhouse must always remain dry, with relative humidity of 15%-75%.
4.2 Pruning Within 15 days after transplanting the melon seedlings, the roots, stems, and leaves grow comprehensively, but the main growth is rooting and the growth of leaf buds (secondary vines) at the 2nd and 3rd leaves. Of the 2 secondary vines, only the leaf buds at leaves 9 and 10 (tertiary vines) are retained for growth and development, and the growing tip is pinched off at the 14th leaf; all other leaf buds and tendrils should be removed at any time. After the female bud appears, leave 1 leaf before the bud and pinch off the tip. To ensure the bud does not abort, do not water at this time. More importantly, promptly pinch off the small stem vines above the roots and the newly emerging small leaf buds, otherwise the bud will abort and the whole plant will fail to set fruit. When the secondary vines are more than 30 cm long, gently push and tilt them toward the melon bed so that the melon vines grow toward each other on the melon bed. When pruning and removing buds in the field, disinfect both hands with disinfectant solution after handling each plant.
4.3 Artificial pollination Normally, after the dew drops on the melon vines recede at 6:00 in the morning, tear off the male petals to reveal the stamens, wipe them on the hand or clothes; if a light yellow streak appears, it proves that the anthers have burst and can be applied to the stigma of the female bud. Note that the hand must hold the pistil gently and not damage the hairs on the female bud. After 4:30 in the afternoon, find male flowers in shaded places with yellowing petals, and these can also pollinate female flowers. Pollen enters the ovary of the female bud through the vascular bundles in 34 hours for fertilization; 3 days later, the ovary swells to the size of a jujube, proving successful fertilization.
4.4 Fruit thinning On each of the 2 tertiary vines of each plant, there is a young fruit weighing 30-50 g. Select and retain one young fruit that is large, high in node position, and regular in shape, remove the other young fruits, and place them at the base as a marker to prove that this plant has been thinned, and insert an 80 cm high bamboo stick beside the retained young fruit after thinning, writing the pollination date on it. Fruit thinning must be completed within 3 days; fruits thinned after 3 days must have a marker tied to the melon stalk to prove that the melon is late-maturing. Fruit thinning should be completed 5-6 days after pollination (when the young fruit is the size of an egg). While thinning fruits, remove all leaf buds and small stem vines on all plants.
4.5 Turning and cushioning melons About 15 days after pollination, when the young melon weighs 1.5-2 kg, turn the young melon 60 degrees, and the ground-contact side of the melon must leave its original position and be hidden under leaves, or covered with newspaper to prevent sunscald. While turning the melon, remove all leaf buds and small stem vines; only then is pruning completely finished. About 20 days after pollination and flower drop, netting begins to form around the stem end of the melon. When the melon weighs 3 kg, it must be cushioned. The melon cushion can be a straw mat woven from rice straw with a diameter of 15 cm and a thickness of 3-4 cm; the straw mat must be dry. After that, turn the melon once every 5-7 days; 40 days after pollination, when the melon is basically mature, turn the melon once every 2-3 days.
4.6 Watering After transplanting and establishing the seedlings, apply the first root-setting water in the melon ditch. The water must not cover the melon roots; it should be 5 cm below the melon roots. Each subsequent watering must not cover the melon roots, otherwise it can easily cause various diseases of the melon roots. The second watering is when the tertiary vines show buds, before flowering, and when the secondary vines have 13 leaves. The third watering is 1-2 days after fruit thinning. The fourth watering is 5 days after the third watering. The fifth watering is on the fifth day after the fourth watering (whether to water depends on the dryness and moisture of the soil).
From 5 to 25 days after pollination and flower drop is the fastest period of Hami melon enlargement, after which the enlargement rate slows down. While the Hami melon enlarges, the stems and leaves grow rapidly, so the demand for water and fertilizer is greatest. In the late stage of Hami melon enlargement, generally do not water again; if the soil in the melon ditch is too dry and the leaves curl downward at 2:00 noon, water half a ditch as appropriate. Hami melon must absolutely not be watered during flowering and pollination. During the fourth or fifth watering, apply 2-3 kg of potassium dihydrogen phosphate with the water, or dissolve diammonium phosphate and potassium dihydrogen phosphate in a container the day before and pour it into the melon ditch with the water the next day. Hami melon needs large amounts of nitrogen and potassium fertilizer during the enlargement period. During the maturity period, it needs large amounts of phosphorus and potassium fertilizer, especially phosphorus fertilizer; insufficient phosphorus fertilizer results in low sugar content in the melon.
4.7 Weeding After transplanting and establishing the seedlings, weed generally 1 time; weed once after pollination or fruit thinning; remove weeds in the melon ditch at any time.
4.8 Removing old leaves Old leaves of Hami melon easily cause disease. When the young melon grows to 2-3 kg, on a sunny day, cut off the 2 or 3 old leaves at the base 2-3 cm from the melon stem and take them out of the greenhouse.
4.9 Integrated prevention and control of diseases and insect pests
① Weeds around the outside of the greenhouse should be removed frequently so as not to leave an environment for diseases and insects to grow; where conditions permit, insect-killing lamps should be hung. After crops in the greenhouse are harvested, the greenhouse should be closed for high-temperature sterilization; at the same time, sulfur fumigation can be used (if there are crops in the greenhouse, sulfur fumigation cannot be used, otherwise all crops in the greenhouse will be fumigated to death).
② During field operations, strictly disinfect the hands after finishing each plant to prevent cross-infection among plants caused by pathogens on the hands.
③ Each time water is applied in the melon ditch, it must not cover the melon roots, and even more so, water must not run onto the melon beds. Keep the relative humidity in the greenhouse at about 45% during the day and below 75% at night, and diseases will not occur.
④ From seedling transplanting to fruit thinning, the disease resistance of the plants is very strong, so insecticide may not be used. To be safe, 80% mancozeb at 600 times dilution or 70% thiophanate-methyl at 800 times dilution can also be sprayed for control, but during continuous rainy weather, when greenhouse humidity is high, 5% chlorothalonil smoke agent or 10% procymidone smoke agent can be used instead for fumigation. When the leaf surface covers the entire melon bed, procymidone smoke agent should be used for fumigation, once every 7 days, and the effect is very good.
When Hami melon is flowering, pay attention to preventing thrips. They can generally be found in the flower center, and later can also be found where the young melon is close to the ground. Spray insecticide promptly, and old foam plastic lunch boxes can be placed in the melon ditch for a long time, filled with cheap insecticide liquid or 84 disinfectant at 300 times dilution; after thrips fly onto the water surface, they die in masses.
⑥ The greenhouse should always remain dry. When the temperature reaches 42°C, Hami melon can still grow normally, so the greenhouse can be appropriately closed for half an hour for sterilization. When the temperature in the greenhouse reaches 50°C, open the greenhouse for ventilation. ⑦ When individual plant leaves in the greenhouse are found to have whiteflies, aphids, melon borers, or black velvet chafer, use pesticides on the individual plants to kill them and control their spread. Each greenhouse should regularly use 300 g of dichlorvos mixed with a combustion aid and be fumigated at night with the greenhouse closed, and the effect is relatively good.
⑧ Stop spraying pesticides 15 days before harvesting Hami melon; smoke-agent pesticides can be used to sterilize and kill insects. 4.10 Harvest In the Beijing area, for Hami melon cultivation, the time for transplanting seedlings in early spring in the greenhouse is basically the same as the time for transplanting local watermelon seedlings, around March 20 each year. The harvest time for Hami melon is June 10-15. Twenty-five days after pollination is the period of sugar accumulation in Hami melon; during this period the climate is dry and sunlight is sufficient, so the sugar content is high and the quality is good.
In the near-maturity period of Hami melon, with sufficient light and a greenhouse temperature of about 38°C (calculated according to the date on the pollination tag of the Hami melon), at 42 days the central refractometer sugar content of the Hami melon can reach 12-13 degrees, and at 45 days it can reach 15 degrees. Use a handheld refractometer to measure; when it reaches 12-13 degrees, it can be picked; Hami melons supplied for special needs and to hotels must reach a sugar content of 14-15 degrees before they can be picked. When picking, cut 2-3 cm from the melon stem, and handle gently. Put a foam plastic sleeve on each melon and place it in a plastic basket; collisions that damage the melon skin and cause pathogen invasion and melon rot are strictly prohibited.