Detailed Guide to Cherry Tomato (Sainte Tomato) Cultivation Techniques
I. Cultivation Season: In the northern region, sowing is from mid-September to early January of the following year, with harvest from late December to mid-May of the following year; in the southern region, sowing is from late August to mid-December, with harvest from late November to April of the following year. II. Variety Selection: Choose varieties that are disease-resistant, heat-tolerant, high-quality, high-yielding, suitable for storage and transport, and have good marketability...
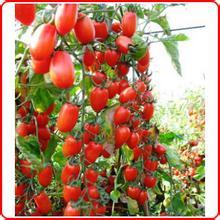
I. Cultivation Season
In the northern region, sowing is from mid-September to early January of the following year, with harvest from late December to mid-May of the following year; in the southern region, sowing is from late August to mid-December, with harvest from late November to April of the following year.
II. Variety Selection
Choose varieties that are disease-resistant, heat-tolerant, high-quality, high-yielding, suitable for storage and transport, have good marketability, and are adapted to the market. Recommended varieties: Asveg No. 6, Cuihong, Longnv, Red Queen.
III. Seedling Raising Techniques
1. Preparation Before Seedling Raising
(1) Seedling facilities: Depending on climatic conditions, choose seedling facilities such as small plastic tunnels or ordinary cold frames. Promote the use of plug tray seedling technology, and disinfect the seedling facilities to create environmental conditions suitable for seedling growth and development. Small plastic tunnel: arch height 0.5 m-0.6 cm, span 1.2-1.5 m, length unlimited. Seedling plug tray: 72-100 cells, tray length, width, and height of 55 cm x 35 cm x 7 cm.
(2) Nutrient soil: According to local conditions, select field soil free of disease and pest sources, rice husk ash or coconut coir, decomposed farmyard manure, and sandy soil in a 6:3:1 ratio to prepare nutrient soil. Requirements: porosity of about 60%, available phosphorus above 100 mg/kg, available potassium above 100 mg/kg, available nitrogen above 150 mg/kg, pH 6-7. Loose, fertilizer-retentive, water-retentive, and complete in nutrients. Spread the prepared nutrient soil evenly on the sowing bed at a thickness of 10 cm, and fill it into the seedling plug trays.
(3) Sowing bed: Prepare enough sowing beds according to the planting plan. Disinfect the sowing bed soil by spraying with a 1000-fold dilution of soil fungicide. The sowing bed is generally 150 cm wide, 25-30 cm high, with unlimited length.
2. Seed Treatment
(1) Disinfection Treatment
Select the following disinfection methods according to the main local diseases.
a) Hot water seed soaking: Place the seeds in 55°C warm water, maintain the water temperature evenly and soak for 15 minutes, then soak in warm water for 5-6 hours. Mainly prevents and controls leaf mold, bacterial canker, and early blight.
b) Trisodium phosphate seed soaking: First soak the seeds in clean water for 4-5 hours, then place them in a 10% trisodium phosphate solution and soak for 20 minutes, remove and rinse clean. Mainly prevents and controls viral diseases.
(2) Germination
After disinfection, remove the seeds and rinse clean, then place them under conditions of 25°C-28°C with warmth and moisture retention for germination.
3. Sowing
(1) Sowing period: Select the appropriate specific sowing period according to the cultivation season, climatic conditions, seedling raising methods, and strong seedling indicators.
(2) Seed quality: Meets the requirements of Grade 2 or above in GBI6715.3-1999. Specific requirements are: seed purity ≥95%, cleanliness ≥98%, moisture content ≤7.0%.
(3) Sowing rate: According to seed size and planting density, generally 3-4 grams of seed per mu of field.
(4) Sowing method: Sow when more than 70% of germinated seeds have broken through the seed coat, or sow directly after disinfection. Before sowing, water thoroughly to moisten the bed soil to a depth of 10 cm with available phosphorus of 100 cm. After the water seeps down, thinly spread a layer of nutrient soil, level the bed surface, and sow seeds evenly. For each square meter of seedling bed, mix 8 grams of 50% carbendazim wettable powder or 8 grams of 70% quintozene wettable powder with dry fine soil and spread thinly and evenly on the bed surface to prevent damping-off disease. After sowing, cover with nutrient soil 0.8-1.0 cm. For plug tray seedling raising, first water the substrate thoroughly, and sow at a depth of 0.8-1.0 cm. According to climatic conditions, cover with plastic film, shade net, or rice straw, and remove when 70% of seedlings emerge through the soil.
4. Seedling Stage Management
(1) Environmental Regulation
a) Temperature: High temperatures are mainly reduced by shade nets. Low temperatures are managed using plastic tunnels. The optimal daytime temperature is 25°C-28°C, and the optimal nighttime temperature is 17°C-20°C.
b) Water and fertilizer: After emergence, appropriately control moisture. After seedlings have 2 true leaves and 1 heart leaf, apply 2-3 rounds of seedling-promoting fertilizer based on seedling condition. Mainly use 0.1%-0.3% NPK compound fertilizer.
(2) Strong Seedling Indicators
4 leaves and 1 heart leaf, plant height 15 cm, stem diameter about 0.4 cm, seedling age of about 25 days. Leaf color dark green, free of pests and diseases.
IV. Transplanting
1. Preparation Before Transplanting
(1) Land preparation and basal fertilizer application. General basal fertilizer application amounts: phosphate fertilizer more than 80% of total fertilizer application, nitrogen and potassium fertilizer 20%-30% of total fertilizer application. Apply 1500-2000 kg of high-quality organic fertilizer (organic matter content above 9%) per mu. When nutrient content is insufficient, supplement with chemical fertilizers. Broadcast 50-75 kg of quicklime per mu, 30-40 kg of high-quality cake fertilizer, and 30-40 kg of high-quality phosphate fertilizer. These fertilizers must be fully decomposed and fermented, with 2/3 broadcast during land preparation with deep plowing of 25-30 cm, and the remaining 1/3 applied into the transplanting furrows (holes). Make beds according to local planting practices. Generally, bed width is 160-180 cm (including furrows).
(2) Mulching with plastic film: Select plastic film according to bed width. Generally choose black plastic film with a thickness of 0.02 mm and a width of 120-130 cm. Lay the plastic film flat on the bed and press the edges firmly with dry fine soil to prevent wind from lifting the film.
2. Transplanting Method and Density
According to bed specifications, use wide-and-narrow row or single-row transplanting. Determine plant spacing based on variety characteristics, pruning methods, soil characteristics, climatic conditions, and cultivation practices. Generally, transplant 1200-1600 plants per mu. Transplanting should be shallow, taking care to retain plenty of nutrient soil, water immediately after transplanting to settle the roots, and seal the transplanting holes in the plastic film tightly.