A detailed guide to grape bagging techniques, master all the key methods
In order to enhance the market competitiveness of grapes, the promotion and application of bagging technology on grapes has become a consensus among growers, but how can the benefits of bagging be maximized? Pre-bagging preparation: 1 week before flowering, trim the flower clusters. For large clusters, remove the secondary clusters and 1 to 8 branch axes at the base of the main axis; for small clusters, remove few or none. Pinch...
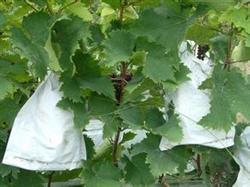
In order to enhance the market competitiveness of grapes, the promotion and application of bagging technology on grapes has become a consensus among growers, but how can the benefits of bagging be maximized?
Pre-bagging preparation
1 week before flowering, trim the flower clusters. For large clusters, remove the secondary clusters and 1 to 8 branch axes at the base of the main axis; for small clusters, remove few or none. Pinch off about 1/4 of the cluster tip before flowering. 2 weeks after fruit set, thin the berries. Once the fruit is stable, begin bagging immediately, and finish before the rainy season arrives.
Bagging method
When bagging, first use your hands to open the paper bag so that the whole bag puffs out, then from bottom to top put the entire fruit cluster fully into the bag, then gather the bag opening onto the cluster stalk and tie it tightly with the sealing wire on one side. However, leave 1.0 to 1.5 cm of the paper bag above the sealing wire, and absolutely do not rub the fruit cluster with your hands.
Timing for removing the bags
After bagging, the bags may be left on, and the fruit harvested with the bags on; generally, red varieties can have their bags removed about 10 days before harvest to promote good coloring. However, if the fruit cluster inside the bag is coloring very well and is already close to the best commercial color tone, then there is no need to remove the bag, otherwise the purple color will deepen and the coloring will be excessive.