Key Technical Points for Top Grafting and Replacing Varieties by Sawing Off Trunks of Old Bayberry Trees
I. Cultivating Vigorous Rootstock 1. Deep plowing and fertilization. In late autumn, deep plow the entire orchard to 20 cm, and apply per tree 15 kg of farmyard manure + 0.25 kg of urea + 0.5 kg of calcium magnesium phosphate fertilizer + 0.25 kg of potassium sulfate. Spread 25 kg of lime per mu to neutralize soil acidity and promote root absorption. 2. Saw off trunks at the right time to promote rootstock sprouting. ...
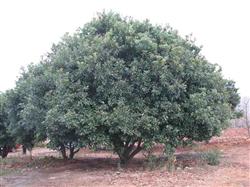
I. Cultivating Vigorous Rootstock
1. Deep plowing and fertilization. In late autumn, deep plow the entire orchard to 20 cm, and apply per tree 15 kg of farmyard manure + 0.25 kg of urea + 0.5 kg of calcium magnesium phosphate fertilizer + 0.25 kg of potassium sulfate. Spread 25 kg of lime per mu to neutralize soil acidity and promote root absorption.
2. Saw off trunks at the right time to promote rootstock sprouting. After fruit harvest (early June), saw off the main trunk or main branches, leaving 30-70 cm above the ground. For old trees whose main branches fork at a high position, leave only 30-50 cm of the main trunk; for those with low branching, leave 50-70 cm and saw off the main branches. The saw surface should be smooth to avoid cracking, and apply a protective agent to prevent infection by pathogens; use 1:1:10 Bordeaux mixture or 50% carbendazim 400x solution. Before the arrival of high temperatures, wrap the saw cuts with agricultural film and provide shade to prevent the cuts from drying and cracking under direct sunlight, which would affect the sprouting ability of latent buds and canopy growth.
3. Management of sprouting shoots. After more than 30 days, the latent buds of the rootstock can sprout. When the sprouting shoots reach 25 cm, select vigorous and relatively evenly distributed shoots as new rootstock for cultivation. If the main trunk is used as the rootstock, keep 3-4 shoots; if a main branch is used as the rootstock, keep 2-3 shoots. The remaining sprouting shoots can temporarily be kept in part as auxiliary nurse shoots, and during the growing season, use branch bending, branch twisting or shoot pinching techniques to control their growth so as not to affect the vigor of the selected shoots. After 5-6 months of cultivation, their stem diameter can reach more than 2.5 cm. During this period, temperatures are high and humidity is great, and pests and diseases occur frequently, so pesticides should be sprayed in a timely manner to control them; use thiophanate-methyl 1000x solution + 20% isocarbophos 500x solution.
II. Timely Top Grafting
1. Grafting period. In general areas, in normal years, top grafting can be carried out from late January to early March. Grafting on sunny days with higher temperatures gives a higher survival rate. Avoid operating on windy, overcast days or when the temperature is too low.
2. Grafting method. (1) Selection and storage of scions: Select one-year-old summer or autumn shoots with plump buds and a stem diameter of 0.6-0.8 cm from the middle and upper parts of disease-free, high-yielding canopies as scions. It is best to collect and graft the scions immediately; if the mother tree is far from the orchard, the scions can be kept moist and stored in a refrigerator, with the temperature controlled at 5 degrees C, and the time should be controlled to about 5 days. (2) Grafting method: Use the branch grafting method. The scion can be cut into 5-6 cm long segments, with a long cut surface 3-4 cm long and a 45-degree slant on the back side, and 2-4 plump buds above the cut surface. Cut the sprouting shoot flat at 6-10 cm, choose the inner or side surface and cut downward along the junction of the cortex and xylem to make a flat surface, with a length the same as the long cut surface of the scion; cut open the rootstock cortex and remove 1/2, insert the scion, align the cambium layers, tie tightly with plastic film while exposing the buds, and put on an ordinary plastic bag 20 cm long and 10 cm wide; slip the plastic bag down to the base of the rootstock and tie it tightly, then cut a small opening at the top of the plastic bag as an air vent.
III. Management After Top Grafting
1. Management of the bag. Observe the sprouting of the grafted buds at any time 15 days after top grafting. As the buds grow, enlarge the small opening of the bag. When the new shoots of the scion grow to 6-10 cm, remove the plastic bag to avoid hindering the growth of the new shoots.
2. Timely supplementary grafting. The survival rate of bayberry grafting is not high. If the grafted branches that survive cannot be selected as main branches or secondary main branches, supplementary grafting should be done in a timely manner; if too late, the survival rate will be poor.
3. Management of new shoots. As the new shoots grow, gradually thin out the sprouting shoots of the rootstock that affect the growth of the new shoots. After the new shoots mature and the high-temperature period has passed, remove the binding plastic film to facilitate the growth of the new shoots. Some shoots grow vigorously and their branches have not yet lignified, so props should be set up to support the shoots and prevent branch breakage caused by wind and heavy rain.
4. Pest and disease control. Observe the occurrence of pests and diseases frequently, with prevention as the main approach. The main diseases include anthracnose, gummosis and leaf blight; use thiophanate-methyl, chlorothalonil or mancozeb for control. The main pests include bayberry leaf-rolling moth and oil-tea geometrid, etc.; use fenpropathrin 1500x solution or 50% phoxim 1000x solution or 80% dichlorvos 800x solution for control.
5. Fertilization. In the first year, apply 0.3 kg of compound fertilizer per tree in May and August. In the second year, apply topdressing 3 times, respectively 10 days before the spring shoots, summer shoots and autumn shoots, and apply base fertilizer in late autumn. For each topdressing, use 0.2 kg of urea + 0.5 kg of calcium magnesium phosphate fertilizer + 0.2 kg of potassium sulfate, and apply 10 kg of farmyard manure per tree as base fertilizer. In the third year, as the canopy expands and fruiting begins, increase potassium fertilizer application, with topdressing in late February and late July respectively; for each topdressing, use 0.3 kg of urea + 0.5 kg of calcium magnesium phosphate fertilizer + 0.5 kg of potassium sulfate, and in October apply 15 kg of farmyard manure per tree. Generally, production can begin in the fourth year, and the fertilization amount should increase year by year, mainly nitrogen and potassium, with a nitrogen, phosphorus and potassium ratio of 1:0.2:3-4.
6. Training and pruning. After top grafting and variety replacement, the bayberry tree shape can adopt the natural open-center form and the natural round-headed form. If the rootstock is the main trunk, select 3 relatively evenly distributed shoots to train as main branches; if the rootstock is a main branch, select new shoots on both sides to train into a natural round-headed canopy, and remove the rest. From the second year, train secondary main branches and fruiting branch groups well. During the growing season, control apical growth, promptly pinch the overlong side branches to promote branching, and thin out crossing branches and overlapping branches. Through pruning, achieve a clear hierarchy in the canopy, balanced vigor, ventilation and light penetration, so as to facilitate three-dimensional fruiting.
IV. Controlling Shoots and Promoting Flowering
In order to achieve early production, appropriate measures to promote flowering and preserve fruit should be applied in the third year. Combined with pruning, weaken apical dominance. In each shoot flush, cut off upright vegetative branches to open up the canopy; use the branch-bending method to moderate shoot growth. In early July of the third year, spray the canopy with 15% paclobutrazol 300x solution, which can increase flower quantity, delay the vegetative growth of autumn shoots, and improve the fruit-setting rate.