Cherry Tomato Winter-Spring Crop Cultivation Techniques in Solar Greenhouses
Cherry tomato, also known as mini tomato, contains various vitamins, minerals, and other nutrients. Like ordinary tomatoes, it is not cold-tolerant nor heat-tolerant. For the winter-spring crop, ordinary or improved solar greenhouses can be used. Generally, sowing takes place from late October to early November, transplanting from mid-to-late January to early February of the following year, and harvesting from early-to-mid March through June...
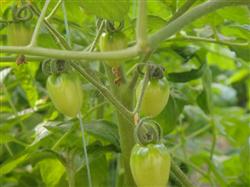
Cherry tomato, also known as mini tomato, contains various vitamins, minerals, and other nutrients. Like ordinary tomatoes, it is not cold-tolerant nor heat-tolerant. For the winter-spring crop, ordinary or improved solar greenhouses can be used. Generally, sowing takes place from late October to early November, transplanting from mid-to-late January to early February of the following year, and harvesting from early-to-mid March through June.
II. Seedling Raising
High-quality strong seedlings are the foundation of high yield. The standards for strong cherry tomato seedlings are: thick and upright stems, short internodes, 7-9 large leaves, dark green and thick leaves with slightly purple undersides, well-developed root systems, plant height of 20-25 cm, stem diameter of about 0.6 cm, the entire plant forming an umbrella shape, small flower buds appearing before transplanting, and no pests or diseases.
For winter-spring cultivation, the seedling stage occurs during the cold winter, with low temperatures, weak light, and short daylight, which is unfavorable for seedling growth. Therefore, during the seedling-raising process, attention must be paid to cold protection and heat preservation, maximizing light exposure to ensure healthy seedling development.
1. Sowing Time and Seedling Age
The seedling age is about 70 days. If electric heating wires are used for heated hotbed seedling raising, the seedling age can be shortened to about 50 days. The sowing time is determined by seedling age, transplanting time, and market time.
2. Preparations Before Sowing
① Seed preparation: 40-50 g of seeds are needed per mu (667 sq m); prepare in advance. ② Seedbed soil preparation. According to your own conditions, one of the following formulas can be used for the sowing bed soil. A: 2/3 garden soil + 1/3 decomposed horse manure. B: 1/3 garden soil + 1/3 sieved fine cinder + 1/3 decomposed horse manure (used when garden soil is relatively heavy and clayey; calculated by volume). C: 60% peat + 30% garden soil + 10% decomposed chicken manure (by volume ratio).
The formula for the pricking-out bed soil is: 6 parts fertile garden soil, 4 parts decomposed organic fertilizer. The required amount of bed soil is: the sowing bed thickness is 8-10 cm, requiring about 100 kg of soil per sq m of seedbed; when the pricking-out bed soil thickness becomes 10-12 cm, about 140 kg of soil is needed per sq m of seedbed. Generally, 5 sq m of sowing bed and 50 sq m of pricking-out bed are needed per mu. At the same time, the bed soil must be sterilized by spraying with a 300-500 times dilution of 40% formaldehyde, spraying one layer and turning one layer, then covering with plastic (11335,-50.00,-0.44%) film, sealing for 5-7 days, uncovering and airing for 2-3 days before use.
3. Seed Disinfection and Soaking for Germination
① Seed disinfection: To eliminate pathogenic bacteria carried inside and outside the seeds and reduce sources of infection. Hot water soaking is usually adopted. The method is: first soak the seeds in cold water for 20-30 minutes, remove and place in hot water at about 50-55°C, stirring constantly, adding hot water as needed to maintain the water temperature at about 50°C for 20-30 minutes. After it cools to room temperature, continue soaking for 4-5 hours, then remove, wrap in cloth, and germinate.
② Germination: The suitable temperature for seed germination is 20-28°C. Spread the seeds until they are separate, wrap them in a moist towel or gauze, and place them in a germination box, incubator, or near a heated kang, germinating at 25-30°C. During germination, wash and select the seeds with warm clean water 1-2 times daily. When most seeds have sprouted (white radicle showing), they are ready for sowing.
4. Sowing
After cherry tomato seeds have germinated, dry the surface moisture of the seeds. Water the sowing bed thoroughly with bottom water. In winter, the sowing water temperature should be 30°C; if the soil temperature is low, the water temperature can be higher. After the water has seeped in, sprinkle a thin layer of fine bed soil on the bed, then evenly scatter the seeds on the bed surface. For those less skilled, seeds can be mixed with fine sand before scattering, then cover with about 1 cm of sieved fine soil.
5. Seedling Stage Management
① Temperature management: (see table below)
② Water management: During the entire seedling-raising period, watering must be strictly controlled; do not water heavily. Water thoroughly 5-7 days before transplanting.
III. Transplanting
1. Cover the film 15-20 days before transplanting to raise soil temperature. Apply more than 5000 kg of fully decomposed organic fertilizer per mu, 50 kg of superphosphate, and 40 kg of diammonium phosphate. Sterilize the greenhouse 3-4 days before transplanting. The method is: mix sulfur powder, chlorothalonil, and sawdust at a ratio of 0.5-1:1:5 kg, ignite and fumigate, keep sealed for 48 hours, then ventilate for 24 hours before use.
2. Transplanting time: When the soil temperature at 10 cm depth stably exceeds 8°C, transplanting can begin, from mid-to-late January to early February.
3. Transplanting method: Use the method of punching holes through the film and watering at the planting point. Two rows per bed. For determinate growth types, plant spacing is 25-30 cm, with 3000-3500 plants per mu; for indeterminate growth types, 2000-2500 plants per mu.
IV. Post-Transplanting Management
1. Temperature and Humidity Management
At the beginning of transplanting, to promote seedling recovery, do not ventilate; maintain a high-temperature and high-humidity environment, 25-30°C during the day and 15-17°C at night. After seedling recovery, begin ventilating to regulate temperature and humidity, 20-25°C during the day and 15-17°C at night. After each watering, ventilate promptly to remove moisture and prevent diseases caused by excessively high temperatures.
2. Water and Fertilizer Management
After seedling recovery, for those transplanted with the point-watering method, supplement with one light watering, then begin the seedling-restraining period. When the first and second flower clusters have set fruit, end the seedling-restraining period, apply one light watering, and simultaneously apply 1000 kg of human and animal manure. Water again after 1 week. Thereafter, water promptly according to soil conditions, weather, and seedling growth, keeping the soil alternately dry and moist. Apply 10-15 kg of urea per mu after every 1-2 waterings.
3. Plant Training
Use single-stem training, promptly remove side branches, and hang vines with nylon rope. Because the harvest period is long, the nylon rope must be strong and resistant to aging. Pinch the growing tip after every 8-10 fruit clusters, or lower and coil the vines at any time to allow indeterminate growth. Promptly remove lower old leaves, and persistently thin flowers and fruits.
4. Hormone Treatment for Fruit Setting
Dip flowers with 15 mg/kg of 2,4-D or spray flowers with 40 mg/kg of 4-CPA (fruit-setting hormone). However, be careful not to dip flowers repeatedly, and gradually reduce the concentration as the temperature rises. Hormone treatment should be used throughout the entire growth period; otherwise, empty clusters or extremely small fruits are likely to form.
V. Harvesting
Cherry tomato harvesting is labor-intensive. Generally, artificial ripening is not needed; pick fruits at different ripening stages as needed.