How to cultivate large cherry saplings? Detailed explanation of seedling methods and techniques
How to cultivate large cherry saplings? What to pay attention to High-quality saplings are the foundation of large cherry production. The quality of saplings not only directly affects how fast the tree grows, how early it bears fruit and how high the yield is, but also has a great impact on the adaptability and stress resistance of the tree. Therefore, in production, attention should be paid to propagating high-quality...
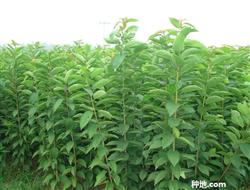
How to cultivate large cherry saplings? What to pay attention to
High-quality saplings are the foundation of large cherry production. The quality of saplings not only directly affects how fast the tree grows, how early it bears fruit and how high the yield is, but also has a great impact on the adaptability and stress resistance of the tree. Therefore, in production, attention should be paid to propagating high-quality, robust saplings. The technical regulations for sapling propagation are introduced as follows.
1 Selection of suitable rootstocks
There are many types of large cherry rootstocks, mainly including Laiyang dwarf cherry and large-leaf type grass cherry (also known as "Daqingye") among Chinese cherries, Maobasuan, Mahaleb and Colt, etc. Practice has proved that the large-leaf type grass cherry has strong adaptability to soil, is most suitable for growing in sandy loam or gravelly loam, has good resistance to crown gall, has strong grafting affinity with large cherry varieties, has deep root distribution and many thick roots. The grafted large cherry grows robustly, has good anchorage, is not easy to lodging, and has good yield. Therefore, in production, the large-leaf type grass cherry should be selected as the rootstock for propagating large cherries.
2 Nursery site selection and preparation
① Nursery site selection. For a nursery site used to propagate excellent new large cherry varieties, it is best to choose neutral loam or sandy loam that is sheltered from the wind and facing the sun, fertile, not continuously cropped, not prone to waterlogging, well drained, and with irrigation conditions.
② Nursery site preparation. For the nursery site, before winter, apply base fertilizer at 5000-6000 grams per sq m, then dig deeply. Before raising seedlings the following spring, plow again, rake level and fine, and then make beds.
3 Rootstock seedling propagation methods
⑴ Propagation by division. The root crown of the large-leaf type grass cherry easily produces a large number of root suckers. In production, they are often used as large cherry rootstocks through division propagation. The method is: in spring and summer, mound soil about 30 cm thick around the root suckers growing around the root system to make them root. After autumn or before sprouting the following spring, separate the rooted suckers from the plant, and plant them together in a concentrated place or in the nursery for cultivation, to be used for grafting large cherries.
⑵ Propagation by layering. In production, the methods of layering propagation of large cherry rootstock seedlings mainly include upright layering and horizontal layering. ① Upright layering. In autumn or early spring, plant the large cherry rootstock seedlings in the propagation nursery. When planting, first dig trenches 30 cm deep at a row spacing of 1.0-1.5 m, then plant the rootstock seedlings in the trenches at a plant spacing of 50-60 cm, with the root crown lower than the ground. Before the rootstock seedlings sprout, cut them back leaving 5-6 buds. When the new shoots from the sprouted buds grow to about 20 cm, carry out the first mounding of soil, about 10 cm thick, and when the new shoots grow to 40 cm, mound another 10 cm of soil. After each mounding, topdress and irrigate. After that, strengthen comprehensive management, and mound soil appropriately according to conditions. After leaf fall in autumn, remove the soil and separate the plants. ② Horizontal layering. Also called stem burial layering, it is currently a method more widely used for propagating large cherry rootstock seedlings. In early spring, first open trenches 20 cm deep and 20 cm wide at a row spacing of 60-70 cm, then plant excellent 1-year-old rootstock seedlings diagonally in the trenches, with an angle of about 30 degrees between the rootstock seedlings and the ground, and a plant spacing roughly equal to the seedling height. After planting, firm the soil and water thoroughly. After the seedlings survive, the lateral buds sprout and produce new shoots. When the new shoots grow to about 10 cm, press the rootstock seedlings horizontally into the bottom of the trench, fix them with small twigs, and mound soil about 2 cm to cover the seedling stems, then water. After that, as the new shoots grow, cover with soil in stages until level with the ground. To promote seedling growth, in early to mid-June, apply urea at 20 kg per mu combined with soil covering. For seedlings with good growth, grafting can be done in the nursery from late June to early July, and for those with poor growth, grafting can be done in September. When lifting seedlings in autumn, cut them into independent rootstock seedlings in sections.
4 Grafting propagation
Sapling grafting mostly uses two methods: "T"-shaped budding and plate budding.
① "T"-shaped budding. In the Yantai large cherry production area, the suitable time for "T"-shaped budding is divided into early and late periods. The early period is within 15-20 days in early to mid-June; the late period is from mid-July to August, sometimes extending to mid-September, lasting about 50 days. If grafting is too early (May), the scion is tender, the cortex is thin, and the grafted buds are not fully developed. If grafting is too late (after mid-September), the branches have mostly stopped growing, and the grafted buds are not easy to peel off. Early to mid-July is in the "dog days rain" season, and after grafting it is prone to gummosis, and the graft interface is difficult to heal. Mastering the budding time well is one of the keys to improving the survival rate. When grafting at different times, scions and grafted buds must be selected differently. When budding in the early period (early to mid-June), select 5-6 plump buds from the middle of robust branches as grafted buds. When budding in the late period (July-August), on robust scions, all buds except basal buds and autumn shoot buds can be used as grafted buds. For budding in September, select plump buds from water sprouts in the inner canopy of the tree crown as grafted buds. When grafting, make a horizontal cut 0.5 cm above the scion bud, then from 1.5 cm below the bud, cut upward from shallow to deep into the xylem to the upper cut, gently pry upward, then pinch one side of the bud sheet with your hand to remove a shield-shaped bud sheet about 2 cm in size. Then, at about 10 cm from the base of the rootstock, choose a smooth spot on the shady side, and use a budding knife to make a "T"-shaped cut deep to the xylem. Then use the tip of the knife to gently peel open the left and right cortex from top to bottom, immediately insert the prepared grafted bud into the cut on the rootstock, align and press the upper end of the grafted bud tightly with the horizontal cut of the rootstock, and then tie it tightly with plastic strips.
② Plate budding. This method can be used throughout the year. The rootstock used for grafting should be more than 0.7 cm thick, and the scion should preferably be collected from 1-year-old branches, selecting plump buds as grafted buds. When grafting, at about 10 cm from the base of the rootstock to the ground, choose a smooth spot, and along the vertical direction, gently cut a long oval cut surface about 2.5 cm long and about 2 mm deep. When cutting the grafted bud, start the knife 1.5 cm below the grafted bud, gently cut the bud sheet off the scion, and cut it into a long oval bud sheet 2.5 cm long and about 2 mm thick. Then, press the bud sheet tightly onto the cut surface of the rootstock, and wrap and tie it tightly with plastic film strips.
5 Management after grafting
① Untie in due time. About half a month after grafting, check whether the grafted buds have survived. If the grafted buds are fresh and somewhat swollen, it indicates that they have survived. For those that have not survived, replant in time. Surviving grafted buds can generally be untied after about 25 days, so as not to affect the sprouting of the grafted buds.
② Cut the rootstock and remove sprouts. After the graft survives or before spring sprouting, cut the rootstock 1 cm above the grafted bud. When rootstock buds sprout, promptly remove the sprouts on the rootstock to promote the sprouting and growth of the grafted buds. After that, continue removing sprouts 3-4 times. When the new shoots grow to more than 20 cm, insert a support beside the sapling, and tie the new shoots to the support with hemp rope or plastic film strips to prevent the new shoots from breaking in the wind.
③ Fertilizer and water management. In order to promote sapling growth, attention should be paid to strengthening fertilizer and water management. Water and topdress in time according to drought conditions and sapling growth. In the early stage, mainly nitrogen fertilizer; in the later stage, mainly phosphorus and potassium fertilizer. After each topdressing, water, and often cultivate and weed. Throughout the growing season, foliar topdressing can also be carried out 2-3 times. To improve the overwintering cold resistance of the saplings and prevent drying out, appropriately control water and fertilizer in the later stage, so as to avoid the saplings remaining green and growing excessively, resulting in insufficiently developed tissues.
④ Pest and disease control. During sapling growth, pest and disease control should be done well. After sprouting, strictly guard against damage by the small gray weevil; it can be caught manually, or poisoned bait made with 80% trichlorfon crystal can be used to trap and kill it. In June-July, 50% fenitrothion emulsifiable concentrate 1000-fold solution or 2.5% deltamethrin emulsifiable concentrate 2500-fold solution can be selected to control the peach fruit moth. In July-August, spray 1-2 times with 65% zineb wettable powder 500-fold solution, or 40% mancozeb 600-800-fold solution, or zinc sulfate lime solution (zinc sulfate 1 part, slaked lime 4 parts, water 240 parts, fully mixed), to prevent bacterial shot hole disease and prevent early defoliation. For pests such as tortrix moths and slug moths, spray 25% chlorbenzuron No. 3 2000-fold solution or 50% dichlorvos emulsifiable concentrate 1000-1500-fold solution for control.
6 Lifting seedlings from the nursery
Generally, seedlings are lifted from the nursery after leaf fall and before the soil freezes. When lifting seedlings, try to keep the root system intact. First remove diseased seedlings and unsuccessful grafted seedlings, then grade them according to stem height, thickness, and root development. For those used to establish an orchard locally, they can be planted directly. For those reserved for orchard establishment the following spring, choose a sheltered place without standing water, dig a false planting trench about 1 m deep, place the saplings in it diagonally, then mound soil to 2/3 of the sapling height for false planting.
For saplings packaged for transport, they can be tied into 1 bundle per 50-100 plants according to grade, and the roots wrapped with moist straw to prevent the root system from losing water. Then tie a label on each bundle of saplings, indicating variety, specification and quantity, complete quarantine work well, and they can be delivered for transport.
Click to get more cherry planting techniques
Click to get more fruit planting techniques