How should navel orange trees be managed when growing them?
How should navel orange trees be managed when growing them? Please give a comprehensive introduction. The following methods can be used for reference when growing navel oranges: (1) Soil management. The mineral nutrients and water needed by the navel orange tree are mainly absorbed from the soil through the root system. Soil is the foundation for the growth and development of navel oranges, and it is also the storage...
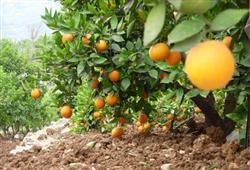
How should navel orange trees be managed when growing them? Please give a comprehensive introduction.
The following methods can be used for reference when growing navel oranges:
(1) Soil management
The mineral nutrients and water needed by the navel orange tree are mainly absorbed from the soil through the root system. Soil is the foundation for the growth and development of navel oranges, and it is also the storage reservoir for fertilizer and water. Therefore, the essence of soil management is to coordinate water, fertilizer, air and heat in the soil, form a soil environment with a virtuous cycle, promote a well-developed root system in navel oranges, and enhance the tree's drought resistance and cold resistance, thereby achieving early fruiting, high yield, good quality and high yield.
1. Expanding planting holes and improving soil
The soil types in the hilly and mountainous areas of southern Jiangxi are mainly red soil, yellow soil and purple sandy soil, whose prominent characteristics are acidity, compactness, leanness, stickiness and drought. Therefore, whether building a new orchard on flat land, hills or mountains, the principle of improving the soil first and planting later must be adhered to. However, deep digging of a planting hole (trench) once cannot solve the problem once and for all. As the root system extends, the canopy expands and the yield increases, the orchard soil must be continuously improved, fertility must be raised, and the vigorous vitality of the tree must be maintained. To achieve this goal, the entire orchard must be systematically expanded and improved according to the growth and development patterns of the navel orange tree.
(1) Method: Expanding holes and improving soil means digging deep outward along the planting trench or the outer side of the previous expansion trench, with no soil partition left, and stopping as soon as roots are seen, so as to avoid damaging too many fibrous roots; the expansion trench is 50-60 cm wide and 60-80 cm deep; for each cubic meter, 20-30 kg of coarse organic fertilizer is buried in layers, and cake fertilizer, phosphate fertilizer, etc. are added near the canopy.
(2) Timing: On the premise of injuring the roots as little as possible, expanding holes and improving soil can be carried out in all four seasons. In practice, filling materials and labor should be arranged according to local conditions and specific circumstances and requirements, and the whole orchard's soil improvement should be completed in 2-3 years. It should be avoided during the vigorous growth period of new shoots, the vigorous growth period of young fruit, periods when winter soil temperature is too low, and hot, dry seasons. In southern Jiangxi, bearing orchards generally carry this out from September to November after the autumn shoots mature; for young, non-fruiting navel orange orchards, it can be carried out from after the spring shoots mature until mid-November.
2. Intercropping and sod culture
Sod culture in navel orange orchards can improve soil structure, continuously increase soil organic matter and fertility, and reduce chemical fertilizer input; prevent soil erosion, preserve fertilizer and water, and resist drought; regulate air temperature and help navel oranges maintain normal physiological activities; promote navel orange growth and significantly increase fruit yield and quality; attract large numbers of natural enemies, improve biological control capacity in the navel orange orchard, reduce pest and disease damage, and reduce pesticide use. It is a technology promoted by the Ministry of Agriculture for green food fruit production and has been designated a national agricultural demonstration and extension project for introducing foreign intellectual achievements and a "948" agricultural technology introduction project.
Orchard intercropping: In young navel orange orchards, the canopy is small, so economic crops can be interplanted between rows, such as peanuts, legumes, Chinese milk vetch (red flower grass), and fodder radish, etc. Crops such as tobacco, corn, watermelon, and sweet potato, which are tall or vines, are not suitable for interplanting.
(1) Natural sod culture: On the premise of thoroughly clearing malignant weeds in the navel orange orchard, beneficial weeds such as dandelion, foxtail grass, and artemisia are naturally retained outside the tree disk.
(2) Artificial sod planting: After thoroughly removing field weeds, grass species with strong adaptability, high fresh grass yield, short stems, and shallow roots that are conducive to the breeding and reproduction of natural enemies of pests are artificially planted outside the tree disk, such as white clover, peanut grass, and ryegrass, etc.; bahia grass can be planted on terrace walls.
Precautions for sod culture:
(1) It must not share the same pest and disease species as navel oranges;
(2) It must not be perennial malignant weeds such as bermuda grass, thatch grass, and purple nutsedge, etc.;
(3) The vigorous growth period of the grass should preferably not coincide with the vigorous growth period of navel oranges;
Sod culture should be combined with tree disk mulching: when the weeds are 50-60 cm tall, mow them promptly for tree disk mulching, which can maintain soil moisture, stabilize soil temperature, improve soil structure, keep the soil loose and breathable, and also increase soil microbial activity and promote plant growth. Note that the thickness of the mulch must reach 10-20 cm, otherwise it will not achieve the effect of preserving moisture and resisting drought; another point is that a gap of about 10 cm must be left around the root crown and stem base to prevent disease at the root crown and stem base caused by rotting mulch. Tree disk mulch can be deeply buried during hole expansion and soil improvement or winter fertilization.
In orchards practicing sod culture, chemical weed control can also be used before the arrival of the high-temperature and dry season in summer to carry out whole-orchard ground mulching. For chemical weed control, first, note that the concentration used must not be too high; second, do not use it more than 2 times per year, so as not to cause adverse effects on the soil and environment; third, ensure the safety of branches, leaves and especially fruit.
(2) Fertilizer management
The mineral nutrient elements required for the normal development of the navel orange tree number as many as the following, among which there are six major essential elements: nitrogen, phosphorus, potassium, calcium, magnesium and sulfur, and six trace elements: boron, zinc, manganese, iron, copper and molybdenum. Navel oranges have two sources of nutrition. One is that the leaves carry out photosynthesis to produce large amounts of organic nutrition; the other is that the root system absorbs large amounts of mineral nutrition from the soil. The inherent nutrients in the soil are limited and need to be continuously supplemented through fertilization, which is the fertilizer management of navel orange orchards.
1. Fertilization principles for navel orange orchards:
(1) Comprehensively consider differences and changes in soil, tree condition and weather, and combine decomposed organic fertilizer with inorganic fertilizer, mainly decomposed organic fertilizer;
(2) Combine the three elements nitrogen, phosphorus and potassium with other nutrient elements, and advocate leaf nutrient diagnosis and formula fertilization;
(3) Correctly master the fertilization amount, fertilization period and method, improve fertilizer use efficiency, and prevent fertilizer damage.
2. Fertilization methods:
(1) Soil fertilization: Soil fertilization can be further divided into soil-disturbing fertilization and non-soil-disturbing fertilization.
Soil-disturbing fertilization methods:
① Strip trench application: Outside the drip line of the canopy, open strip-shaped fertilization trenches on two opposite sides, mix fertilizer and soil evenly and apply into the trenches, changing the position each time;
② Ring trench application: Along the outer edge of the canopy drip line, open ring-shaped fertilization trenches on two opposite sides, mix fertilizer and soil evenly and apply into the trenches, changing the position each time;
③ Radial trench application: Within the canopy projection area, starting at a certain distance from the trunk, dig 4-6 radial fertilization trenches that are shallow inside and deep outside, mix fertilizer and soil evenly and apply into the holes, changing the position each time;
④ Hole application: Within the canopy projection area, dig several fertilization holes, mix fertilizer and soil evenly and apply into the holes, changing the position each time.
Non-soil-disturbing fertilization methods:
① Broadcast application on the tree disk: In the rainy seasons of spring and summer, apply quick-acting fertilizers such as urea and compound fertilizer on the tree disk before rainfall (or immediately after rain). Broadcasting chemical fertilizer on the tree disk should be done in small amounts many times, not too much at once, to avoid serious loss when rainfall is heavy; fertilizer should be spread evenly and not concentrated in one place, especially not too close to the root crown.
When broadcasting, be careful not to scatter fertilizer onto branches and leaves; before and after broadcasting fertilizer on young navel orange trees, it is best to properly loosen the tree disk to prevent surface soil compaction.
② Water-fertilizer irrigation: After decomposed organic fertilizer is diluted with water, irrigate it within the canopy area. Fertilizers such as oil cake and human and livestock manure can be selected, and must be fully decomposed before irrigation; when applying water-fertilizer irrigation, the fertilizer concentration must be strictly controlled to prevent fertilizer damage caused by excessively high concentration. Taking decomposed cake fertilizer as an example, a concentration of about 1% is recommended, with a maximum not exceeding 1.5%; quick-acting chemical fertilizers such as urea and compound fertilizer may be appropriately added to organic water-fertilizer, and the chemical fertilizer concentration should be controlled below 0.5%. When using water-fertilizer irrigation, to prevent roots from floating upward, the amount applied each time to large mature trees should be no less than 50 kg, and young trees should be watered until thoroughly soaked. To reduce loss of water-fertilizer and allow it to penetrate deeply, strip or ring trenches 15-20 cm deep can also be dug on both sides outside the canopy drip line, and the water-fertilizer poured into the trenches; after it has completely infiltrated, cover with a thin layer of soil to reduce evaporation. After repeated use in this way, the fertilization trenches will eventually be completely filled.
(2) Foliar fertilization
Fertilizer is dissolved in water as ions or components of certain nutrient elements.
Commonly used concentrations for foliar fertilization:
Urea: 0.2-0.3% (biuret content in urea<0.25)
Zinc sulfate: 0.2%
Magnesium sulfate: 0.05-0.2%
Borax: 0.1-0.2%
Potassium dihydrogen phosphate: 0.2-0.3%
Ammonium molybdate: 0.05-0.1%
The main periods for foliar fertilization are: flowering period, and the greening period of spring shoots and autumn shoots. When using foliar fertilization, first, pay attention to strictly controlling the concentration used and the type of fertilizer; second, never carry it out during high-temperature periods, so as to avoid scorching the epidermis of leaves and fruit.
3. Fertilization of young trees planted in the current year
For young trees planted in the current year, the main purpose is to ensure survival and grow the tree, but the root system is not well developed. In terms of fertilization methods, frequent light application and small amounts many times are mostly used. Starting half a month after planting and survival, until mid-August, apply a dilute decomposed organic water-fertilizer plus quick-acting nitrogen fertilizer once every 10-15 days; in autumn and winter, combine with hole expansion and soil improvement to appropriately apply a heavier basal fertilizer once.
4. Fertilization of young trees before fruiting
For young trees before fruiting, expanding the canopy is still the main purpose, in preparation for bearing. In fertilization, organic fertilizer is dominant, with appropriate additional nitrogen fertilizer and supplementary phosphorus and potassium fertilizer. Fertilization periods: apply shoot-promoting fertilizer 7-10 days before each new shoot flush; after the new shoots self-prune, apply 1-2 shoot-strengthening fertilizers; in autumn and winter, apply basal fertilizer deeply once.
Specific fertilization amounts: for shoot-promoting fertilizer, apply 0.5-1 kg of decomposed organic fertilizer (or bio-organic fertilizer), 0.05-0.1 kg of urea, and 0.1 kg of compound fertilizer per tree; for shoot-strengthening fertilizer, apply 0.1-0.15 kg of compound fertilizer per tree, or foliar fertilization can be used instead; for basal fertilizer, deeply apply 2-5 kg of decomposed cake fertilizer, 0.5-1 kg of calcium magnesium phosphate fertilizer, and 0.15-0.2 kg of potassium fertilizer per tree.
5. Fertilization of trees at initial fruiting
For navel orange trees at the initial fruiting stage, the canopy must continue to be expanded while a certain yield must also be formed. Because their fruiting mother branches are mainly early autumn shoots, fertilization should focus on fruit-strengthening and shoot-promoting fertilizer, and the amount applied should increase year by year with tree age and fruiting amount.
Specific fertilization amounts: for spring bud fertilizer, apply 0.1-0.15 kg of urea and 0.1-0.2 kg of compound fertilizer per tree; for fruit-strengthening and autumn shoot-promoting fertilizer, apply 2-3 kg of decomposed cake fertilizer (or bio-organic fertilizer), 0.1-0.15 kg of urea, and 0.2-0.3 kg of compound fertilizer per tree; for basal fertilizer, deeply apply 2-5 kg of decomposed cake fertilizer, 0.5-1 kg of calcium magnesium phosphate fertilizer, and 0.1-0.2 kg of potassium fertilizer per tree.
6. Fertilization of mature fruiting trees
In mature navel orange orchards, depending on the fertilization time, fertilize 2-3 times throughout the year. Generally, apply basal fertilizer after fruit harvest, apply pre-bud fertilizer from mid-to-late February to early March (some also apply basal fertilizer together with pre-bud fertilizer), and from late June to early July apply fertilizer to promote autumn shoots and strengthen fruit. Specific fertilization amounts (taking trees with a per-tree yield of more than 60 kg as an example):
Basal fertilizer: apply 4-5 kg of decomposed organic fertilizer (or bio-organic fertilizer) and 0.5-1 kg of phosphate fertilizer per tree.
Spring fertilizer: For those that have already applied basal fertilizer in winter, mainly nitrogen and phosphorus, apply 0.15-0.2 kg of urea and 0.15-0.3 kg of compound fertilizer per tree; for those applying basal fertilizer together with spring bud fertilizer, mainly decomposed organic fertilizer (or bio-organic fertilizer), combined with nitrogen, phosphorus and potassium fertilizer, apply 5-6 kg of decomposed organic cake fertilizer or bio-organic fertilizer, 0.15-0.2 kg of urea, and 0.15-0.2 kg of compound fertilizer per tree, accounting for 50-60% of the annual fertilization amount.
Fruit-strengthening fertilizer: Apply organic fertilizer and inorganic fertilizer deeply mixed. Apply 4-5 kg of decomposed cake fertilizer (or bio-organic fertilizer), 0.1-0.2 kg of urea, and 0.2-0.3 kg of potassium fertilizer per tree, accounting for 40-50% of the annual fertilization amount.
Recommended fertilization methods: (fertilization amounts based on large mature trees as an example)
Spring: Broadcast chemical fertilizer urea 0.1 kg on the tree disk, broadcast 2-3 times;
Summer and autumn: Use water-fertilizer irrigation, concentration 1%-1.5%, each application amount no less than 50 kg, used 6-8 times;
Winter: Use strip or ring trench application, trench depth 50-60 cm, place 20-35 kg of coarse organic matter such as weeds (or rice straw, fern, etc.) at the bottom of the trench, apply 3-4 kg of decomposed organic cake fertilizer (or bio-organic fertilizer) in the upper layer, and 0.5-1 kg of phosphate fertilizer (can be used every other year).
Whether young or mature navel orange trees, after early August, the application of quick-acting nitrogen fertilizer should be stopped and replaced with organic fertilizer, to prevent excessive nitrogen fertilizer from producing late autumn shoots or affecting fruit coloring.
(3) Water management
Water is an important component of the navel orange tree and a necessary condition for all life activities. Too much or too little soil moisture will affect plant growth and fruiting. Southern Jiangxi has a typical subtropical monsoon climate, with abundant rain in spring and summer and little rain and drought in autumn and winter. Water management in navel orange orchards mainly revolves around drainage in spring and early summer, and irrigation in midsummer and autumn and winter.
Drainage in spring and early summer: In low-lying orchards, if water accumulates and the root system remains in an anaerobic respiration state for a long time, many harmful substances are produced under anaerobic soil conditions, easily causing root rot and inducing foot rot. Drainage by clearing ditches should be done promptly to prevent water accumulation, and at the same time attention should be paid to directing water into ponds and pools to store water for drought resistance.
Irrigation in midsummer and autumn and winter: In dry seasons with little rain, on the basis of agricultural techniques for water conservation and drought resistance (mulching, shallow plowing, etc.), orchard irrigation should be carried out in a timely and economical manner to promote fruit enlargement and marketing and prevent fruit cracking. Each irrigation must soak thoroughly; too little irrigation water cannot play its due role and instead increases management costs. For mature fruiting trees, the irrigation amount each time should be no less than 100 kg per tree, once every 10-15 days. From 15-20 days before fruit harvest, except when special drought requires appropriate irrigation, irrigation is strictly prohibited to prevent reducing fruit quality and storage performance. Irrigation in midsummer and autumn can be combined with irrigation of decomposed organic water-fertilizer.
In certain special periods, water management has its special role. For example: to further increase the sugar content of navel orange fruit, appropriate water control is carried out before fruit ripening; to promote flower bud differentiation, water control is also carried out in the navel orange orchard; if low-temperature frost occurs in winter, irrigation should be carried out promptly to raise soil temperature and reduce frost damage.
(4) Training and pruning of navel oranges
(1) Key technical points for navel orange training and pruning
1. The spacing between scaffold branches should be wide, striving for side branches not to touch each other and allowing sunlight into the inner canopy;
2. Appropriately thin out some large branches around the outer canopy, leaving enough gaps for light to enter, and correspondingly increase the fruiting volume;
3. Maintain balanced growth of side branches, avoid uneven strength among branch groups, and reduce fruiting;
4. Maintain the ratio of old leaves, new leaves and flowers at 2:3:2 so that fruiting is good. Regulate the leaf-to-fruit ratio to avoid alternate bearing;
(2) Main pruning periods
1. Winter pruning: Refers to pruning after fruit harvest and before the germination of spring buds the following year. To prevent frost damage and retain as many old leaves as possible through winter, it is generally carried out after "Start of Spring";
2. Summer pruning: Refers to pruning after spring shoots mature and before and after autumn shoots emerge;
3. Spring flower bud stage pruning: Mainly to regulate the ratio of old leaves, new leaves and flowers;
(3) Main pruning methods and effects
1. Heading back: A pruning method in which a section is cut off from a new shoot or perennial branch. Usually heading back the current year's new shoots can promote branching, lower branching height, and enhance tree vigor; heading back perennial branches, because it reduces the branching order at the site of shoot emergence, makes the new shoots that emerge even more vigorous.
2. Thinning out: Cutting off new shoots, perennial branches or branch groups from their basal branching point. Thinning can reduce the total number of branches in the tree, help moderate growth vigor, and promote flowering and fruiting.
3. Retrenchment: Thinning out the weak and declining front portion of a large branch group, then moderately heading back the vigorous branch at the cut. Through retrenchment, the vegetative growth of the branch at the cut is promoted, renewing the originally declining branch group into a new branch group with strong growth vigor.
4. Bud rubbing and shoot release: When navel orange buds germinate sporadically, rub them off, for 2-3 consecutive times, and after more buds have developed and matured, allow them to sprout a large number of new shoots uniformly and neatly.
5. Pinching: During the growing season, remove a section from the tip of a new shoot that has not stopped growing. It is actually an extremely light heading back carried out during the growing season.
6. Propping, pulling and hanging branches: By applying external force, change the growth direction or insertion angle of new shoots and large branches, to achieve the purpose of adjusting growth vigor and distribution space.
(4) Training and pruning of young trees
1. High-position trunk training and shaping of young trees
The "short, dense, early" cultivation model easily causes serious canopy shading, poor ventilation and light penetration, easy breeding of pests and diseases, short and small canopy, fruit hanging down and dragging on the ground, increased difficulty in orchard management, high production costs, and rapid decline in fruit yield and fruit quality, and it can no longer meet today's navel orange production requirements.
High-position trunk training and reasonable sparse planting are an inseparable cultivation model. Adopting the technical measure of high-position trunk training can cultivate a taller and larger canopy, with advantages such as a robust tree, large fruiting volume, strong bearing capacity per tree, significantly improved tree ventilation and light conditions, reduced pest and disease damage, convenient orchard management, increased yield and fruit quality, and lower production costs, and it is worth promoting and applying in production.
Technical requirements for high-position trunk training:
(1) Trunk height about 40 cm (on flat land and gentle slopes it can be appropriately higher, 40-60 cm);
(2) Cultivate 3-4 main branches, with spacing between main branches of about 10-20 cm. Main branches should be evenly distributed and must not overlap vertically;
(3) Cultivate 2-3 secondary main branches on each main branch, evenly distributed.
Technical measures for high-position trunk training:
(1) Trunk determination. After the seedling is planted, cut the top at 60-80 cm from the graft union. The area about 20-40 cm below the cut bud is the shaping zone, and below the shaping zone is the trunk. If the upper part of the seedling has 2 or more branches that are close in position and similar in growth vigor, choose the strongest and most upright shoot to cut the top, and for the remaining shoots either take measures such as branch pulling and girdling to weaken growth vigor, or simply thin them out, to avoid disrupting the tree shape later. For the original weak and small shoots on the trunk, retain them as much as possible; if the original shoots are insufficient, some sprouts can also be selected and used as auxiliary nurturing branches; for shoots with overly strong growth vigor, measures such as branch pulling or heavy heading back (cutting off 2/3 of the front end of the branch) combined with repeated pinching can be taken to promote branching, weaken their growth vigor, and keep them as auxiliary nurturing branches. In short, as long as the shoots on the trunk are controlled so that their growth vigor does not exceed that of the main branches and secondary main branches and they will not disrupt the tree structure, they should be retained as much as possible to support tree growth. After the canopy is basically formed, gradually remove them as appropriate.
(2) Selecting and retaining main branches. Within the shaping zone, use the seedling's original branches or after new shoots germinate, select 3-4 strong shoots as main branches to cultivate, and the remaining branches and buds should be rubbed off as early as possible. The first main branch is about 40 cm above the ground, and the spacing between main branches is about 10-20 cm. The distribution of main branches in three-dimensional space should be even, and growth vigor should be balanced. The angle between the main branch and the trunk is 45-55°.
(3) Equipping secondary main branches. After the main branch extends, select and retain 2-3 secondary main branches on it. The first secondary main branch is about 30 cm from the trunk, and the spacing between secondary main branches is about 20 cm. Note that the growth vigor of secondary main branches should be weaker than that of the main branch. Secondary main branches on different main branches should not overlap or cross each other, and should make full use of space.
(4) Retaining side branches. At appropriate positions on the main branches and secondary main branches, select and retain as many moderately vigorous and slightly weak branches as possible as side branches to support tree growth. It is not acceptable to retain only scaffold branches and no auxiliary nurturing branches.
2. Pruning during the young tree period
During the young stage of navel oranges, there are fewer branches and leaves, so pruning and shoot rubbing should be minimized on the basis of shaping, in order to increase the amount of branches and leaves and form the canopy as early as possible.
(1) Heading back the extended branches of main branches and secondary main branches: To ensure strong growth vigor of the main branches and secondary main branches, before each shoot flush, lightly head back their extended branches (cut off about 1/3 of the front end). Note the direction of the cut bud; obliquely upward is best, and do not choose to head back at a bud facing upright inward or obliquely downward.
(2) Bud thinning: After heading back the extended branches of main branches and secondary main branches, if there are too many buds sprouting at the tip, thin out the weak and small buds when the new shoots are 3-5 cm long, retain 2-3 strong new shoots, and maintain the growth vigor of the main branches and secondary main branches; if new shoots emerge too densely in other positions, part of the weak and small new buds should also be thinned out promptly.
(3) Pinching: Before each new shoot (mainly spring and summer shoots; autumn shoots are not pinched) self-prunes, pinch off the tip after retaining 8-10 leaves, to promote maturity;
(4) Bud rubbing and shoot release: Before summer and autumn shoots germinate, first rub off sporadically emerging new buds, to promote neat new shoot emergence and facilitate control of leafminer and canker disease.
(5) Thinning: During the shaping process, if water sprouts are found that seriously disrupt the tree shape and have no space for development around them, they should be thinned out promptly.
(5) Pruning of trees at initial fruiting
The purpose of pruning trees at initial fruiting is: on the one hand to promote appropriate flowering and fruiting, and on the other hand to expand the canopy, increase branches and leaves, and enter the high-yield period as soon as possible. Pruning is mainly light pruning and long release, adopting the "two promotions" and "two controls" techniques.
1. Before spring shoots and early autumn shoots emerge, head back the extended branches of main branches and secondary main branches;
2. Promote spring shoots: Before spring buds germinate, thin out dense branches at the same node and overly weak vegetative branches, concentrate nutrients to promote vigorous spring shoots;
3. Promote early autumn shoots: In late July and early August, carry out summer pruning and heading back throughout the orchard, combined with bud rubbing and shoot release, to promote high-quality, abundant early autumn shoots that emerge at the Beginning of Autumn and End of Heat;
4. Control early summer shoots: During May-June, rub off summer buds that still emerge sporadically. To rapidly expand the canopy, a moderate release of late summer shoots can be made in late June (in citrus orchards with severe canker disease, it is best to fully control summer shoots until autumn shoots are released);
5. Control late autumn shoots: Rub off late autumn shoots that emerge after September;
6. For drooping branch groups after fruiting, choose vigorous branches that can be raised upward for retrenchment, rejuvenation and renewal.
(6) Pruning of large trees at the full fruiting stage
After navel oranges enter the full fruiting stage, the canopy is tall and large, with luxuriant branches and leaves, and the tree is easily shaded. The main task of pruning is to improve the tree's ventilation and light conditions, promote fruiting in the inner canopy, create a good canopy structure for three-dimensional fruiting, maintain a relative balance between shoot emergence and fruiting, and extend the full fruiting stage as much as possible.
Pruning methods: Mainly large branch pruning, with timely retrenchment and renewal.
1. Large branch pruning
Traditional fine pruning methods require a long pruning time; in some large orchards, pruning may not even be finished during the young fruit stage, involving much labor and high cost. Too many pruning cuts make the tree susceptible to freezing injury under low-temperature frost, and in summer, high temperature and drought can easily cause serious gummosis. The pruning amount is large, and the nutrients accumulated in the branches and shoots are largely wasted.
Adopting the large-branch pruning technique is not only fast and labor-saving and reduces production costs, but also significantly improves the light conditions inside the canopy, stimulates the growth of bearing branches in the inner canopy, achieves the goal of three-dimensional fruiting, and realizes consecutive years of high and stable yields.
According to differences in tree structure, different large-branch pruning methods should be adopted:
(1) Pruning method for dense trees with many main branches: First determine 3 to 4 main branches to retain and cultivate that are reasonably distributed in position and relatively uniform in growth vigor, and remove the remaining main branches from the base, so as to adjust the tree structure and improve ventilation and light penetration. If there are too many main branches, they should be systematically removed year by year during pruning. First remove the upright, upward-growing main branches in the middle of the canopy to let sunlight into the inner canopy; next remove large branches that hinder the growth of the main branches to be retained, large branches that cross or overlap with the main branches or are too close to them, and large branches positioned too low. Avoid doing it all at once, as too heavy a pruning amount will severely weaken tree vigor. Keep the amount of branches and leaves removed each time within 1/5 of the total branch and leaf mass.
(2) Pruning method for dense trees with many branch groups: In this type of tree, the main branches are clear; canopy density is mainly caused by too many branch groups. Pruning should focus on opening "skylights" and "side windows." First remove the upright branch groups in the upper canopy that block light, that is, "open skylights"; then remove some branch groups on the upper side (or lower side) of branches at the dense middle part of the canopy to form an opening shape, that is, "open side windows."
The standard for large-branch pruning of mature trees is: scattered light can be seen on the tree disk. Large-branch cuts should be protected by smearing them with wax or tung oil mixed with fungicide to protect the wounds.
After adopting the large-branch pruning method to improve the tree's ventilation and light penetration conditions, latent buds in the inner canopy tend to sprout into shoots. Apart from appropriately removing buds where branches are too dense, the rest should be retained as much as possible to promote flowering and fruiting. For excessively vigorous water sprouts that emerge from the upper side of main branches and at pruning cuts, if there is space, promptly pinch them to promote branching and form bearing branch groups in the inner canopy; if there is no space for growth, promptly remove them.
2. Renewal pruning by heading back
Promptly head back bearing mother branches, branch groups and declining branch groups, retain as many longer leafy bearing branches as possible and cut them back as branches.
(7) Renewal pruning of aging trees
When most branch groups in all parts of the canopy have become weak branch groups and fruiting capacity has clearly declined, a thorough renewal pruning is needed. Before renewal pruning, root renewal should be carried out first, with moderate root cutting and increased fertilizer application.
Renewal pruning mainly involves removing overly dense basal branches, lateral branches, overlapping upper and lower branches, crossing left and right branches, drooping diseased and insect-damaged branches, secondary main branches and 3- to 5-year-old branch groups, retaining only an appropriate number of main branches, secondary main branches and large branch groups.
The timing of renewal is best before new shoots sprout, usually from February to March. At the same time, grafting wax should be used to protect pruning cuts and saw cuts, and trunk whitewashing should be carried out.
V. Flower and fruit management of navel orange
Flower and fruit management is key to the yield and quality of navel orange, and is also an important technical measure for overcoming alternate bearing in navel orange, alleviating the contradiction between tree growth and flowering and fruiting, and maintaining consecutive years of high yield. According to differences in tree condition, it mainly centers on the two aspects of "protecting flowers and fruits" and "thinning flowers and fruits," with special emphasis on the work of "thinning flowers and fruits."
1. Protecting flowers and fruits
The targets of flower and fruit protection are mainly off-year trees that bore too much fruit the previous year and excessively vigorous trees with few flowers.
(1) Protecting flowers and fruits with nutrient solution: For off-year navel orange trees, because they bore too much fruit the previous year, tree nutrient consumption was great, tree vigor is relatively weak, and flower quantity is relatively small. A nutrient solution can be sprayed once each at the white bud stage, after petal fall, and after the end of the first physiological fruit drop. Commonly, 0.3% urea + 0.2% monopotassium phosphate + 0.2% borax (boric acid), or organic and inorganic foliar fertilizers produced by regular manufacturers, are sprayed on the canopy to supplement the nutrients needed by the tree and promote flower and fruit growth. The nutrient solution is best used alone; when mixed with pesticide solutions, take care to prevent antagonistic failure or pesticide damage (fertilizer damage).
(2) Protecting flowers and fruits by controlling shoots: This is mainly applied to off-year navel orange trees with excessively vigorous tree vigor, many shoots and few flowers. When flower buds are white, remove the flowerless strong spring shoots on the upper canopy and near flowering branches, retain moderate and relatively weak spring shoots, and remove flowerless spring shoots above the flowering branches on the same mother branch, so as to alleviate the contradiction between shoots and fruits and increase the fruit-setting rate. At the same time, promptly remove summer shoots that sprout before the end of June.
(3) Protecting fruits with low-concentration hormones: For plants with relatively few set fruits after the first physiological fruit drop, brassinosteroids or 920 (GA3) may be sprayed for fruit protection. The concentration of 920 should be controlled within 25 to 50 x 10-6 times solution (1 g diluted in 20 to 40 kg water). It is not advisable to use high concentrations or repeated hormone applications for fruit protection, otherwise rough-skinned large fruits will appear. The use of 2,4-D for fruit protection is prohibited.
2. Thinning flowers and fruits
Navel orange has a large flower quantity, low natural fruit-setting rate, and serious flower and fruit drop, which greatly consumes tree nutrients. Thinning flowers and fruits can save nutrients, increase the fruit-setting rate and the proportion of commercial fruit. It is mainly aimed at on-year trees and stable-yield trees.
(1) Flower thinning: For navel orange trees with too many flowers, from after bud emergence to before flowering, promptly thin out leafless inflorescence branches, leafless single-flower branches, slender weak flowering branches, densely growing flowering branches, etc., cut back some long flowering branches, and retain more leafy single-flower branches and leafy inflorescence branches to reduce flower quantity. Leafless single flowers on moderate branches in the inner canopy have a certain fruit-setting ability and should be appropriately retained. Newly bearing trees should also reduce flower quantity through flower thinning to prevent excessive fruiting and premature aging that forms "small old trees."
(2) Fruit thinning: Fruit thinning should be carried out in a planned way, completed in 2 to 3 rounds, and not all at once. In mid-June after the end of the second physiological fruit drop, promptly thin fruits on navel orange trees bearing too many fruits. The first fruit thinning should be early; otherwise it is difficult to achieve the effect of enlarging the fruit. According to the principle of "thin the dense and keep the sparse, keep the good and remove the poor," remove small fruits, deformed fruits, diseased and insect-damaged fruits, densely set fruits, mechanically damaged fruits and fruits with stunted development, etc. For trees with a large flower quantity in spring and very few new shoots, the amount of fruit thinning should be greater, exchanging fruits for shoots, increasing the proportion of new leaves, and helping restore tree vigor. In mid-to-late July, carry out the second fruit thinning in combination with cutting back to promote shoot growth, mainly removing small fruits, deformed fruits, diseased early fruits, sunburned fruits, obviously rough-skinned single terminal fruits, etc. In early-to-mid September, carry out the third fruit thinning, mainly removing small fruits, deformed fruits, cracked fruits, sunburned fruits, diseased and insect-damaged fruits, etc.
Click to get more navel orange cultivation techniques
Click to get more fruit cultivation techniques