Detailed Guide to Hyacinth Planting Methods and Care Tips
Hyacinth (scientific name: Hyacinthus orientalis L.): It is a perennial herbaceous bulbous plant, with an ovate bulb covered by a membranous outer skin; the color of the skin is positively correlated with the flower color. Before blooming, it looks like garlic. It originates from the Mediterranean coast and the Asia Minor region, and is the most fragrant variety among the flowering plants discovered by research. It prefers a growing environment with abundant sunlight and relatively humid conditions, and requires well-drained and fertile sandy loam, etc.

Soil Culture
1. Treat the bulbs. This year I grew the hyacinths in soil. Here you only need to prepare nutrient soil, carbendazim, water, a flower pot and hyacinth bulbs. Hyacinths are relatively cold-tolerant, and can generally be planted around November or December when the temperature is suitable. Mine were bulbs I bought, and at this point we need to treat them. First, gently remove the dried skin on the surface of the bulbs, then use scissors to cut off the dried root tendrils on the base plate and the soil at the bottom, being careful not to damage the base plate.
2. Preparation work. Mix carbendazim and water at a ratio of 1:1000, then put the treated bulbs into the solution and soak for half an hour, then take them out to dry. Here I left them for one night and planted them the next day. While they are drying, use the remaining water from soaking the bulbs to stir the nutrient soil so that it becomes moist, then cover it with plastic wrap and let it sit overnight to sterilize and disinfect.
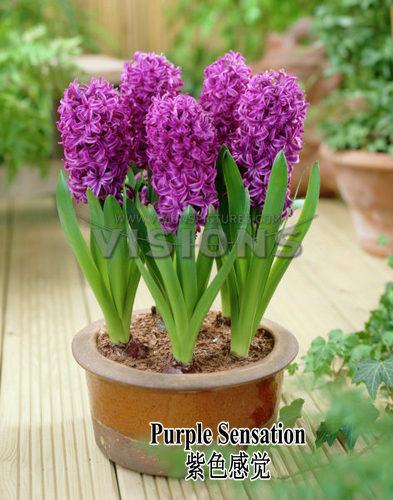
3. Planting the bulbs and care. Once the preparation work is done, let's plant them. Bury the hyacinth to one third of the bulb. Here the soil should not be too wet, nor too dry; the soil we prepared the day before is just right. After planting, place it in a cool and bright place to let it grow roots. After about half a month, when the exposed skin withers, it can be placed in the sun. Water once when the soil dries, and water thoroughly, that is, until water flows out from the bottom of the flower pot. Do not water when it is not dry; too much water will rot the bulb. In winter, when the temperature is below zero, the flower pot should be placed indoors in a place with light.
4. Propagating the bulbs. By February and March, the hyacinths should bloom. At this time, do not place them in the sun or in a warm place, as this will affect the flowering period and shorten it. After the flowers fade, cut off the flower stems, and after the aboveground branches and leaves have all withered, dig out the bulbs, place them in a cloth bag, hang them in a ventilated place and leave them alone. Wait until November or December, take out the bulbs, and you can start planting again.
Hydroponics
1. Preparation work. Last year I grew hydroponic hyacinths. The first two steps are similar to soil culture, except that the later part is simpler. Treat the bulbs and dry them. Then what is used here is water and a glass bottle. I used tap water and a canning jar. You can also use the special bottles for hydroponics. The mouth of the canning jar should be two sizes smaller than the bulb. Put it on the bulb and adjust it into the water. Let the tap water sit in the bottle for one night to settle and evaporate, because substances in the water will affect plant growth.
2. Caring for the bulbs. At this point, you can put the dried bulbs into the bottle. Do not let the water in the bottle cover the bottom of the bulb; keep the bulb at a distance of about 1cm from the water surface. Soaking the bottom of the bulb in water will lead to mildew and rot. Then place the bottle in a dark place, and cover the bottle body with something. This will promote root growth, and the roots that grow will be snow-white, neat and beautiful. Change the water about once every 15 to 29 days. Do not change all the water at once; leave a little of the previous water at the bottom, so the roots will adapt better.
3. Care during the germination period. After germination, place the bottle in a bright, airy position with sunlight to benefit its growth. At the beginning, expose it to sunlight for one or two hours a day, then gradually increase it to seven or eight hours. When the leaves open, you can see a bundle of sturdy white roots below. This scene of enjoying both the flower and the roots together is a special feature of hydroponic hyacinths. After flowering, the bulbs can generally be thrown away, and they basically will not bloom again the next year.
Precautions
- After the hyacinth shows flower buds, it is best to apply fertilizer once, and the flowers will bloom better.
- During the process of rooting in hydroponics, mildew spots may appear on the bulb. At this time, you can wipe them off with a paper towel, or you can ignore them, but it is best to wipe them for a more attractive appearance. You can also wipe with a carbendazim solution to prevent mildew next time.
- It is best to keep the hydroponic bottle shaded until the leaves open, so the roots will be very white and beautiful; contacting the sun too early will make the roots turn green.