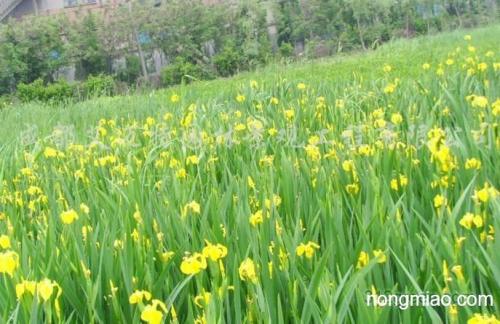
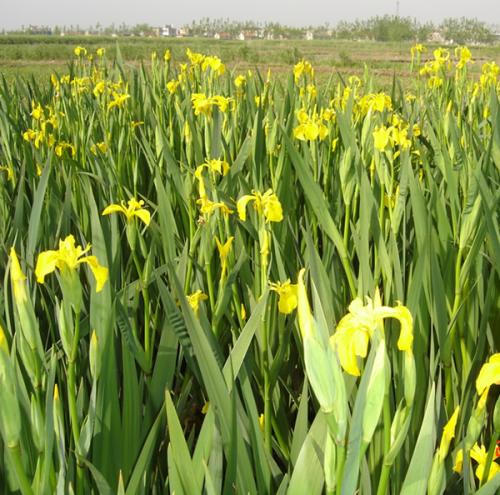
Yellow flag iris (scientific name: Iris pseudacorus L.): it is a perennial wetland or emergent herbaceous plant with persistent roots, tall in stature, with short and thick rhizomes. The leaves are dense, basal, green, long sword-shaped, 60-100 cm long, with a prominent midrib and transverse netted veins. The flower stems rise slightly above the leaves; the upper part of the drooping petals (falls) is oblong, nearly equal in width at the base, with or without brown markings; the standard petals (standards) are pale yellow; the flower diameter is 8 cm. The capsule is elongated, containing many seeds; the seeds are brown and angular. The flowering period is May-June.

Propagation Methods
Division:Division propagation is generally carried out once every 2 to 4 years, in spring, autumn, or after flowering. Irises are divided after flowering (avoiding the plum rain season); before winter arrives, the flower buds can differentiate sufficiently, and they will bloom the following year. When dividing the rhizomes, 3 to 4 buds per division is best. If the divisions are too small, flowering the following year will be affected. When carrying out division propagation, the upper leaves of the plant should be cut off, leaving about 20 cm before planting. Most iris varieties are suitable for shallow planting. Planting spacing varies by type: for robust varieties, 50x50 cm; for ordinary varieties, about 20x20 cm.
Sowing:If seed propagation is used, it should be carried out immediately after the seeds mature, as this makes the seeds easy to germinate, and they will bloom in 2 to 3 years.
Bulbs:After a bulb is planted and blooms for one year, its nutrients will be exhausted and new roots will form; around the new bulb there will be many daughter bulbs, and after 1 to 2 years of planting, the daughter bulbs can develop into flowering bulbs. Flower cultivation experts around the world have carried out tissue culture on different organs of bulbous irises, such as axillary buds, bulbs, stem discs, and flower stems, to grow new bulbs, which provides a new method for accelerating propagation and cultivating disease-free, robust mother bulbs.
Planting Methods
Soil
Irises can be grown both under protected cultivation and in the open field. Any type of soil can be used to grow irises as long as it drains well, has strong moisture retention, and does not become compacted. Good soil structure is very important for the growth of irises; sandy loam gives the best cultivation results, because sandy loam has good aeration and water permeability, which is very favorable for the expansion of the iris root system. To improve the structure of clay soil, plant ash, perlite, coarse sand, etc. can be applied to the soil surface before planting and then mixed evenly by deep plowing; if the soil is highly sandy and drains too quickly, materials such as rice husks, pine needles, and peat can be scattered on the soil surface after planting as mulch to mitigate this.
Disinfection
The soil for planting irises is best disinfected once a year. Soil disinfection is a very important step, generally using deep plowing and sun exposure or chemical disinfection methods. Deep plowing and sun exposure generally takes about 20 days; chemical disinfection generally uses chlorothalonil or quintozene sprayed for disinfection. Bulbs must also be disinfected before planting; soaking them in a 1/1000 aqueous solution of captan or chlorothalonil for 30 minutes is sufficient. After the bulbs arrive, they should be disinfected and planted immediately. If they cannot be planted immediately, they must be stored in a well-ventilated cold storage at below 2 degrees C, and storage must not exceed two weeks; storing too long is unfavorable to the later growth of stems and leaves, and also increases the chance of the root crown being infected by Penicillium.
Planting
When planting irises, the soil temperature is required to be below 20 degrees C. If the average temperature during the expected cultivation period is expected to exceed 23 degrees C, then irises cannot be planted, and the planting period must be moved earlier or later. To obtain high-quality cut flowers, it is best to use large-sized bulbs, 9/10 or 10/+. Iris bulbs must be planted very carefully, especially when the root system has already begun to grow, taking care to avoid damaging the roots as much as possible. The planting depth should be such that the top of the bulb is 7-10 cm from the soil surface. Shallow-planted bulbs are easily damaged by dry soil and are prone to lodging in the later growth stage. The planting density is best at 80-100 bulbs per square meter
Temperature
The soil temperature after planting is very important; the minimum temperature is 5-8 degrees C, the maximum temperature is 20 degrees C, and the optimum temperature is 16-18 degrees C. The minimum air temperature is 5 degrees C, the maximum is 25 degrees C, and the optimum is 15 degrees C.
Watering
Irises like water, and the soil should be kept moist during cultivation. Soil that is too dry is unfavorable to plant growth. Generally, outside the rainy season, a thorough watering can be given about every 10 days; during the rainy season, natural rainfall can suffice; in late autumn, sufficient antifreeze water should be applied. In early spring of the following year, thawing water should be applied in time, and the thawing water must be sufficient and thorough. Water must be applied once before planting to ensure the soil is moist during planting, which helps rapid rooting. After planting, water once more so that the soil fully contacts the bulbs. After that, soil moisture should be kept at a moist standard, that is, it forms a ball when squeezed in the hand and does not scatter when released. Watering is best done in the morning. The relative air humidity is best kept at 75-80%. Irises are sensitive to salt, so the EC value of irrigation water is best no greater than 0.5 ms/cm.
Fertilization
Applying base fertilizer before planting is not advisable (except organic fertilizer), because irises are very sensitive to soil salt; if fertilizer is applied before planting, it will increase the salt content in the soil and hinder iris rooting. A later topdressing method can be used, but irises are relatively sensitive to fluorine; for example, superphosphate and triple superphosphate are prohibited, and diphosphate with low fluorine content can be used. Before planting, cow or horse manure or dried chicken manure can be applied as base fertilizer; after the base fertilizer is applied, it should be mixed evenly with the cultivation soil. After planting and survival in spring, urea can be topdressed once in early summer, phosphorus-potassium fertilizer once in early autumn, and in late autumn, along with watering antifreeze water, cow or horse manure can be shallowly applied once more, or it can also be scattered directly on the nursery plot.
Weeding
In the nursery plot where irises are planted, weed control work should be done in advance. If weeds appear during the planting process, they should be pulled out by hand in time; as far as possible, do not use chemical herbicides to remove weeds.
Harvesting
In autumn, harvesting can begin when the parts 3 cm below the flower top have all colored. In spring and summer, they can be cut when the flower top has opened 1 cm; the flower top refers to the part where the flower bud is completely colored. When harvesting, pull them up with the roots, and immediately tie the flowers into bundles after harvesting; otherwise, place them in cold storage as soon as possible. After harvesting, first cut off the bulbous roots, remove excessively long leaf tips and unattractive yellow-brown leaves, then grade and bundle them. A grade interval of 5 cm is suitable; for irises tied in one bundle, the longest stem and the shortest stem should preferably differ by no more than 3 cm, and the flower tops should be aligned. After harvesting, immediately send them into cold storage pre-adjusted to 2 degrees C. In autumn and winter, the harvested flower stems are soft and easily bent; after bundling, they should be immersed in 2 degrees C cold water and placed in 2 degrees C cold storage for at least two hours.