Detailed Explanation of Morning Glory Planting Methods and Technical Key Points
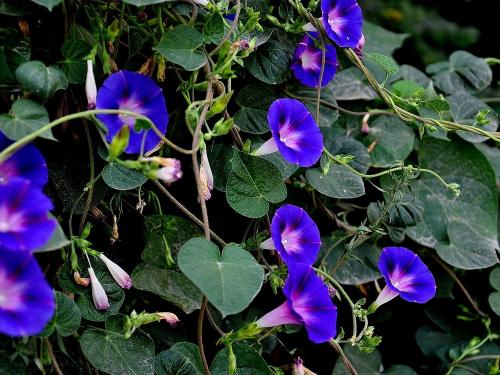
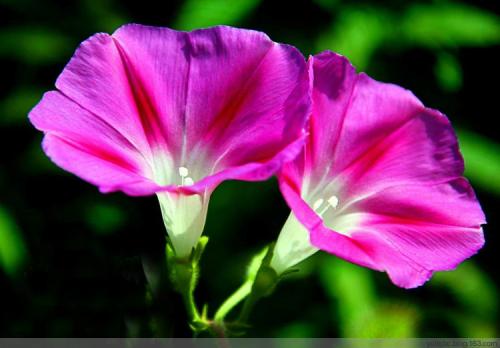
Morning glory (Pharbitis nil (L.) Choisy) belongs to the genus Pharbitis in the Convolvulaceae family and is an annual twining herbaceous plant. The flowers of this plant closely resemble a trumpet shape, so in some places it is called trumpet flower. Morning glories are generally sown in spring, bloom in summer and autumn, and come in many varieties. The flower colors include blue, crimson, peach red, purple, and others, as well as mixed colors. The petal edges vary considerably, making it a common ornamental plant. The fruit is egg-shaped and can be used as medicine. The leaves of morning glory are three-lobed with a heart-shaped base. The flowers are white, purplish-red, or purplish-blue, funnel-shaped, and the entire plant is covered with coarse hairs. The flowering period is most abundant in summer. The seeds have medicinal value.
Planting Methods
Seedling raising: The germination temperature for morning glory seeds is 20-30°C. Generally, sowing is done in late April to early May (earlier in the south). Sow in rows by variety in a fine sandy soil seedbed. When humidity is moderate, germination occurs in about 10 days. After about another 10 days, the cotyledons fully open. When the true leaves have just begun to emerge, the seedlings should be transplanted into small pots. Too early and the seedlings are weak; too late and the roots are damaged, neither of which is beneficial for later development. Small pots should be labeled with the variety name.
Transplanting: After the seedlings in the small pots have grown two or three true leaves, the root system has developed well and they can be transplanted into medium pots with basal fertilizer added in advance. As Mr. Mei said, morning glories are not afraid of heavy fertilizer; horse hooves, cooked hemp residue, and similar materials can be used as basal fertilizer. The root system development of morning glory requires warmth, so the pots should be rotated frequently to ensure even sunlight exposure, allowing the root system to develop fully.
Pinching: After the morning glory has grown three or four true leaves, vines begin to grow from the center, and at this point they should be pinched off. After the first pinching, branch vines grow from the leaf axils. After the branch vines produce three or four leaves, pinch again, and at the same time shape the plant. After each pinching, apply additional fertilizer similar to that used for chrysanthemums. Be careful not to let fertilizer water and mud stain the leaves (including cotyledons), as this may cause leaf drop. After the branch vines grow, the plant enters the flowering period (generally one month after transplanting). Ideally, the first leaf of the branch vine produces axillary buds, and the second and third leaves produce flower buds from their axils. After the flower buds take shape, the stipules of the buds can be removed to promote bud development. To ensure sufficient nutrients are supplied to the buds so they produce large, brilliant flowers, some buds can also be removed to cultivate single blooms, just like cultivating a specimen chrysanthemum. After flowering, remove the spent flowers and prevent them from setting seed, so as not to affect the nutrition of the next batch of flowers. Of course, after three or four batches of flowers have bloomed, axillary buds proliferate and become difficult to control. Ordinary varieties can be moved to ground planting, while superior varieties should be kept for seed.
Seed saving: Good varieties must have their seeds saved well. After they mature in autumn, collect the seeds, classify them, and label and store them. If variations appear, they should be preserved with even greater care. For crossbreeding morning glories, after selecting the female and male parents, cut off the upper end of the flower bud at dusk on the day before flowering, then remove the stamens and wrap with a wax paper bag. The next morning, remove the wax paper bag, use the stamens of the male parent for artificial pollination, then wrap with the wax paper bag again. After one or two weeks, the wax paper bag can be removed, but the pollinated seed pods must be well marked and recorded. The following year, all crossed seeds should be planted well, and after flowering the results can be observed, allowing the study of the effects of various genetic factors.
Experienced morning glory enthusiasts can distinguish superior from inferior seedlings based on the shape of the cotyledons, so that inferior ones can be removed early. They can also estimate the flower color based on the color of the young stem, such as pale white-green indicating white flowers, deep purple indicating purple flowers, and so on. Unusual cotyledon shapes, unusual true leaf shapes, and unusual flower shapes