Detailed Explanation of the Cultivation Methods and Technical Key Points of the Phoenix Oyster Mushroom
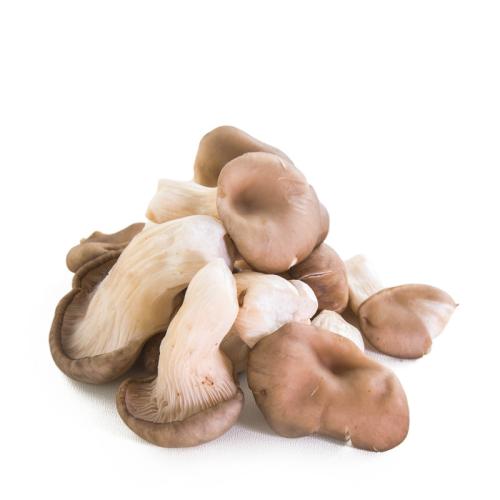
The Phoenix oyster mushroom (Pleurotus geesteranus ), also known as the miniature oyster mushroom, ring-stalked pleurotus, yellow-white pleurotus, ring-stalked funnel mushroom, king oyster mushroom and small flat oyster mushroom. It differs from the ordinary Phoenix mushroom in that it is smaller, with a stalk of 5-6 cm and a cap diameter of less than 3 cm. The Phoenix oyster mushroom is actually a more commercially oriented name for the Phoenix mushroom, being the immature fruiting body of the Phoenix mushroom.

Cultivation techniques for the Phoenix oyster mushroom:
I. Strain isolation and selection
The Phoenix oyster mushroom strains used in production come from two sources: one is obtaining pure mycelium by isolating from the fruiting body, and the other is directly introducing them from research institutions and strain production units. Research institutions generally obtain them by isolating, purifying and rejuvenating from the fruiting body. Ordinary growers, lacking the conditions for isolation and strain production, generally introduce them directly from strain production units.
II. Cultivation season arrangement
According to the fruiting temperature of the Phoenix oyster mushroom, spring cultivation is arranged with bag-making in February-March, and autumn cultivation is arranged with bag-making in May-August; at high altitudes the bag-making time can be arranged earlier.
III. Cultivation methods
The cultivation methods for the Phoenix oyster mushroom are basically the same as the sterilized substrate cultivation of oyster mushrooms and Phoenix mushrooms, but raw substrate cultivation cannot be used. It can be cultivated indoors, or outdoors in a shaded shed.
IV. Bag production and mycelial growth
Raw material formulas for cultivating the Phoenix oyster mushroom:
① Miscellaneous wood sawdust 50%, corncob 26%, wheat bran 15%, cornmeal 5%, sucrose 1%, gypsum powder 1%, lime 2%, potassium dihydrogen phosphate 100 g, magnesium sulfate 25 g.
② Cottonseed hull 92%, wheat bran 5%, sucrose 1%, gypsum powder 1%, lime 1%. ③ Sugarcane bagasse 50%, sawdust 32%, wheat bran 15%, gypsum powder 1%, lime 2%, urea 100 g. ④ Cottonseed hull 90%, rice husk 4%, glucose 1%, peptone 0.5%, glutamic acid 0.5%, wheat bran 4%, a small amount of lime. Corn stalks, peanut stalks, peanut shells, rice and wheat straw, etc. can all be used as culture material; all the above raw materials should be crushed before use.
V. Fruiting management
1. After the Phoenix oyster mushroom mycelium has fully colonized the bag, continue culturing for another 5-7 days so that the mycelium reaches physiological maturity and accumulates nutrients, then it can be transported to the fruiting site and mushroom house for fruiting. The fruiting house should be easy to manage and require ventilation, heat preservation, moisture retention, cleanliness and hygiene; there should be no garbage, no excrement and no foul water ditches beside the mushroom site. Before the bags are moved in, the whole mushroom house should first be sprayed with dichlorvos and omethoate to kill insects once, and then sprayed with a 5% formaldehyde aqueous solution for sterilization.
2. Usually after 5 days the mature bags can be moved in for arrangement and fruiting management. The arrangement methods include tiered-shelf stacking (suitable for factory-style standardized three-dimensional cultivation), floor stacking, upright bag arrangement on raised beds, and bag-unwrapping and soil-burying on raised beds, etc. Regardless of which method, before the bags are moved in, the already disinfected and insect-killed mushroom house (shed) should first be pre-humidified, with plenty of water sprayed on the bed frames, walls and floor, to increase the humidity of the whole mushroom house (shed). Arrange 2-3 insect-killing lamps in the mushroom house (shed) so as to control insect population density.
3. After the bags enter the house, culture the mycelium for 2 days, cut off the plastic bag along the neck ring, scrape off the original old strain or swollen primordia, and keep the relative air humidity of the mushroom house at 90%. For 3-5 consecutive days, keep the temperature at 23-25°C, and provide a certain amount of diffused light every day. At this time the mushroom house should be sprayed with water frequently and ventilated slightly.
4. Generally after 3-5 days, the primordia on the surface of the substrate can be seen beginning to differentiate, and when a large number of mushroom buds have formed, increase slight ventilation and light duration, maintain a suitable carbon dioxide concentration, and keep humidity at 85-90%. At this time, never spray water directly onto the mushroom buds, otherwise the buds are prone to turning yellow, shrinking and dying. When the caps gradually flatten, a fine sprayer can be used to spray frequently.
5. Under dry weather conditions, the mushrooms can be harvested after 1-2 days. After the first flush of mushrooms is completely harvested, it is best to scrape clean the dry old roots and dead mushrooms and mushroom buds on the surface that same day; the humidity of the mushroom house can only be maintained at 70-80%, letting the surface of the culture material dry a little, so as to prevent mold diseases on the fresh material surface and prevent the hatching of some insect eggs. When the material surface is too dry, a sprayer can be used to spray a little fine mist; under these conditions, culture the mycelium for 6-10 days.
6. After mycelial culturing, before the second flush of mushrooms emerges, the bags need to be replenished with water, so that each bag gains 30-50 g in weight. For bed cultivation with soil covering, the soil surface should be kept neither dry nor wet. After water replenishment, if conditions permit, give the bags in the mushroom house a low-temperature stimulus below 10°C for 1-2 days, or a day-night temperature difference stimulus of about 10°C for 3 days, while also inhibiting the growth of contaminating microorganisms. At this time the management is the same as for the first flush of mushrooms, and at this time ventilation and moisture retention are especially the first priority. The management of the third flush, fourth flush, and fifth and sixth flushes of mushrooms is similar to that of the second flush; the key is that the handling of mycelial culturing and water replenishment must be appropriate in order to achieve stable and high yields.
VI. Harvesting and processing
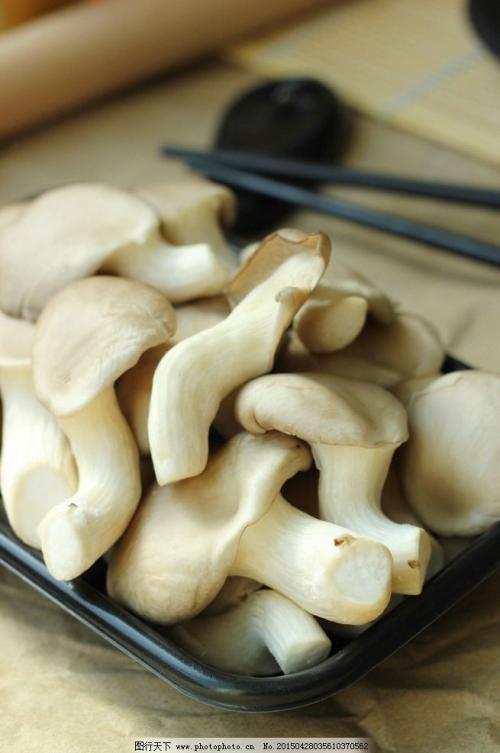
The sign of a mature Phoenix oyster mushroom fruiting body is that the cap has grown to 2-3 cm, the cap edge is incurved, and it is suitable for harvesting when the spores have not yet been discharged. After harvesting, the fresh mushrooms should first be drained of moisture, then placed in a cold storage; when there is enough stock, take them out, trim off the mushroom bases, sort them according to harvesting and grading, package them, and transport them out. If the fresh mushrooms cannot be sold for the time being, they can also be brined or processed into dried mushrooms.
VII. Pest and disease control
For insect pests, choose high-efficiency, non-toxic, short-residue broad-spectrum insecticides for spraying, such as pyrethrum, derris, tobacco leaf, cypermethrin, mushroom insect cleanser, etc.; generally spray when there are no mushrooms after harvesting, and spray clean water 1-2 times after use.
For green mold, use 0.1% procymidone aqueous solution for continuous spraying 2-3 times for control; for Neurospora, also known as red mold, use 800-fold carbendazim plus diesel oil to disinfect the locally infected areas; for Mucor, also known as hairy mold, promptly pick it out and dispose of it. For yellow mold and black root mold, refer to the control method for green mold.