Detailed Explanation of Spider Lily Planting Methods and Care Points
Spider lily (scientific name: Hymenocallis littoralis (Jacq.) Scalisb.) is a perennial bulbous herbaceous plant. Leaves are basal, oblanceolate, with acute tips. The scape is hard and flattened, solid; the umbel bears 3-8 small flowers at the top of the stem, sessile; flower diameter can reach 20 cm, the perianth tube is long and split, generally linear or lanceolate; 6 stamens are borne at the throat, and the lower part is united by a membrane into a cup-shaped or funnel-shaped corona, the flowers are greenish-white and fragrant. The flowering period is summer and autumn, the capsule is ovoid or ring-shaped, splitting open when mature. Seeds are spongy, green.
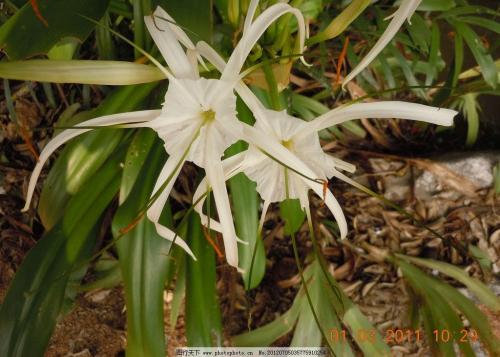
Growth habits of spider lily
Spider lily is native to tropical America and the West Indies, and likes sufficient light, a warm and humid climate, and is not cold-tolerant. It has no strict requirements for soil and prefers fertile soil; it can be potted in leaf mold soil or planted in clayey soil. The overwintering temperature for potted spider lily is above 15°C, and water and fertilizer must be sufficient during the growing period. Spider lily planted in the open ground needs its bulbs dug up in autumn and stored dry indoors. With just a little care, spider lily will grow and bloom year after year.
Propagation methods of spider lily
1. Bulb division: Bulb division propagation of spider lily can be carried out in April and May each year together with repotting. When repotting, dig out the bulbs, and plant the divided bulbs. When planting, be careful not to plant too deep; keeping the neck of the bulb level with the ground is sufficient. Daughter bulbs can be buried slightly deeper. In North China, potted spider lily is planted in March, and outdoor planting is best in early May, and must be after frost.
2. Division: As spider lily grows, it usually produces small buds on the mother plant, and these small buds are the material used for division. Generally, in February to March of spring, remove the mother plant of spider lily from the pot and soil, then cut off the small buds beside the mother plant. The cut small buds are the daughter plants and can be directly potted. Usually, divide once every 3-4 years together with repotting.
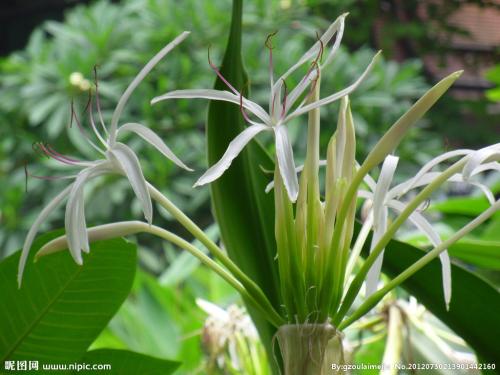
Cultivation methods of spider lily
1. Soil: Spider lily has no strict requirements for soil; it can be potted in leaf mold soil or planted in clayey soil. Potted spider lily can be planted in early spring, commonly using a mixed soil of equal parts peat soil, fertile garden soil and river sand. The planting depth should be such that the top of the pseudobulb is level with the pot soil. For ground planting, choose clayey soil with deep, fertile and well-drained layers, and planting in early May is appropriate.
2. Watering: Spider lily likes a moist soil environment and is not drought-tolerant. During the growing period, especially during high summer temperatures, water should be supplied fully to keep the pot soil moist and not let the pot soil become too dry. It dislikes waterlogging; after rain during the plum rain season, accumulated water in the pot should be poured off in time. In winter, watering needs to be moderated to keep the pot soil relatively dry. Low temperature combined with high humidity can easily cause pseudobulb rot.
3. Light: Spider lily likes a semi-shaded environment and has strong shade tolerance. When summer light is too strong, it should be properly shaded or the flower pot moved to a semi-shaded place. If placed in too shady a place for a long time, spider lily leaves will become thinner and the leaf color darker, making the plant shape unattractive. It dislikes strong light exposure, otherwise the leaves turn yellow and the tips scorch. From May to September, shading should be provided, or it should be placed in a place with sufficient scattered light. At other times, sufficient sunlight should be given.
4. Temperature: Spider lily likes warmth and is not cold-tolerant. The most suitable temperature for growth is 21-27°C. Below 15°C, spider lily growth stops; below 10°C, the leaves turn yellow and wilt; at 5°C, the aboveground part dies. The overwintering temperature for potted spider lily is above 15°C. If the aboveground part dies, it can enter dormancy in the form of underground bulbs, and after the temperature rises the following spring, it can still sprout new leaves and grow.
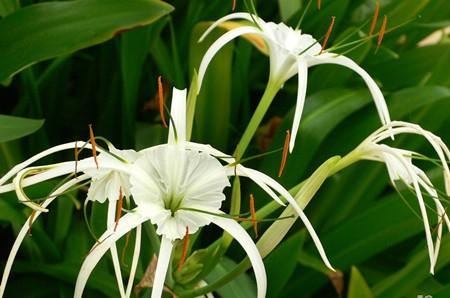
5. Fertilizing: During the growing period, fertilize spider lily once every half month. After entering the bud stage, increase the application of phosphorus and potassium fertilizers so that the flowers will be large; stop fertilizing when flowering. After flowering, apply a fertilizer mainly of nitrogen and potassium to promote stem and leaf growth and pseudobulb enlargement. If the growing environment is rather shady, reduce the supply of nitrogen fertilizer and increase the application of phosphorus and potassium fertilizers, which can make the plant grow robustly without excessive vegetative growth. Stop fertilizing in winter.
6. Pests and diseases: Spider lily is prone to brown spot disease in high-temperature and high-humidity or low-temperature seasons, and attention should be paid to prevention and control. When brown spot disease occurs, small round brown spots appear on the leaves, then gradually expand; the edges of the spots are dark brown and the centers gray-black, until the spots connect and the leaves die. If only a small amount is found, remove the diseased leaves and destroy them. In severe cases, spray with 75% mancozeb wettable powder at 500 times dilution for control.
7. Pruning: After spider lily flowers fade, cut off the scape in time to avoid seed formation consuming nutrients and affecting plant growth. If indoor space is small, the aboveground leaves can be cut off before winter arrives, and the potted plant placed in a dry, shady place, keeping the room temperature at 5-10°C, then repot and place in sunlight for cultivation the following spring.
8. Repotting: Potted spider lily should be repotted once every 2-3 years in April of spring. It likes fertile, moist, organic-rich and well-drained clayey soil. The substrate can be prepared from materials such as leaf mold soil, garden soil, peat soil and plain sand. Planting should not be deep; the top of the pseudobulb should be level with the pot soil, but daughter bulbs can be planted slightly deeper.