A Detailed Guide to Potato Cultivation Techniques and Management Methods
The potato, also known as the Irish potato, originated in the high mountain regions of Peru and Chile and was introduced to China by the Dutch in the mid-17th century; it has a cultivation history of more than 300 years in our country. Potato tubers contain 8-29% starch as well as proteins, minerals, vitamins and various other nutrients. With good yielding ability and wide adaptability, the potato has gradually become an important food, vegetable, feed and industrial raw material for humans. It can be said that the potato will be one of the main crops with the greatest development prospects in the 21st century.
Environmental Conditions
1. Temperature: Potato tubers can sprout at temperatures above 4°C, and tubers freeze below 0°C. The optimal storage temperature for potato tubers is 0°C-4°C. Potatoes prefer a cool climate; the optimal germination temperature for buds on the tubers is 12°C-16°C, and at 18°C-25°C germination is rapid, but the resulting seedlings are weak and small. The suitable soil temperature for tuber development is 16°C-18°C, preferably not exceeding 21°C; above 25°C is unfavorable for tuber enlargement. High temperatures will cause the tubers to stop growing.
2. Water: The tuber formation stage is the period of greatest water demand. At the early and peak stages of tuber setting, a soil moisture content of 70-80% of field maximum water-holding capacity is more suitable; at the late tuber-setting stage, a soil moisture content of 60% of field maximum water-holding capacity is appropriate. Therefore, early-maturing varieties have their greatest water demand from the aboveground bud stage to the late flowering stage, when stems and leaves grow rapidly and tubers form in large numbers; for mid-maturing varieties, the entire period from flowering until the stems and leaves stop growing is the tuber enlargement stage, so their water-demand period is longer than that of early-maturing varieties.
3. Light: The potato is a light-loving crop. During the growth period, insufficient light intensity or overly dense planting will cause excessive stem and leaf growth, delay tuber formation and reduce disease resistance. Day length directly affects plant growth and tuber formation; long days can promote stem and leaf growth and bud formation and flowering, while short days favor tuber formation. Under 11-13 hours of sunlight per day, stems and leaves are well developed, photosynthesis is vigorous, and tuber yield is also high.
4. Soil: The potato is best suited to soil with a deep topsoil layer, loose structure, good drainage and aeration, and rich organic matter, such as the paddy soil (loam) and sandy loam of the Hanzhong plain. Heavy clay soil hinders root development and tuber enlargement, causing deformed tubers, protruding eyes and rough skin. Potatoes are suited to growing in slightly acidic soil; in alkaline soil, potatoes are prone to common scab.
Cultivation Techniques
Variety Selection
1. The safe sowing period for open-field potatoes in the Hanzhong plain and hilly areas is around the Beginning of Spring on February 4; in mountainous areas, temperatures are lower and the sowing period is relatively delayed.
2. Variety selection. Through experimental demonstration and promotion in recent years, suitable varieties for open-field potatoes in Hanzhong include Kexin No. 6, Kexin No. 1, Shaza 15, Anshu No. 58, Anshu No. 56, Taiwan Red Skin, etc.
Promoting Strong Sprouts
When the growing season is short, promoting strong sprouts before sowing is especially important. The measures for promoting strong sprouts in seed potatoes are briefly summarized as follows:
1. Seed dressing with chemicals: Mix 2 kg of 70% thiophanate-methyl plus 1 kg of 72% agricultural streptomycin evenly into 50 kg of talcum powder to make a mixed powder; for every 50 kg of seed potatoes, mix in 2 kg of the mixed powder to prevent seed potato rot.
2. Sprouting process: ① Warm sprouting: In a relatively warm room or a rainproof greenhouse (temperature 18°C-20°C), find an empty area, spread a layer of moist sandy soil or loose fine soil about 10 cm thick, place the seed potatoes on the sandy or fine soil and spread them into a thin layer, then cover with about 5 cm of sieved sandy or fine soil, and use a watering can to spray water and keep it moist (the sandy or fine soil should just hold together when squeezed in the hand). If the temperature is below 18°C, cover further with straw, wheat straw, straw mats, etc. to keep warm and promote sprouting. Moisture retention and rot prevention: during the sprouting process, if the covering sandy or fine soil dries out, use a watering can to spray water and maintain moisture; while maintaining moisture, also prevent the seed potatoes from rotting. ② Cooling to strengthen sprouts: When the young sprouts of the seed potatoes have grown to about 5 mm, remove the covering, lower the temperature appropriately (12-15°C) or move them to a cooler place, and gradually expose them to diffused light to strengthen the sprouts. The seed potatoes should be stacked in 1-2 layers, not too thick. Every day, turn them carefully and gently so that sprouting is even and sturdy, avoiding overly long sprouts on the lower layer of tubers. If the seed potatoes have already sprouted during storage, place them under diffused light to strengthen the sprouts. When the sprouts are about 1 cm long, they are ready for cutting or sowing.
3. Precautions for sprouting: Do not place the seed potatoes directly under direct sunlight; handle the seed potatoes carefully, lifting and setting them down gently to prevent broken sprouts; the seed potatoes should be placed in a well-ventilated place, avoiding rain and frost.
Cutting Seed Pieces
1. 15 days before sowing, select tubers that have the characteristics of the variety, with fresh skin color and no cracking or disease spots, as seed potatoes.
2. To ensure uniform emergence of potatoes, apical dominance must be broken. The method is to cut vertically through the center point of the tuber's apical bud into two pieces, and then cut further.
3. Site disinfection. The site for cutting seed pieces and the tools for holding the seed pieces should be sprayed with a 2% copper sulfate solution, or disinfected with plant ash. This reduces the chance of seed pieces being infected by pathogens and viruses.
4. Knife disinfection. Pathogens such as potato late blight and ring rot overwinter on seed potatoes, and the cutting knife is the main tool for spreading pathogens, especially ring rot, for which there is currently no specific drug for treatment and control. Therefore, effort must be made in cutting seed pieces to prevent pathogens from spreading via the knife. The specific method is: prepare a porcelain basin containing a certain amount of 75% alcohol or 0.3% potassium permanganate solution, and place three cutting knives into the solution to soak for disinfection; these knives are used in turn and immediately put back into the basin for disinfection after use. The knife can also be burned over a flame for 20-30 seconds and then used again. This can effectively prevent ring rot, blackleg and other diseases from being transmitted through the knife.
5. Requirements for cutting seed pieces. Seed pieces should not be too small; each seed piece must weigh no less than 30 g. Larger seed pieces can enhance drought resistance and prolong the weaning period. Each seed piece must have at least one eye. Dress the cut potato pieces with plant ash, which serves both as seed fertilizer and for disease prevention.
Sowing
1. Plot selection: A plot suitable for potato cultivation should have loose soil, good aeration, rich organic matter content, flat terrain, proximity to a water source, and convenient irrigation and drainage.
2. Reasonable crop rotation: Potatoes are not suitable for continuous cropping, because continuous cropping can aggravate soil-borne diseases and insect pests, easily cause severe deficiency of certain elements in the soil, disrupt the natural balance of soil microorganisms, increase the accumulation of harmful substances secreted by roots, and affect potato yield and quality. The preceding crop can be rice, corn, onions and garlic, melons, etc.
3. Reasonable fertilization: It is best to use balanced fertilization (formula fertilization). Fertilize according to the nutrient requirements of potatoes. Experiments show that when the tuber yield is 1000 kg per mu, it is necessary to absorb 5.6 kg of nitrogen, 2.2 kg of phosphorus and 10.2 kg of potassium from the soil. Among the three major fertilizer elements, potatoes require the most potassium, followed by nitrogen, and less phosphorus. The ratio of nitrogen, phosphorus and potassium is 5:2:9. Where conditions for balanced fertilization are lacking, apply 3000 kg of farmyard manure and 75-100 kg of potassium-rich three-element compound fertilizer per mu on medium-fertility land.
4. Sowing: Open furrows with a ridge spacing of 50-60 cm and a furrow depth of 10 cm; apply chemical fertilizer in the furrow, and apply organic fertilizer above the chemical fertilizer. Sow seed pieces above the organic fertilizer, keeping the seed pieces separated from the chemical fertilizer as much as possible. Sow according to the density required by the potato variety; the plant spacing for early-maturing varieties is 20 cm, and for mid-maturing varieties it is 25 cm. Cover with soil 6-10 cm thick. Under medium-fertility conditions, ensure more than 5000 hills planted per mu. After sowing in the main field is completed, sow a certain amount of seed pieces in the ridge furrows at the head and edges of the field, to be used for replanting when there are gaps in the main field.
Field Management
1. Management during the seedling stage (emergence to bud stage):
(1) Intertillage and hilling. The first intertillage and hilling is done when the seedlings are about 6 cm tall; at this stage the underground stolons have not yet formed, so deep hoeing is reasonable. After 10 days, carry out the second intertillage and hilling; at this stage the underground stolons have not formed in large numbers, so deep hoeing is reasonable to achieve the purpose of hilling higher layer by layer. In the early bud stage, carry out the third hilling; at this stage the underground stolons have already formed and the tips of the stolons have begun to swell to form tubers, so shallow cultivation is reasonable to avoid damaging the stolons. Three intertillage and hilling operations during the seedling stage enhance soil aeration and create good soil conditions for potato root development and tuber setting.
(2) Pest control. The main pests during the seedling stage and even the tuber-setting and tuber-growing stages are aphids, cutworms and red spiders. Control can be carried out as soon as individual pests are found in the field. The control agents should be high-efficiency, low-toxicity and low-residue pesticides.
(3) Topdressing. Under conditions of good soil fertility and sufficient basal fertilizer, topdressing is generally not needed. However, when topdressing is necessary, it can be done at the 6-leaf stage; topdressing too early will not have a topdressing effect, and topdressing too late will have a poor yield-increasing effect, or even cause excessive vegetative growth and reduced yield.
2. Management during the tuber-setting stage (bud stage to flower drop)
(1) For varieties that set many fruits, remove excessive flower buds to save nutrients, especially photosynthetic products, and promote underground tuber setting. When removing flower buds, do not damage the flag leaf.
(2) This stage is the period of greatest water demand. Drought should be avoided; when drought occurs, water should be applied to keep soil moisture at about 70% of field maximum water-holding capacity.
(3) Potato late blight is likely to occur and spread during this stage. Before the disease develops, use metalaxyl mancozeb, ridomil, mancozeb, chlorothalonil, copper sulfate, or dichlofluanid for prevention.
3. Management during the tuber-setting stage (flower drop to physiological maturity of tubers)
During this stage the root system gradually ages and its absorption capacity weakens, so attention should be paid to preventing premature senescence. Spraying a 0.5%-1% potassium dihydrogen phosphate solution once on the leaves can effectively prevent premature senescence and allow the underground tubers to reach physiological maturity.
Harvest
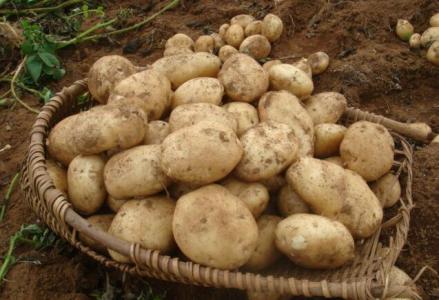
When most of the stems and leaves turn from green to yellow and then to withered yellow, the underground tubers have reached physiological maturity and should be harvested immediately