Garlic chives, (scientific name: A. tuberosum Rottl. ex Spreng.) also known as: Fengben, Caozhongru, Qiyangcao, Lazy Man's Vegetable, Changshengjiu, Zhuangyangcao, Biancai, etc.; belongs to the
Liliaceae family, a perennial herbaceous plant, with a distinctive strong odor, rhizome lying horizontally, bulbs narrowly conical, clustered; bulb tunic yellowish-brown, reticulate fibrous; leaves basal, linear, flat; umbel inflorescence, terminal.
The leaves, scapes and flowers are all eaten as
vegetables; the seeds and other parts can be used as medicine, having effects such as tonifying the kidney, strengthening the stomach, refreshing the mind, and arresting sweating and astringing. In traditional Chinese medicine, some people call garlic chives the "intestine-washing herb."
Garlic chives have strong adaptability, are cold-resistant and heat-tolerant, and are cultivated everywhere across the country.
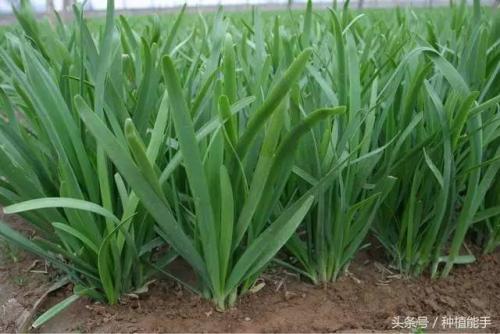
Cultivation Techniques
Land Preparation and Fertilization
The seedling nursery should be convenient for irrigation and drainage, and should be
sandy loam or clay loam where onion and garlic vegetables have not been grown in the past 1-2 years. Deep plow before winter, water to freeze, and in the following spring harrow and plow as soon as the ice breaks to preserve moisture. Apply 4-5 cubic meters of decomposed farmyard manure per mu. To prevent onion maggots, use 5% phoxim granules at 2 kg per mu, add 10-15 kg of dry fine soil, spread evenly, shallow plow and then harrow finely, level and make beds. Bed width 1.2-1.5 m, length 7-10 m, for ease of management.
Timely Seedling Raising
Garlic chive seedlings grow slowly, so sow early at the appropriate time, preferably from late March to late April for
sowing. After soaking seeds to promote germination, use the wet sowing method to broadcast in the seedling bed, covering soil in two stages: first cover with a thin layer of soil, then after it becomes moist, cover with soil a second time, with a total soil cover thickness of 2 cm. Seed rate per mu is 6-8 kg. After covering with soil, cover with a layer of plastic film to help increase temperature and preserve moisture, and remove the film after seedlings emerge. Generally, seedlings from 1 mu can transplant to 7-9 mu of vegetable field.
Seedling Bed Management
When seedlings are about 5 cm tall, water lightly once and loosen the soil in time; after 10 cm, apply decomposed manure or topdress with urea 2-3 times along with watering, and flush-apply trichlorfon crystals at 0.5-1 kg per mu with the water to kill onion maggots and other pests. After seedlings reach 15 cm in height, control irrigation to prevent excessive growth and lodging. Weeds should be pulled promptly. When seedlings are about 12 cm tall, apply 0.5-0.75 kg of 25% nitrofen per mu for control; or after sowing and before emergence, spray the soil surface with 0.15 kg of 33% pendimethalin EC per mu.
Reasonable Transplanting
Choose a plot with fertile soil and convenient irrigation and drainage, apply 4-5 cubic meters of decomposed farmyard manure per mu, level and make beds. Bed width 2-3 m, with every 3 beds as one group, and a 1 m wide cold-protection belt set on the north side. Transplant from late June to early July. Before transplanting, cut off the ends of the fibrous roots and trim them into small bundles even with the bulb. Plant in holes on flat beds, with row spacing 13-20 cm, hole spacing 10-15 cm, and 6-8 plants per hole. When planting, do not bury the leaf sheath, firm the soil after planting, and water promptly.
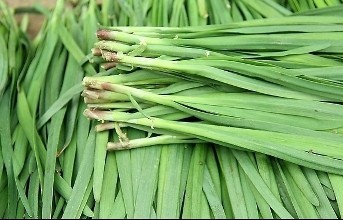
Field Management
When new garlic chive leaves emerge, water to help the seedlings recover, and cultivate to
preserve moisture, keeping the soil alternately dry and moist. After autumn begins, which is the period of most vigorous growth for garlic chives, fully supply fertilizer and water. Later, as temperatures gradually drop and plant growth slows, just keep the soil surface from drying out. After frost, shift to arched shed management.
Arched Shed Cultivation
Before the ground freezes in late October, set up the shed frame, and after cutting one batch of fresh garlic chives before a hard frost, cover with film. First hoe and loosen the bed surface, air and sun it for 3-4 days, and spread decomposed pen manure, and apply urea and phosphorus-potassium fertilizer in furrows. Along with watering, use phoxim or trichlorfon to drench the roots to control onion maggots, and cover with film after the soil dries slightly. Place corn stalks on the cold-protection belt to block wind and prevent cold, and dig cold-protection trenches around the garlic chive shed, with the trench 10 cm from the shed edge, 50 cm deep, and 50 cm wide. Fill the trenches with crushed corn stalks or wheat straw. Use wheat bran and other materials as an insulation layer, cover well with soil on top, and compact it. This helps keep the arched shed warm. After covering with film, shallow hoe once on a sunny day to raise the ground temperature. During the growth period, maintain the shed temperature at 15-20°C during the day and 5-7°C at night. During severe cold, cover the
shed film tightly and seal the irrigation opening. After covering the shed, harvest can begin in 50-60 days; the first cutting of garlic chives is generally harvested at New Year's Day or in mid-January, and thereafter harvested about every 30 days. After the third cutting, remove the shed and shift to open-field cultivation.
Harvesting
The number of times garlic chives are
harvested each year depends on the growth condition of the garlic chives, the fertilization situation, and market conditions. In winter and spring, garlic chives in arched sheds can be harvested 3 times. Although the quality in autumn is good, in order to cultivate root stock and lay the material foundation for arched shed growth, it is advisable to harvest 1-2 times. The standard for cutting garlic chives is 7 leaves and 1 heart. Harvesting in the early morning is best. It is advisable to cut to 3-4 cm above the bulb at the yellow leaf sheath. Thereafter, each cutting should be slightly higher than the previous one to ensure normal growth. In the first 1-2 years after transplanting, yield is relatively low; years 3-6 are the peak growth period with the highest yield; after 10 years they enter the aging stage and should be divided and transplanted promptly.