Detailed Explanation of Narcissus Bonsai Shaping and Carving Techniques
The selection of flower heads is relatively strict. Based on the external form of the flower head and the author's intention, through careful conception, skillful use of force, carving and layout, careful water cultivation and gradual trimming, various narcissus bonsai of a thousand shapes and full of vitality are cultivated. Carved flower heads should first be soaked in water for 1 day—2 days before water cultivation, allowing them to fully absorb water, so that the buds and root tips begin to sprout, and to remove the mucus flowing from wounds, in order to keep the scales white.
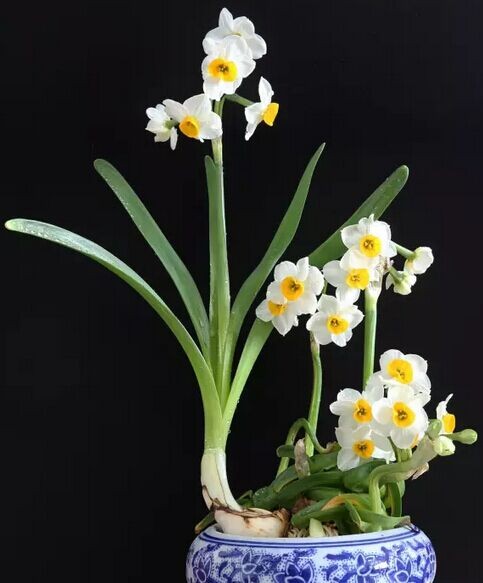
During water cultivation, apart from the pen-rack type which is placed upright and the shaped-and-carved fixed-form type, most others use inverted water cultivation, that is, with the wounded surface facing upward. In the early stage of water cultivation (5 days to 7 days), the leaves and flower stems are yellow and weak, so exposure to sunlight should be avoided, and it is best to cultivate indoors. Once the leaf color turns green, full sunlight is needed, so that the plant becomes compact and sturdy with emerald color. Through carving and water cultivation, flowering is earlier and the flowering period is slightly shorter. In the south, flowering generally occurs in 25 days—30 days; in the north, where the weather is colder, flowering occurs in 35 days—40 days, and the flowering period is 10 days—15 days. During the flowering period, the water temperature can be used for adjustment: with warm water the flowering period comes earlier, and vice versa it is delayed. If managed well, it can bloom on schedule.
1. Cleaning:
Before carving, first peel off the outer skin of the bulb, and at the same time remove the root-protecting soil, village roots and rotting impurities cleanly, to avoid the scales or roots in water cultivation being contaminated and becoming moldy and rotten.
2. Opening the cover:
Make the cut from the scale surface toward which the bud bends. Hold the bulb flat with the left hand, hold the traditional carving knife with the right hand, and cut an arc-shaped line along a point about 1 cm from the root plate. Along the line, pare off the surface scales toward the bulb end until all buds are exposed.
3. Thinning the gaps:
Carve away the scales sandwiched between the buds, so that there are gaps between the buds, making it convenient to carve the bud bracts, leaves and flower stems. One method is to use the tip of a traditional carving knife inserted into the gaps to carve, and this method is suitable for relatively skilled carvers.
4. Peeling the bracts:
Peel off the bud bracts exposed on the outside of the buds. How many bud bracts to peel off should be determined according to the shaping requirements. Generally, a diagonal-mouth knife tip is used to cut two straight lines on both sides of the bud bract, then the knife tip is used to flick the bract from the end of the bud bract and peel it along the direction toward the base of the bract, which can prevent damage to the flower bud.
Another method is to use a diagonal-mouth dual-purpose knife for carving, and this method is more suitable for beginner carvers.
5. Paring the leaves:
According to the shaping requirements, determine the width of the leaf to be pared. First use a diagonal-mouth knife to make a cut at the end of the leaf, then use the round-mouth knife of a round-tip dual-purpose knife to pare along the leaf veins from the leaf end toward the base. Because the structure of the round-mouth knife is that the outer arc of the blade has a certain slope, it is both convenient for paring away leaves and can avoid damaging the flower bud. If the leaf needs to be pared down to the leaf base, a pointed triangular knife can be used, inserted along the leaf veins to the base.
6. Scraping the stem:
According to the shaping requirements, determine the amount and direction of scraping the epidermis of the flower stem. Use a diagonal-mouth knife to scrape off the epidermis from the stem end along the direction toward the stem base. If scraping is needed down to the bulb, a pointed triangular knife can be used to insert along the epidermis of the flower stem to the bulb. Be sure to prevent injuring the flower stem, which would cause blind flowers or dropped flowers.
7. Carving the lateral bulbs:
The mother bulb generally bears more than one pair of lateral bulbs. Most lateral bulbs have no flower scape, but some plump lateral bulbs do have flower scapes. When carving the lateral bulbs, observe carefully. The lateral scales are a component part of the entire narcissus bulb, and are also an indispensable element of narcissus shaping.
8. Trimming:
Finally, all cut openings should be trimmed neatly, both to maintain a beautiful appearance and to prevent fragments from becoming moldy and rotten. If the flower bulb is to open and grow, the scales at the bottom should be split open in a regular manner. In carving, special attention should be paid to the fact that because the maturity of the flower arrows gradually forms over time, the flower scapes controlled to bloom at Spring Festival are relatively mature, so leaf paring, stem scraping and base insertion can be carried out during carving. Damage to flower buds and dropped flower buds will be relatively less frequent.
If flowering is to be controlled to before Spring Festival, the flower arrows in the bulb are relatively tender during carving, and when paring leaves, scraping stems and inserting at the base, it is very easy to damage the flower buds and cause dropped flower buds. During carving, leaf paring, stem scraping and base insertion may temporarily be omitted, and after soaking the bulb for about one day, the steps of leaf paring, stem scraping and base insertion should immediately be carried out as a supplement. This is because at this time the leaves and flower arrows have begun to loosen and separate, and during operation damage to flower buds or dropped flower buds can be prevented. If the bulb is soaked for too long, the leaves spread out and grow, and at this time the base of the leaves is still fragile, making it very difficult to pare the leaves, and also likely to cause the leaves to break.