Detailed Explanation of Key Techniques for Raising Japanese Honeysuckle Bonsai Seedlings
In landscaping, Japanese honeysuckle is used for vertical greening such as park hedges, walls, balconies, flower corridors and flower trellises, and can also serve as ground cover material for soil and water conservation and windbreak and sand fixation. Besides being planted in the ground, Japanese honeysuckle can also be grown in pots for ornamental purposes.
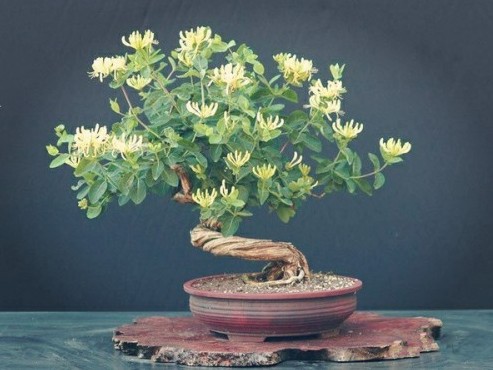
There are three methods of cultivating Japanese honeysuckle: growing from seed, layering and cuttings. Cuttings are mostly used in production. This is because this method can maintain the excellent traits of the variety and can quickly produce large quantities of high-quality seedlings.
Techniques for raising Japanese honeysuckle bonsai seedlings:
1. Propagation by sowing
From August to October, harvest ripe fruits, wash off the fruit skin with clean water, scoop out the seeds and dry them, then put them into a cloth bag and store them in sand at low temperature until the following spring. Sow from late March to early April. Before sowing, first soak the seeds in 25°C warm water for one day, then mix them with wet sand, put them into a cloth bag and place it indoors, using rice straw (stalks, thatch, etc.) to keep them warm. When more than 1/3 of the seeds have cracked open and turned white, sow them in loose, fertile, well-drained sandy soil. Seedlings emerge about 10 days after sowing. In the following spring, transplant them to the nursery field; generally, after 5 years of sowing they are potted for cultivation.
2. Propagation by cuttings
In mid-to-late June, cut plump semi-lignified branches of the current year as cuttings, each segment about 15-20cm long. Keep the bed soil moist and spray the cuttings; they can take root in about 25 days. In the following spring, transplant them to the nursery field, and after 4 years they are potted for cultivation.
3. Propagation by division
In spring and autumn, dig up the suckers sprouting from the roots of the mother plant together with their roots (separate them with a sharp knife), and transplant them with roots to the nursery field; after 4 years they can be potted for cultivation.
4. Propagation by layering
In spring and autumn, first take longer branches from the mother plant, bury them in the soil about 5cm long and 2-3cm deep, and keep the soil moist; they can take root by autumn of that year. In the following spring, separate them from the mother plant and plant them in the nursery field, and after 3 years they are potted for cultivation; or in the plum rain season, select sturdy, ancient and elegant branches for air layering, and after rooting, cut them off from the mother plant and pot them directly for cultivation. This method takes shape relatively quickly