How to graft potted cherry blossoms? A detailed guide to the practical technical points
Cherry blossoms are an important ornamental flowering tree species for gardens. When they bloom in early spring, the large and gorgeous flowers cover the whole tree, even bending the branches with their weight; their form is graceful and dazzling. Afterwards the branches and leaves flourish, forming a canopy of green shade, and the bark is glossy with horizontal stripes. Suitable for roadside and courtyard greening and beautification.
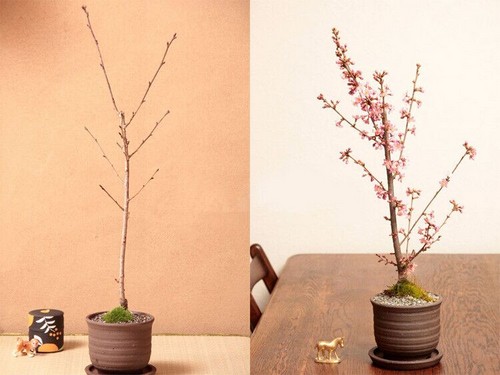
[Cultivation and selection of rootstock and scion]
For grafting cherry blossoms, it is not advisable to use wild peach (Prunus davidiana) or wild apricot (Prunus armeniaca) as rootstock, because the compatibility is poor, especially in the later stage. Generally, seedling rootstocks grown from seeds of wild cherry (Prunus pseudocerasus), mountain cherry (Prunus serrulata) or sweet cherry (Prunus avium) varieties are used. Superior cherry blossom varieties generally do not produce seeds. The author introduced and developed the Colt rootstock by tissue culture starting in the 1980s. Besides being suitable as a sweet cherry rootstock, tests have shown it is also suitable as a cherry blossom rootstock, and it can be propagated asexually by layering. For scions, use thick, strong branches of superior varieties. For large trees of inferior varieties, they can be used as large rootstocks for top grafting to change the variety.
[Grafting methods]
The first is autumn bud grafting. Seed-propagated rootstocks can reach a plant height of more than 70 cm by autumn, making them suitable for bud grafting. The grafting method can be T-shaped budding, or chip budding. After grafting, do not cut the rootstock; in the following spring, cut off the rootstock above the grafted bud to promote sprouting of the grafted bud. After one year of growth, a strong seedling is formed.
The second is summer grafting. Rootstock seedlings that have rooted by layering are moved into the nursery in the second year. By summer, the scion has begun to lignify, so T-shaped budding or square bud grafting can be carried out, grafting onto the middle part of the rootstock and pinching off the top. After the graft has taken, cut off the rootstock above the grafted bud, keep the old leaves on the lower part of the rootstock, and remove sprouting buds to promote growth of the grafted bud, so that a strong seedling can be formed by autumn.
The day before yesterday, a junior schoolmate asked me about grafting techniques. Actually, I only know a little about grafting techniques, but I have never practiced it myself. How embarrassing! Below I will introduce cherry blossom grafting techniques to everyone!
1. Selection of rootstock varieties:
It is best to use seedlings of wild cherry (Prunus pseudocerasus) as rootstock. From mid-December to late January, from vigorous wild cherry mother trees, select current-year branches that have basically lignified, and cut them from bottom to top into small sections 8-10 cm long to use as rootstock.
2. Grafting: Use the rootless rootstock cut-grafting method, whose advantage is that the operation technique is simple and practical. Grafting can be done on rootstocks with a relatively small ground diameter, improving rootstock utilization; the grafting period is long and can be postponed to the end of March, and repeated supplementary grafting can be done, effectively increasing the grafting survival rate, with significant economic benefits.
Grafting steps:
(1) Preparation of grafting materials
For scions, use fully lignified, healthy current-year shoots, requiring plump buds and no pests or diseases; one special grafting knife, which must have a flat surface; for tying material, it is best to use organic plastic film with good tensile strength and strong elasticity, cut into strips 30 cm long and 1.5-2.0 cm wide for later use.
(2) Cutting the rootstock
Before grafting, use the prepared cut rootstock (8-10 cm), and from the top end of the rootstock make a slanted cut at the cut site, slightly including xylem (0.5-0.7 mm), then make a vertical cut downward, with a depth that reaches the wood but does not damage the wood; the cut surface should be about 2 cm long, and the cut surface should be smooth and flat without fuzz.
(3) Placing the scion
A scion with 1 bud is cut into slanted surfaces at both ends, and the scion length is 2.5-3 cm. When cutting the scion, choose a scion with the same diameter as the rootstock or slightly smaller. First cut off the scion branch 0.5 cm above the bud, then from the front side of the bud, about 2 cm downward, cut a short slanted surface at 50°, and then on the back side of the bud, 0.5 cm away from the bud, cut a long slanted surface, with a depth that reaches the wood but does not damage the wood, and a length slightly longer than the rootstock cut surface. Then, insert the slanted base end of the prepared scion outward into the rootstock cut, inserting it so that it fits tightly against the bottom of the rootstock cut, and be careful to align the rootstock bark (cambium).
(4) Tying with film
After the scion is placed, immediately tie it with plastic film strip leaving the bud exposed, tying tightly from bottom to top over the cut surface and the top of the scion bud branch. The tying must be careful and steady. After grafting, store them uniformly and neatly in soil, and wait until early spring to plant them by cuttings.
(5) Supplementary grafting
Thirty days after grafting, check the survival of the scions and carry out supplementary grafting; another supplementary grafting can also be done in March. Through supplementary grafting, the survival rate can reach more than 95%.