Detailed Guide to Cutting Propagation Techniques for Potted Cherry Blossoms
Cherry blossom (Prunus serrulata) is a deciduous tree in the rose family (Rosaceae), with a plant height of 5-25cm. The flowers are borne in corymbose or racemose inflorescences of 3-5 blooms, in white or pink, single or double. Flowers and leaves may appear together or flowers may precede leaves, with a blooming period from April to May. When spring arrives and flowers open, the trees are covered in blossoms vying in beauty, with brightly colored, delicately fragrant flowers that are elegant and graceful. It is a famous flowering tree for landscape greening.
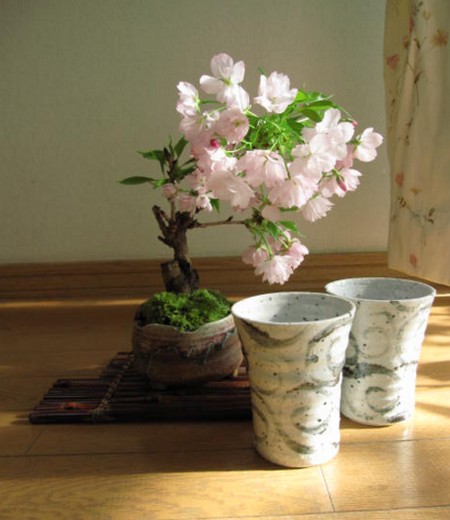
Cherry blossoms are usually propagated mainly by grafting, mostly using single-petaled cherry blossoms or cherry (Prunus pseudocerasus) as rootstock, with cut grafting or cleft grafting carried out before flowering in early spring. There are very few reports on the use of cutting propagation. In recent years, our experiments on softwood cutting propagation of cherry blossoms showed that within 25d after cutting, the average rooting rate was over 95%, with a maximum of 20 roots per plant, most of which were cortex-type roots, with some callus-type roots as well, and the transplant survival rate was over 90%. The technique is described below.
1. Cutting collection and treatment
From early to mid-June through early to mid-September, collect semi-lignified branches that grew in the current year, cut them into 10-15cm long segments, keep 2-3 leaves at the top of each segment, and remove the remaining leaves together with their petioles. Cut the lower end of the cutting with a sharp blade in a flat cut, requiring a smooth cut surface. Tie the prepared cuttings into small bundles of 50 or 100 pieces, and in a cool, moist place soak the basal 3-4cm of the cuttings in a 50mg/L solution of ABT Rooting Powder No. 1 (developed by the ABT Research Center of the Chinese Academy of Forestry) for 5-8h, or in a 100mg/L solution for 2-4h.
2. Cutting method and post-cutting management
Cutting bed setup:
Choose a cool, well-drained location and build a small plastic arch tunnel 1.2-1.5m wide and 5.0-6.0m long, with a height of 70-90cm. First dig down 25cm at the bottom, then lay about 10cm thick cinder, and on top spread about 10cm thick expanded perlite or river sand as the cutting substrate, and water thoroughly.
Cutting:
Insert the cuttings into the cutting bed at a plant spacing of 3cm and a row spacing of 5cm (it is best that the leaves of the cuttings do not overlap each other). Before inserting, first make holes with short wooden pegs slightly thicker than the cuttings, then place the cuttings into the holes, firm the substrate around the cuttings so that the substrate is in close contact with the cuttings. The insertion depth is 4-5cm.
Post-cutting management:
Immediately after cutting, sprinkle thoroughly with clean water and cover the tunnel film tightly, keeping the relative humidity above 95%. Thereafter, spray a moderate amount of clean water once every morning. The temperature inside the arch tunnel should be kept at around 30°C; if it exceeds 35°C, water may be sprinkled to cool it down. The substrate temperature is best at around 25°C. In the early stage of cutting, the amount of water sprinkled should be somewhat larger, then gradually reduced. When the cuttings begin to root (generally about 15d after cutting), ventilation can be done appropriately in the morning and evening, then gradually increase the ventilation amount and extend the ventilation time. When the roots of the cuttings reach 3-5cm in length and each cutting has 3-5 roots, they can be transplanted.
3. Transplanting
Before transplanting, gradually open the tunnel film and harden the seedlings for about 7d, and reduce the amount of water sprinkled. When transplanting, move the hardened cuttings directly into the field, water thoroughly immediately, and shade with a shade net for a few days; avoid exposure to strong sun. Alternatively, first move them into nutrient pots (the potting soil should have good permeability), then place them in a small arch tunnel, water thoroughly, cover with the tunnel film, keep moist and shaded for a few days; at first ventilate every morning and evening, after 2-3d gradually increase the ventilation amount, after 10d open the tunnel film, remove the shading material, and after hardening for another 4-5d they can be moved into the field.
Cherry blossoms are usually propagated mainly by grafting, so there are not many technical documents on cherry blossom cutting propagation. In fact, using the softwood cutting method to propagate cherry blossoms also has many advantages. The method introduced here can achieve a rooting rate of over 95% within 25 days after cutting, with a transplant survival rate of over 90%, which already counts as highly efficient production in cherry blossom cultivation and propagation. The method is described below:
Preparation before softwood cutting of cherry blossoms and the cutting method:
1. During June to September, collect semi-lignified branches that grew in the current year and cut them into 10-15cm long segments. Keep only 2-3 leaves at the top of each segment, and cut the lower end of the cutting with a sharp blade in a flat cut. In a cool, moist place, soak the basal 3-4cm portion of the cuttings in ABT Rooting Powder No. 1 solution for 2-4 hours.
2. Choose a cool, well-drained site and build a small plastic arch tunnel 1.2-1.5m wide and 5.0-6.0m long, with a height of 70-90cm. First dig down 25cm at the bottom, then lay about 10cm thick cinder, and on top spread about 10cm thick expanded perlite or river sand as the cutting substrate, and water thoroughly.
3. Insert the cuttings into the cutting bed at a plant spacing of 3cm and a row spacing of 5cm. Before inserting, first make holes with short wooden pegs slightly thicker than the cuttings, then place the cuttings into the holes, firm the substrate around the cuttings so that the substrate is in close contact with the cuttings. The insertion depth is 4-5cm.
Notes on management after cherry blossom cutting:
1. Immediately after cutting, sprinkle thoroughly with clean water and cover the tunnel film tightly, keeping the relative humidity above 95%.
2. Thereafter, spray a moderate amount of clean water once every morning. The temperature inside the arch tunnel should be kept at around 30°C.
3. In the early stage of cutting, the amount of water sprinkled should be somewhat larger, then gradually reduced.
4. When the cuttings begin to root, ventilation can be done appropriately in the morning and evening, then gradually increase the ventilation amount and extend the ventilation time. When the roots of the cuttings reach 3-5cm in length and each cutting has 3-5 roots, they can be transplanted.