What are the home pot-culture propagation methods for Phalaenopsis?
Phalaenopsis is an epiphytic orchid native to the tropics and has long been known as the "Queen of Orchids." It bears a raceme with many flowers; the flowers resemble butterflies in shape, with brilliant and richly varied colors, and a very long blooming period. It is one of the most widely and commonly cultivated species in the orchid family, deeply loved by people around the world. As a very important indoor flower, it can often be seen in homes and offices, and in some regions it is also commonly used as a bride's bouquet.
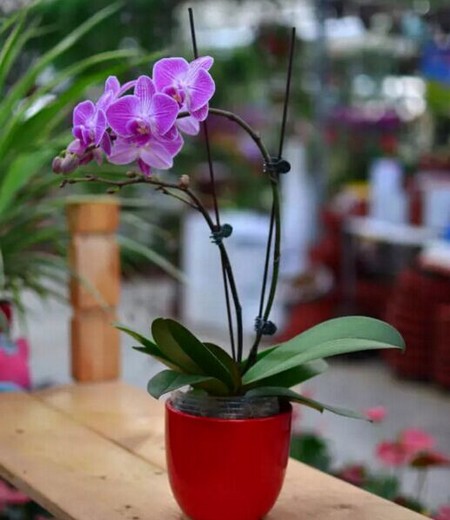
Phalaenopsis is generally propagated by tissue culture, but this requires equipment and conditions that only professionals can provide. Phalaenopsis is a monopodial plant and generally does not produce tillering buds, which many flower enthusiasts who want to propagate it under home conditions deeply regret. Here we recommend a propagation technique that uses Phalaenopsis flower spikes for propagation and to stimulate tillering buds.
I. Flower spike bud forcing method:
1. Cut off the spent flowers on the flower spike together with the spike, taking care to keep the un-sprouted bud nodes (about three or four nodes). Carefully remove the bracts from the top one or two nodes to expose the node buds, being careful not to damage the buds. Take a small amount of bud-forcing agent (plant hormone) and apply it evenly to the node buds; it is even better if you can also coat and cover the wounds left after removing the bracts. Place the treated orchid in a suitable spot (where it gets light but not direct sun). The temperature must be kept at 25-30°C and the humidity above 75%, and new flower plantlets will grow in 2-3 months. When the new plantlet has grown to a certain size, wrap a small amount of sphagnum moss around its base with plastic film; when the plantlet has grown two or three thick roots, it can be cut off and planted separately.
2. Take a small amount of bud-forcing agent and apply it evenly to the node buds; it is even better if you can also coat and cover the wounds left after removing the bracts.
3. Un-sprouted bud nodes on the flower spike (about three or four nodes). In Phalaenopsis, flowers normally differentiate only at the 6th and 7th nodes counting from the base of the flower spike (near the mother plant). Apart from the first node at the very base, peeling back the bracts on the nodes below the flowering nodes reveals buds, all of which are good material for propagation. For Phalaenopsis flower spike bud culture, the timing of material collection is not greatly restricted: from when the flower spike first appears until after the flowers fade, as long as the spike is still green and not withered and yellow, it can be used as culture material.
4. Carefully remove the bracts from the top one or two nodes to expose the node buds, being careful not to damage the buds.
5. Take a small amount of bud-forcing agent; dip a toothpick in the bud-forcing agent and dab it on the bud points of the stem. Bud forcing is fast and the effect is good.
6. Place the treated orchid in a suitable spot (where it gets light but not direct sun). The temperature must be kept at 25-30°C and the humidity above 75%, and new flower plantlets will grow in 2-3 months. When the new plantlet has grown to a certain size, wrap a small amount of sphagnum moss around its base with plastic film; when the plantlet has grown two or three thick roots, it can be cut off and planted separately. The picture shows a treated flower stem fixed on sphagnum moss, which has already grown three leaves and two roots. It can be cut off and planted separately.
II. Stem cutting method (commonly known as beheading):
Phalaenopsis is a single-stemmed plant that grows endlessly upward from its upright stem, but in the leaf axils along the stem there are 1-3 latent buds, which under normal conditions mostly cannot sprout into plantlets.
1. After the plant has grown quite long, you can cut it off between the cluster of leaves below and the cluster of roots with a sterilized knife or scissors. The upper part with roots and leaves is potted in a new pot or mounted on a board so it continues to grow, while the lower part left with the rhizome is given appropriate water.
2. To prevent rot, apply a disinfecting and sterilizing powder such as carbendazim to the cut surface.
3. Before long, the latent buds can sprout 1-3 shoots (depending on the plant's characteristics and the management method). If the stem is too long, it can also be cut into several sections; as long as each section is more than one cun long and has more than one root, each node can send out 1-2 buds.
The buds that continue to grow.
By the second year, two young plantlets have grown.
Cut off the young plantlet with roots from the easily separated point.
The cut-off young plantlet with roots.
4. After being planted separately, it continues to grow. A new pot of Phalaenopsis is thus born.
The above content is excerpted from the experience shared by folk experts!
What do you think? Now let's enjoy the mini Phalaenopsis sale show from No. 39 Gardening Workshop! So easy on the eyes!