Detailed Explanation of Key Points on Evening Primrose Seed Sowing and Propagation Techniques
Evening primrose, also known as late cherry primrose, its flowers slowly bloom in the evening and wither at dawn. The flower blooms for only one night, and legend says its blooming is specially for the moon to admire, which is how it got the name evening primrose. Like the epiphyllum, evening primrose blooms at night, hence it is called “night-blooming cordate telosma”, with a pleasant fragrance, suitable for adorning night scenes.
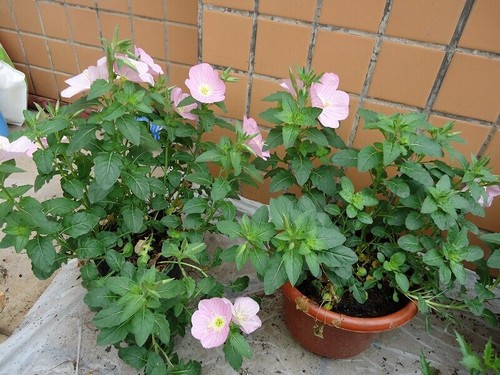
Propagation by seed:
In the north, sow in spring; in areas south of the Huai River, sow seeds in autumn or spring for seedling raising. When sowing, the soil should be raked fine and level, scatter the seeds on the surface of the seedbed, lightly rake over with a rake, and cover with a thin layer of soil; the seeds are small, so the soil must not be too thick, otherwise it will affect seed germination and growth. After sowing, the soil should be kept moist. About 10-15 days after sowing, the seeds will germinate into seedlings.
Autumn sowing is often carried out after mid-to-late September:
1. Disinfect the substrate used for sowing; the best method is to put it in a pot and heat it by stirring, so that any pests and diseases are killed by the heat.
2. Soak the seeds in warm water (temperature similar to face-washing water) for 3-10 hours, until the seeds absorb water and swell. For very common seeds that germinate easily, this step can be skipped.
3. For tiny seeds that are difficult to pick up with hands or other tools, moisten one end of a toothpick with water, stick the seeds one by one onto the surface of the substrate, cover with substrate 1 cm thick, then place the sowing pot into water, with the water depth at 1/2-2/3 of the pot height, allowing the water to slowly soak up.
4. For larger seeds that can be picked up with hands or other tools, place the seeds directly into the substrate, sowing at 3×3 cm spacing.
5. After sowing, cover with substrate to a thickness 2-3 times that of the seeds. After sowing, use a sprayer or fine-hole watering can to moisten the sowing substrate; later, when the potting soil is slightly dry, water again, still taking care not to water too forcefully, so as not to wash the seeds away.
Management after sowing:
1. After autumn sowing, when encountering a cold wave with low temperatures, you can wrap the flower pot with plastic film to help keep warm and retain moisture.
2. After the seedlings emerge, promptly remove the film, and let the seedlings receive sunlight before 9:30 every morning or after 3:30 in the afternoon, otherwise the seedlings will grow very weak and spindly.
3. After most of the seeds have germinated, appropriate thinning is needed: pull out the diseased and unhealthy seedlings so that the remaining seedlings have some space between them; when most of the seedlings have grown 3 or more leaves, they can be transplanted into pots.