Detailed Explanation of the Key Points of Chinese Scholar Tree Bonsai Shaping and Pruning Techniques
The Chinese scholar tree (Sophora japonica) has a low branching rate, with no lateral branches on the middle and lower parts of the trunk, and the trunk thickens slowly. Moreover, most of these trees have hard wood but a slow lignification process, which makes the trunks of young seedlings thin and soft. Because the upper part of the seedling has a high water content and dense leaves, it easily sprouts branches during the second growth period, causing a top-heavy condition. After wind, rain and sun exposure, the seedling naturally bends. In addition, because pests bite and feed on the young tips, a large number of adventitious branches are produced, forming headless seedlings. Below, we introduce the shaping and pruning techniques for the Chinese scholar tree:
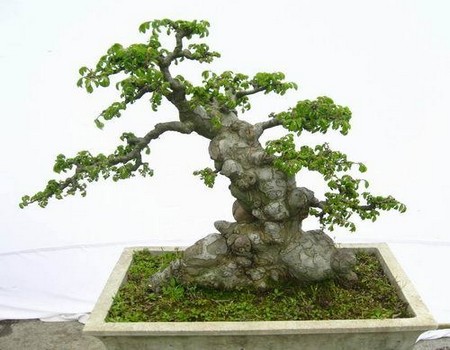
Tree shape: open-center shape.
Number of prunings per year: 1 time during the dormant period, 1-2 times during the growing season.
Key points for shaping and pruning in the first year: During the dormant period, select and retain 3-5 main branches that are evenly distributed at the top of the trunk and grow vigorously, leave 30-50cm and shorten them, keep the bud at the cut at the side and at the same horizontal height, and cut off all other branches. After sprouting in spring, maintain the tree shape of the main branches, promptly remove root suckers and wipe out all lateral buds on the trunk and those below 2/3 of the length of the main branches.
Key points for shaping and pruning in the second year: In the dormant period of the following year, among the branches sprouting near the top on both sides of the main branches, select and retain 2-3 as extension branches, and shorten them at 40-60cm, with the bud at the cut still kept at the side of the branch, and remove all other branches.
Key points for shaping and pruning in the third year: After sprouting in the third year, continue to retain 2-3 evenly distributed small lateral branches on each branch, and remove buds. After 3-5 years, the shape can be formed.
[Pruning techniques]
1. Timely trunk truncation
Every year after spring growth stops and before the second growing season arrives (generally in early July), cut off the curved part at the top. After new branches emerge, choose one vertically upward branch as the new trunk.
2. Reasonable pruning
So-called reasonable pruning means, without affecting the growth of the trunk, retaining as many lateral branches as possible. This is beneficial to the thickening growth of the trunk, speeds up the lignification process, and avoids trunk bending. The specific operations are as follows:
(1) Horizontal branches and nearly horizontal branches are generally not pruned, and are allowed to self-prune naturally.
(2) Competitive branches that affect the growth of the main leader should be cut off in time.
(3) For other lateral branches that do not form competitive growth, control their growth. When their thickness reaches 1/2 of the trunk thickness, they should be cut off in time. This prevents the trunk taper from becoming too large and at the same time increases trunk height. If cut off too late, the wound is large and not conducive to healing.
3. Trunk truncation again
For 2-3a-old seedlings, when growth begins in spring, if the seedling has no obvious main leader or has a main leader but it is too skewed, trunk truncation should be carried out again, and the cut can be made at the point where the skew begins.