How to Propagate Hoya by Cuttings? A Detailed Guide to Post-Cutting Care
Hoya is mostly propagated by cuttings. Apart from winter and early spring, when low temperatures make it unsuitable, cuttings can be taken at any other time of year, and March to April is the most suitable period for propagation by cuttings.
When propagating Hoya by cuttings, let your imagination run wild as much as possible; if you lack flower pots and plastic bags, many everyday items around you can be put to use. Old plastic water cups and coffee cups work well, but don't forget to punch a few drainage holes, which a single matchstick can handle. A soda bottle can be turned into a mini greenhouse; just remove the top and invert it over the pot. Desktop type: a small propagation box works very well, and one with heating is even better; if you want to take a large number of cuttings, then you will need to invest a little.
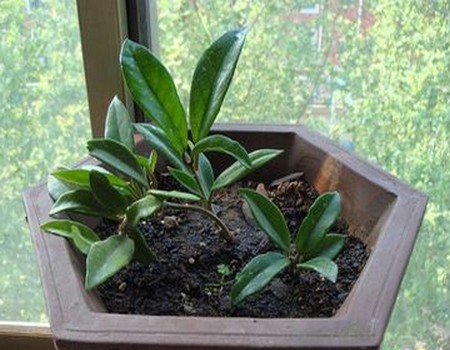
There are many ways to root Hoya cuttings after planting. Some people root them in water, others in a solid medium, but the most effective method is still a solid medium. Mix one part sphagnum moss or peat soil, one part vermiculite, and one part small-particle expanded clay (LECA). Before planting, the cut end of the cutting should be left to dry thoroughly. Insert the cutting so that the lowest two leaves touch the surface of the medium, then cover the pot with a plastic bag to increase humidity, and don't forget to punch one or two ventilation holes in the plastic bag.
If a Hoya cutting has flower buds, some people suggest removing them, believing they hinder rooting. Usually the flower buds on an unrooted cutting will drop off on their own, but if you leave them alone, they may eventually bloom anyway. My advice is to leave them alone; keeping them has little effect on the cutting.
When the Hoya cutting has rooted and begun to grow, it should be replanted into its final growing container. Don't make it too large; it is better for the pot to be on the small side than too big. A pot that is too large will keep the plant endlessly growing roots, which affects stem and leaf growth and flowering.
Hoya seedlings grown from seed are rather slender and weak, grow slowly, and require meticulous care; protect them from sun and rain, shade them, and mist frequently to maintain humidity. Indoor-grown plants often do not set seed, so propagation in production mainly uses cuttings and layering. Apart from winter and early spring, when low temperatures make it unsuitable, cuttings can be taken at any other time of year. Both one- to two-year-old old stems and tender stems of the current year can be used as cuttings, each with 2 nodes, keeping the leaf of the upper node or leaving it without leaves, and inserted into a container or flower pot with loose soil, shaded and kept moist. Roots can develop in 15 to 20 days, and after about 3 months of cultivation, container seedlings need to be moved into larger pots for final planting. Seedlings rooted in flower pots do not need to be transplanted again. Layering is done during the vigorous growth period from May to August, choosing the near-top part of a tender stem and pressing it into the soil at a node bud; after about half a month, once the root system has developed well, it can be cut off and planted out, giving faster results.
For Hoya, both one- to two-year-old old stems and tender stems of the current year can be used as cuttings. Cut them into sections 5 to 8 cm long, keeping 2 nodes, remove the leaves that will be inserted into the medium, and keep only 1 to 2 leaves on top. After the cut end has dried thoroughly, insert the cutting into a sand bed or a loose-soil flower pot medium to one-third or one-half of its length. If using a No. 180 flower pot, about 10 cuttings can be inserted per pot.
In addition, Hoya can also be propagated by sowing seeds. The follicles mature successively from August to December, and the seeds are hairy. Seeds that mature in summer and autumn are best sown as soon as they are collected. Seeds collected in autumn and winter can be stored until after the weather warms up the following spring before sowing.
Cuttings are best taken and planted right away to aid survival. From April to June, light is relatively strong, so to maintain a cool environment, two layers of black shade netting can be set up. Cuttings will root in about 20 days, and new leaves will grow after 1 month. Once the root system has developed well, they can be transplanted into larger flower pots for final planting, then moved to a semi-shaded, ventilated spot for routine care.
Although Hoya can be propagated by cuttings at any time other than winter, the conditions to watch out for differ from season to season. This article walks through the main points to note when taking Hoya cuttings in autumn, as a reference for flower lovers propagating Hoya by cuttings.
1. Medium: In autumn, temperatures gradually drop and the day-night temperature difference increases. Therefore, a solid medium is more suitable for cuttings, and water propagation is not recommended. If you are an old hand, that is another matter. Because temperatures are low, rooting in water takes a long time, which not only tests your patience but also easily leads to unexpected problems due to water quality issues. Compared with water propagation, cuttings in a solid medium can better ensure the roots have sufficient warmth, which helps rooting. You can choose vermiculite, peat, or a mixture of the former two with perlite, which retain warmth and moisture well. Of course, the best choice is the medium you are used to using (as long as it is an inert medium) rather than what I recommend.
2. Watering: Because temperatures will slowly drop, the watering frequency should be reduced. Taking vermiculite as an example: for a 30x15 cm rectangular pot with vermiculite at a height of 6 cm, such a cutting pot only needs a thorough watering every 10-15 days. Too much water not only makes rooting difficult, but even after rooting it easily causes root rot. This is mainly because low temperatures reduce transpiration and weaken the roots' water uptake. If the roots are too wet at low temperatures, root damage is unavoidable. A drier, looser medium is instead more favorable for rooting.
3. Light: The cutting pot does not need strong light; just place it in a spot with scattered light and good ventilation. It is best not to place it where wind blows directly. This prevents a sudden temperature drop in a small area caused by wind from affecting the results of the cuttings.
4. Rooting time: Rooting is slow for autumn cuttings. Taking vermiculite as an example, ordinary branches need half a month to a month to root before they can be potted up, and the root system is not as developed as in spring and summer, but potting up poses no problem at all.
5. Common problems with failed autumn cuttings: branches too tender (cuttings require stems more than one year old), medium humidity too high, unhealthy branches, roots chilled during the cutting process, medium containing fertilizer, poor medium aeration and drainage, and so on.