A detailed guide to blue plumbago (Plumbago auriculata) cuttings: easy to learn
You have a blue plumbago yourself and want to propagate it by cuttings. You cut off a piece of stem, remove the leaves from the lower half, and put it in water. Then, a few days later, the bottom has turned black, and the leaves at the top have wilted. Then you cut off the blackened bottom part and keep it in water. Then, a few days pass, and the bottom has turned black again……
So how exactly should blue plumbago be propagated by cuttings?
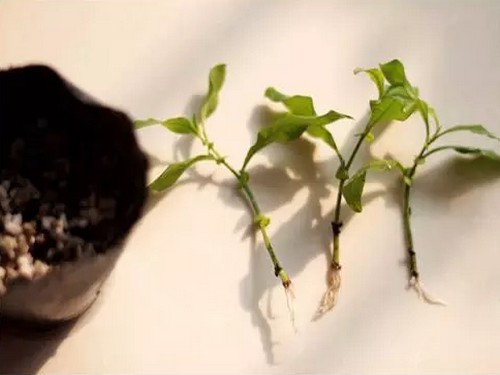
Taking cuttings is an important method of propagating blue plumbago, because blue plumbago sets seed with difficulty, which affects its speed of reproduction, so propagating blue plumbago by cuttings becomes a necessity. However, many flower lovers lack experience with cuttings, so this article summarizes the keys to successfully taking blue plumbago cuttings, which are the following:
1. Timing of cuttings: late spring or early autumn is best (some flower lovers want to take cuttings or sow seeds at any time of the year, but this is actually unreasonable; although there are success stories, the odds are much lower).
2. Medium: clean vermiculite (vermiculite is not necessarily required; perlite also works, and water propagation is fine too; flower lovers can try several approaches).
3. Moisture: the moisture should be saturated, there should be standing water below the medium, and plastic film should cover everything throughout to retain moisture (poor ventilation will cause blackened tips, but if they do turn black, just cut them off and improve ventilation; there is still no problem).
4. Stem: new shoots or the current year's young growth (5-7 cm is enough; you can cut the lower leaves in half across the middle, keeping the tender tip).
Cuttings were started on September 1.
Because a seedling tray is used, the lid is put on to retain moisture. If a pot is used, it is recommended to cover it with a plastic bag or something similar to retain moisture.
On September 29, roots had grown; of nine plants, seven survived. Because vermiculite has no nutrients, they were potted on temporarily on October 3.
Record of key points for taking cuttings:
1. Take cuttings in spring (autumn also works);
2. The knife must be sharp; wash a new knife with water first to remove oil, then disinfect it with alcohol;
3. Choose stems grown this year that have become semi-lignified, about 10 cm long;
4. Use long coconut fiber and sponge as the medium;
5. Put a bag over the pot to retain moisture, with holes cut in it;
6. Place in a spot with bright, indirect light;
7. Roots emerge after about 3 weeks or more;
8. After rooting and planting out, keep a bag over them to retain moisture for 1~2 weeks.
Propagation by cuttings cannot do without sunlight, because the cuttings still need to carry on photosynthesis to produce nutrients and rooting substances to supply their need to form roots. However, the stronger the light, the higher the temperature inside the cuttings, the more vigorous the transpiration of the cuttings, and the more water they consume, which is not good for the survival of the cuttings. Therefore, after taking cuttings, 50~80% of the sunlight must be shaded out, and once the root system has grown, the shade netting is gradually removed: on sunny days, take off the shade netting at 4:00 every afternoon and put it back on before 9:00 the next morning.
PS:
Cuttings always have successes and failures. Generally speaking, rooting 7-8 out of 10 cuttings is fairly common.