Detailed Explanation of Key Grafting Techniques for Golden Bullet (Diospyros cathayensis) Bonsai
For people who love nature and enjoy plants, surely they must have quite a few potted plants at home. The feeling of being surrounded by flowers and greenery is wonderful, as if being immersed in a forest, and one's mood becomes much more relaxed, which is also greatly beneficial for health.
For most bonsai enthusiasts, surely they all know the Golden Bullet (Diospyros cathayensis), which is an excellent choice as a landscape plant. The Golden Bullet has an elegant, antique posture, sparse branches and red leaves, flowers shaped like bottles, and fruits round like balls that turn orange-red when ripe, with a long fruiting period, bright and pleasing to the eye. It is an excellent fruit-viewing bonsai. Below is an introduction to the grafting techniques for Golden Bullet bonsai:
1. Because the sap of the Golden Bullet oxidizes and turns black quickly, the grafting season must be chosen well. April is better (it may differ by region; the best time is when the grafted buds are just sprouting but have not yet leafed out). Choose an overcast day just after rain (with sufficient sap, so the grafted buds will not dry out too quickly).
2. The rootstock should be at least as thick as a little finger (if thicker, the joint surface is larger and survival is easier, and the buds also grow faster). The bud branch should be as thick as a chopstick, straight, 1 to 2 years old, with buds spaced about 4 cm apart. Old and tender ones will not survive grafting, so do not use them.
3. Take a section of bud, leaving 0.5 to 1 cm on top and about 3 cm below. Use a small knife (which must be sharp) to cut straight down along the woody layer of the rootstock to separate the bark, with a distance equal to that of the grafted bud, leaving 1 cm of bark below.
4. Also cut off the bark on the opposite side of the grafted bud with a straight knife, and cut the lower part and the cut surface into an angle slightly less than 45 degrees.
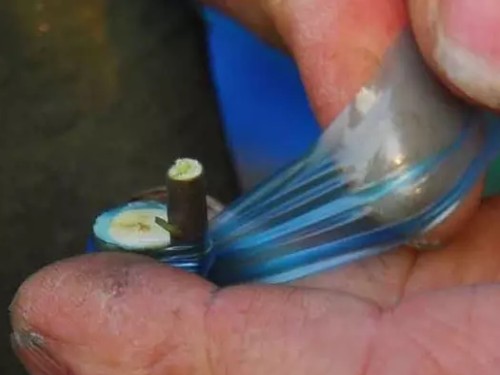
5. Insert the bud into the rootstock; there must be no gap at the joint surface. Then wrap the remaining bark well around the lower part of the bud branch, and bind it tightly with plastic tape (be careful not to damage the bud). The upper bud opening should be sealed to prevent water evaporation.
6. After finishing, put a small transparent bag over it to protect against rain.
Precautions:
1. Use the knife in one smooth cut; if a follow-up cut is needed, it must be flat, with no debris.
2. The knife must be sharp and sterilized. Do not touch the cut surface with your hands, as hands have sweat.
3. After grafting, if the sunlight is strong, shade it a bit so it does not die from sun exposure. It must not be exposed to water; contact with water means death, so a bag must be used.