Key Points of Sowing and Seedling-Raising Techniques for Potted Cineraria
For flower lovers who have a high degree of independence in growing flowers and are not satisfied with buying seeds, they hope to collect seeds themselves. On sunny days when the outdoor temperature is relatively high and there is no wind, you should persist in moving the cineraria outdoors to a sunny spot to bask for several hours, so as to rely on the warm outdoor spring breeze and insects to help with pollination and increase the seed-setting rate. Entering April, when the midday sun is strong, a little shading may be provided, otherwise it is unfavorable for seed setting. Generally, after more than a month, the seeds gradually mature one after another. As soon as the white pappus just appears at the top of the fruit, the fruit should be harvested, so as to prevent the seeds from scattering after the pappus flies away. After drying in the sun, remove impurities, put the seeds in paper bags, mark them well, and store them in a dry and ventilated place.
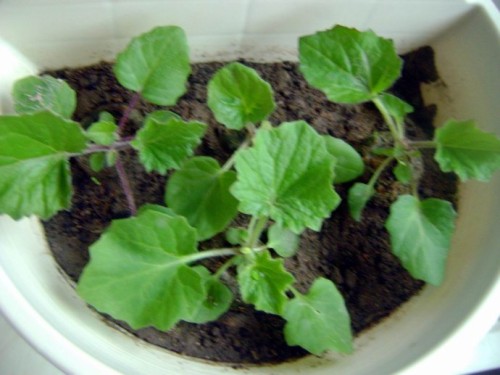
Except for double-petaled varieties that do not set seed easily, cineraria intended for seed collection can be sown in mid-September. After emergence, the seedlings go through two rounds of transplanting, and are planted in 18 to 20 cm pots in mid to late December.
Cineraria is generally sown and raised in August-September. Cineraria likes cool conditions and cannot tolerate high temperatures, so the seedling-raising pot should be placed under the shade of trees to avoid excessively high temperatures.
1. Seed soaking and germination
Before sowing cineraria, soak the seeds in warm water at 40 degrees for 8-12 hours, which can make them emerge 3-4 days earlier.
2. Sowing substrate
The commonly used sowing substrate for cineraria is half leaf mold and half fine sand. After mixing evenly, disinfect it with carbendazim or potassium permanganate water, or disinfect it by exposure to the sun.
3. Sowing method
Cineraria is commonly raised in shallow pots, sown by the broadcast sowing method, with the covering soil just enough so that the seeds are not visible. After sowing, water by the pot-soaking method, cover with glass or plastic film, and place in a cool place. At around 20 degrees, seedlings emerge in 6-7 days.
After the seedlings emerge completely, remove the glass or plastic film to let air in, and gradually move them to a sunny place to prevent the seedlings from growing leggy. At the same time, control the water in the seedling pot soil; it should not be too dry or too wet. Lower the temperature of the seedling pot and supply water by spraying. In principle, spraying until the surface is moist is enough.
4. Seedling separation and temporary planting
About one month after the cineraria emerges, when the seedlings have grown 2-3 true leaves, they can be separated. Water once with a thin liquid fertilizer, and separate the seedlings and temporarily plant them into small flower pots or nutrient pots with a diameter of 10 cm.
5. Potting and final planting
After the seedlings that were separated and temporarily planted grow 5-6 true leaves, or when the roots fill the temporary planting pot, they can be finally planted. When finally planting, choose flower pots with a diameter of 20 cm; either plastic pots or clay pots are fine. When potting, a small amount of long-acting base fertilizer should be applied at the bottom of the pot, such as organic fertilizer or slow-release fertilizer.
For cineraria after potting, the lateral buds that appear at the 3-4 nodes at the base should be removed at any time, so as to reduce nutrient consumption and avoid overly crowded branches and leaves, thereby concentrating more nutrients to supply the growth of the upper flower branches, which helps produce more flowers, larger flowers, and brighter colors.
After final planting, control watering, and with other aspects maintained according to routine care, it can bloom from late February to early March of the following year. At this time, the temperature is already relatively high, and there are gradually more bees and butterflies pollinating and setting seed. You can select excellent plants with large flowers, bright colors, spreading leaves, short petioles, compact and sturdy growth, and no pests or diseases as mother plants for seed collection, place them in a sunny and well-ventilated room, apply more fertilizer mainly based on phosphorus, and also use 0.2 to 0.3 percent potassium dihydrogen phosphate for foliar topdressing.