A detailed guide to sowing blue-eyed daisy (blue marguerite) in pots, easy enough for beginners to learn
I am especially fond of this kind of small herbaceous flower; today I learned that it also has a beautiful name, blue-eyed daisy. Blue-eyed daisy is also known as African daisy and large-flowered blue-eyed daisy. It is a semi-shrub or perennial herbaceous plant with a rhizome, with solitary flower heads, hairy involucres, white ray florets with pale purple undersides, and blue-purple disk centers. The blue-eyed daisy's achenes have ribbed grooves and long soft hairs. The plant height is 20--1500px, with basal leaves growing in clusters and stem leaves alternate, usually pinnately lobed.
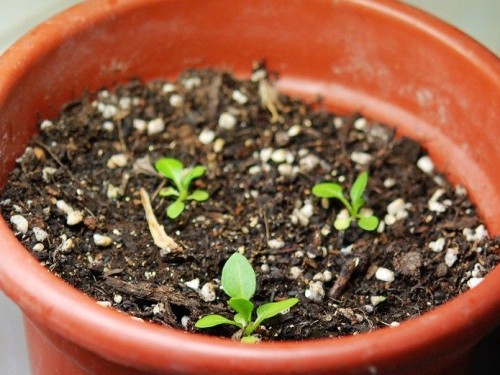
Blue-eyed daisy can be used in flower borders, or as a cut flower, with a relatively long vase life. It can also be grown in pots, with a beauty like a modest little jade. It is usually propagated by sowing or cuttings. Spring sowing is done in March, and autumn sowing in September. For ground planting, choose a spot with ample sunlight; for pot planting, use half loam and half leaf mold, with an appropriate amount of river sand added. Below is an introduction to the sowing method for blue-eyed daisy.
1. Prepare the sowing soil.
2. For sowing fine seeds, the soil is best sifted first. Just use the common household colander or vegetable basket; set the fine soil that falls through aside. First use the twigs and debris removed by sifting to line the bottom, because the bottoms of seedling trays all have small finger-sized drainage holes, and fine soil is easily lost. This is exactly the chance to make use of these large pieces, then fill the cells with fine soil until full. The fine soil is placed on the surface, in order to better moisten and bond with the small seeds, which helps germination. Actually, with Cuijun sowing soil, it is not a big problem even without sifting, since Cuijun sowing soil itself is already fairly fine
3. The moisture of the sowing soil should be appropriate, ideally so that it forms a clump when squeezed in the hand and falls apart when the hand is opened. Some people may ask, isn't it the same to sow the seeds in the soil and then spray water? It really is not the same. Anyone who has used it knows that potting soil is very light, and dry soil has very poor wettability; once sprayed with water it floats up and is very hard to moisten, so first add a little water and stir and mix the soil well.
4. Put the coarse soil left after sifting in the lower part of the seedling tray cells, and put the fine soil on top.
5. Spray water to make the soil surface fully moist. If you have it on hand, you can spray with its 500-fold dilution, which helps germination.
6. Sow the seeds. Dip a toothpick in water and use it to pick up the seeds, one at a time, and place them in the center of each cell. For coated seeds, it is best to press them slightly into the soil. Fine seeds are generally light-loving, so no soil covering is needed; it is best to place one seed per cell. After sowing, put the seedling tray into a bottom tray with water and let the water seep in slowly. Large seeds dislike light, so the seeds must be covered with soil to bury them, and before germination it is best to place them in a cool, dark place. (Petunias dislike light, so the plastic film used for covering can be black film.) Seedling trays are only suitable for sowing fine seeds; plants like geraniums, blue-eyed daisies, and nasturtiums are best sown directly in small seedling pots.
7. After sowing the seeds, spray water again until the soil is completely soaked through, then cover with plastic film. Do not remove the plastic film before germination; it is best to supplement with a spray of water once a day, until after germination, then remove the plastic film and give the seedlings normal light. Make your own little home greenhouse. Put the seedling tray into such a home greenhouse. Cover the lid well until germination. When the temperature is high, place the greenhouse in a cool place; when the temperature is low, it can be placed outside in the sun during the day and brought back indoors at night. Note that once any seedling germinates, it must be given sunlight, otherwise it may become leggy in just one or two days. When most of the seedlings have come up, take out the seedling tray and let the seedlings receive sunlight in a well-ventilated place; it is best to let the soil go through a wet-dry cycle over one or two days. For blue-eyed daisies sown in a large pot, space them 2-3CM apart, one seed each, and after germination transplant them out, one seedling per pot. Seedlings from small seeds are generally fairly tolerant of transplanting, so you can wait until the seedlings are a bit larger before transplanting. When transplanting, it is best to keep some soil around the roots, and after transplanting, take care to provide appropriate shade for a few days.
8. After sprouting, they need ventilation and sunlight, and the soil must not stay constantly wet, otherwise stem rot comes easily. The first summer rain has arrived, and the blue-eyed daisy has also sprouted tender yellow little shoots. For large seeds, it is also fine to sow a single plant directly, but if sowing multiple seeds mixed together, that is best.