Key Techniques and Methods for Propagating Camellias from Cuttings
Camellia, also known as the camellia flower, is a plant of the genus Camellia in the family Theaceae. With its full, plump blooms and dignified elegance, it is one of China's traditional top ten famous flowers and also one of the world's famous flowers. As long as the temperature is suitable, camellias are very easy to manage, and their characteristic of disliking fertilizer makes day-to-day care even simpler. They naturally prefer a warm, humid environment. The flowering period is fairly long, with blooms from October through May of the following year, and the peak blooming period is usually from January to March.
For home potted camellias, autumn cuttings are generally taken from September to October. For autumn cuttings, it is best to use shoots that were kept growing over the summer, because these new branches have already become half-lignified and can fully meet the energy needs for callusing and rooting. As a result, some varieties will even root in the same year, but they generally cannot produce branches that same year and will only branch and leaf out the following spring. When winter arrives, measures to protect against cold and drought are needed, along with strengthened management.
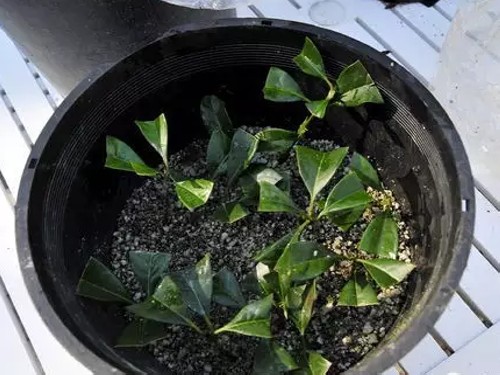
For home cuttings or cuttings of a small number of precious varieties, containers such as pots and wooden boxes are mostly used. For pots, shallow clay pots are preferable, and for wooden boxes, low boxes with plenty of gaps should be used. For the cutting soil, use fresh, clean pine needle leaf mold mixed with 1/3 river sand. Whether using pots or wooden boxes for cuttings, first cover the drainage holes and gaps at the bottom of the pot or box with a piece of plastic window screen, then spread a layer of coarse gravel on top. The leaf mold should be added in layers, fine on top and coarse below, until it reaches 1/2-2/3 of the height from the pot or box rim. If glass is placed over the pot or box, leave a slightly larger opening on the pot or box.
After the pot or box is filled with cuttings, firm it down by shaking the pot or box several times so the soil is compacted and the cuttings fit tightly against the soil. After the pot or box is full of cuttings, use a fine watering can to sprinkle water, or place the cutting pot into a slightly larger basin filled with clean water, letting the water seep slowly upward from the drainage holes at the bottom and along the pot walls into the soil inside the pot, and move it out once the surface soil is thoroughly wet. This can avoid washing away the surface soil and compacting the surface of the pot.
The following are the specific operating steps for camellia cutting propagation:
1. Preparation of the cutting medium
The cutting medium is required to have properties such as heat retention, moisture retention, and loose, breathable texture. Generally, sandy soil or soil rich in humus can be chosen as the cutting medium. When conditions do not allow it or when propagating in large quantities, clean, impurity-free, top-grade loess can also be used. About one week before cutting, the cutting medium should be placed under the sun to bake or disinfected with potassium permanganate solution. Then, 1-2 days before cutting, water the cutting medium thoroughly to moisten it.
2. Collecting cuttings and treating the cuttings
As cuttings, branches from young trees root more easily than branches from old trees, and half-lignified young shoots root more easily than fully lignified old branches. Therefore, from healthy camellia mother plants with excellent quality, stable traits, robust growth, no pests or diseases, and a relatively young age, select current-year, well-developed, half-lignified branches as cuttings, and cut them into 8-10 cm long cuttings, keeping the upper 2 leaves and cutting off the remaining leaves from the base of the petiole. Cut the top end of the cutting flat about 0.5-1 cm from the bud, and cut the bottom end at a slant near the internode.
3. Cutting method
When taking cuttings, follow the principle of inserting them as soon as they are collected. Insert 1/3 of the treated cutting branch into the moist medium (generally about 3 cm, and in arid regions it can be inserted somewhat deeper). To avoid damaging the bark at the base of the cutting, first make a hole with a small wooden stick slightly thicker than the branch, then insert the cutting, and afterward gently firm the soil with your fingers so that the soil closely contacts the cutting. The cutting density should be such that the leaves just slightly overlap.
4. Management after cutting
The four factors affecting rooting of cuttings are humidity, temperature, air, and light. Immediately after cutting, water the seedbed thoroughly once, and set up an arched frame covered with plastic film so that the air humidity remains at around 95% and the temperature is controlled between 18-27 degrees. At first, the seedbed should be shaded, and the degree of shading needs to be fairly heavy. If hot weather occurs, the temperature can be lowered by spraying water on the leaves or misting in the air. After 15-20 days, callus tissue begins to form; at this point, gradually reduce the amount of watering and maintain humidity at around 85%. About 20 days after callus tissue forms, rooting begins. After that, the amount of watering can be further reduced, keeping the soil merely moist. While avoiding direct strong sunlight, gradually increase the light duration so the cuttings can photosynthesize, and at the same time the two ends of the film can be appropriately opened to allow ventilation.