Illustrated Guide to Propagating Mint from Cuttings: A Step-by-Step Tutorial on How to Root Mint Cuttings
Mint, also known as Su mint, is a perennial herbaceous plant. The rainy days lasted for a whole week, and the plants in the yard grew more lush thanks to the rain. Getting up early, with the long-awaited sunlight streaming into the room, I took a stroll around the yard. The fresh air carried the cool scent of mint, and I decided that this summer was the taste of mint. So I might as well pick some fresh mint and make a delicious, positive-energy breakfast, giving it a romantic name: A Summer with the Taste of Mint.
When it comes to mint, everyone is surely familiar with it. In everyday life, we have all eaten cool mint candy, brushed our teeth with mint toothpaste, and used cooling balm when feeling drowsy…all of these contain mint. Mint is one of the world's three major spices and is also a common herb used both as medicine and food. Buy a pot of mint, and you can enjoy it both as an ornamental and as something to eat.
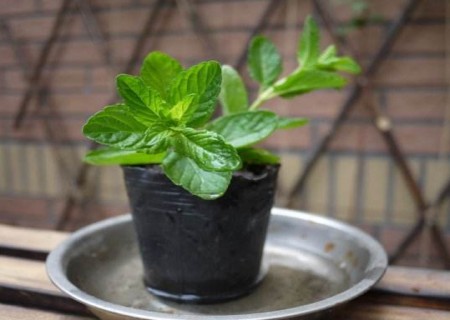
Mint is famously easy to grow. Keeping mint well is very simple. If you see someone else's mint growing beautifully and want to grow one yourself, what should you do? Next, Xiaoya will tell you some very, very easy little methods. Soon you will also have a beautiful, lush pot of mint. Here is an introduction to the water-culture cutting propagation method for mint:
1. From a relative's home, a friend's home, or a local flower-growing friend's home, ask for one sprig of mint, preferably two or more, so the chance of success is greater.
2. If this mint comes with a bit of root, that is even better, very convenient. Just bury it casually in a flowerpot and it will do. Even if the top is bare with no leaves, there is no need to worry; after a while it will sprout and grow leaves.
3. If it is only one or two stems, and the temperature in spring or summer is relatively high, you can put them in a cup and grow them in water.
4. The purpose of water culture is to let it slowly grow roots, and then plant it in soil. This is also a method. If you like this method, you can try it; it is also very easy.
5. The most direct method is actually that you do not need water culture. Prepare a flowerpot, keep the soil inside moist, preferably mix in a bit of sand, and then insert the mint stems directly as cuttings.
6. The best time for these cuttings is spring and autumn, especially late spring and early summer, when the survival rate of cuttings is very high. Roots will grow quickly; just keep the potting soil moist the whole time. Then new mint leaves will grow.
Below is a netizen's cutting method/steps:
Step 1: Prepare tools, mainly scissors and tweezers.
Step 2: Cut a section of mint, any length. I was pinching off the growing tip, so it was very short. Actually, length is not a problem; if it is too long, it is more likely to fall over. Choose strong stems with close, compact nodes, take stem cuttings with terminal buds and a length of 9-15 cm, and remove the lowest 2 pairs of leaves to help with rooting.
Step 3: Remove the lower leaves. Too many leaves consume too many nutrients; before roots have formed, it does not need so much consumption. During water culture, I found that the places where leaves were removed root very easily.
Step 4: There are many cutting methods. Some use a toothpick to poke a hole in the soil and then plant it. The cuttings can be placed directly in water, then potted after rooting, or inserted into a seedling pot. The soil is best as pure vermiculite or perlite, and water thoroughly when inserting the cuttings.
1. Cutting is very important. I think my method is much more convenient. The method I introduce here is similar to planting aquatic plants in a fish tank. The important tool is tweezers; I use eyebrow tweezers.
2. First, grip the mint with the tweezers so that the bottom of the mint is level with the tweezers. If the mint is longer than the tweezers, the mint stem is easily injured during cutting. Do not grip too tightly when inserting; as long as the mint does not fall off, that is enough. Then aim and insert it at a right angle to the soil you want. The cutting is complete.
Step 5: Mint roots very quickly; in 1-2 weeks it can grow many roots. After rooting, move it to a pot for normal care and apply a little slow-release fertilizer or organic fertilizer. Spray water every day to keep it moist, and make sure it has bright, indirect light and ventilation. After new leaves grow, pinch off the growing tips 2 times, and it will fill the whole flowerpot. After that, it will not take long before you see a full pot of mint.