Ivy cutting method step-by-step illustrated guide, beginners can easily learn it too
Ivy is also called English ivy. It has a graceful and neat form, and is a plant very suitable for beautifying the home, especially when placed in a relatively spacious living room, study, or sitting room, with an elegant and simple style, and a touch of southern charm. At the same time, ivy is suitable for growing in households with smokers, as it can absorb the carcinogens in secondhand smoke, helping to purify the air, and more conveniently, it does not need too much careful attention.
Spring warmth and blooming flowers make it the perfect season for enjoying flowers and spring outings. Looking at the vigorous vitality in the countryside, with green filling your eyes and making you linger, don't you wish you could move them all home? Well, let me tell you, it is very simple: pinch off a piece of ivy outside and see what miracle happens!
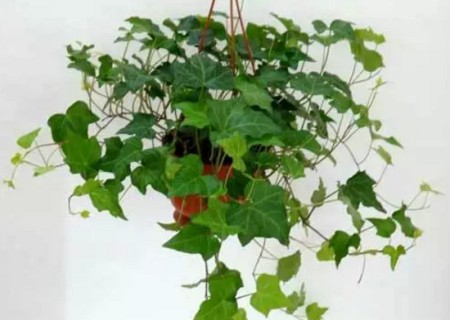
Suitable cutting time: For ivy, spring and autumn are the best times for cuttings.
Unsuitable cutting time: In winter and summer, the temperature is either too high or too low, and ivy is in a dormant period, which is not good for ivy cuttings.
Key points for cuttings: Take an ivy branch 3 to 5 nodes long, remove one or two lower leaves, insert it directly into the prepared substrate, water thoroughly, and after 2 to 3 weeks it will take root and sprout.
1. Selecting cuttings
Before making the cuttings, prepare the branches and the potting soil. Pinch off a branch about 30 cm long from the top of the ivy, and after returning home cut it into three sections for cuttings. When cutting, make sure the leaves remain intact and there are no traces of insects on the upper part of the branch. Ivy is found in many places, and cutting off one section will not affect its growth.
After cutting, it is best to wrap the cut end of the branch with a paper towel, then wet the paper towel and cover it with a plastic bag, to prevent the branch from drying out and shriveling due to water loss. After returning home, cut off the leaves at the bottom.
2. Preparing the potting soil
After returning home, find a few disposable plastic cups and poke a few holes in the bottom to use instead of flower pots. This kind of pot has several advantages: it holds less soil, so the branches are less likely to rot. Second, the cup is transparent, so you can clearly see the rooting situation and transplant in time. It also takes up little space.
3. Inserting the cuttings
After putting soil in the cup, use chopsticks to poke a few small holes in the soil, insert the branch, basically one plant per cup. Press gently with your fingers to prevent the branch from leaning this way and that when watering.
4. Management and care
After cuttings, water thoroughly and place in a bright spot with plenty of sunlight. At the beginning, water more, once every 2 days, and after a week gradually reduce the frequency of watering, watering again only when the soil is dry. Keep the temperature between 15 and 20°C, and rooting will occur in about 20 days. After rooting, do not transplant immediately; let the young seedlings grow in the cup for a period, and after another 1 month, when the root system has developed well, they can be transplanted into pots.
5. Transplanting the seedlings
Transplanting is also very simple: just plant the seedling upright in the soil. After transplanting, place it in a cool place for about 1 week to recover, then care for it normally. Friends who like a lush, full pot can plant two plants in one flower pot, growing opposite each other.
Ivy cutting method/steps:
1. Cutting selection: From the top of the ivy, cut 3-5 nodes, a healthy terminal bud 5 cm long, as the cutting, and remove 1-2 leaves at the bottom.
2. Branch treatment: You can also take a section of a robust branch for cuttings. After removing 1-2 leaves from its lower part, cut it to an appropriate length.
3. Preparing the container: Cut three or four holes in the bottom (a disposable cup can be used). This way it holds less soil, dries and rewets quickly, and you can also clearly observe the plant's rooting situation, making transplanting more convenient, while also taking up little space.
4. Adding soil: Put in soil with good air permeability; sandy soil is also fine. Use a finger or chopsticks to poke a hole in the soil in the middle of the cup.
5. Inserting the branch: Place at least one branch with its leaves cut off into the soil.
6. Firming the soil: Add soil and press the soil around the cutting slightly, so that it does not lean this way and that when watering.
4. Proper watering: After watering thoroughly, place it in a bright spot without direct sunlight. For the first few days, water about once every two days, and after about a week, gradually reduce the frequency of watering.
With proper management and suitable temperature, rooting can occur in about 15-20 days. After rooting, do not rush to transplant; let the seedling continue to grow in the cup for a period. After about a month and a half, when the root system has developed well, it can be transplanted into a larger flower pot.
After the seedling is transplanted, water thoroughly, first place it in a place without direct sunlight for two or three days to recover, and then it can be exposed to sunlight. Ivy has strong vitality and is easy to manage. Generally, water when the soil is dry and let it dry between waterings. In winter, placed indoors, watering once every half a month is no problem.