How to graft plum blossoms? A detailed guide to the cleft grafting propagation method
Plum blossoms are usually propagated by grafting, because seedlings grown from seed often fail to pass on the superior traits of the mother plant, and grafting is divided into two types: cleft grafting and bud grafting. We have already covered the bud grafting technique for plum blossoms, so this article will discuss the cleft grafting propagation method for plum blossoms!
As for the scion, there is no need to elaborate, it is the same as usual: start the cut about 1 mm below the lowest bud and slice two sloping faces forward, with the sloping faces about 1.5 cm long.
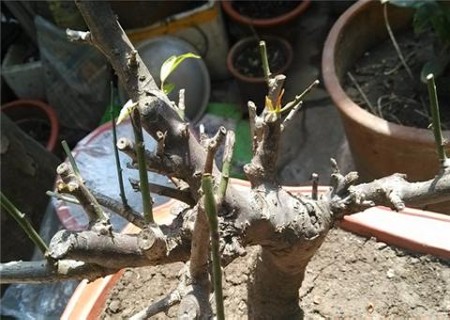
For the rootstock, also choose a semi-lignified new branch of the current year, and cut it back at the base, leaving 5 to 6 buds. I do this together with the cutting back, that is, on the basis of grafting in early spring, I carry out a second grafting of another variety.
Features:
1. The scion has no leaves, while the rootstock keeps its leaves; the top of the rootstock should be cut at an upward slant 2 mm above the bud. The purpose is to make it easy to pry open the cut with your hand at the top of the slanted cut,
2. The rootstock keeps its leaves in order to continue producing nutrients, and the cutting back also stimulates a second flush of new buds. In addition, when bagging, wrap 2 to 3 leaves inside the bag and seal it tightly to lock in moisture. Because of leaf transpiration, the air humidity reaches saturation, ensuring the scion does not lose water, while also providing a shading effect.
3. The scion likewise needs to be wrapped first, then bagged, and when bagging, wrap 2 to 3 leaves inside the bag.
Method/Steps:
1. Cleft grafting mostly uses one- to two-year-old rootstock; at the end of March (in a cold room) or in early April (in the open field), cut off the upper part of the rootstock 3—5 cm above the ground.
2. Use vigorous one-year-old branches as scions, cut them to 5—6 cm long, keeping at least 3 buds, and cut slanted downward on both outer sides of the lowest bud into a duck-bill shape, then open a 3 cm long slit on one side of the rootstock.
3. Insert the scion into the slit of the rootstock so that the two fit closely together, then bind it with a plastic film strip, or stick it tight with a polyester strip.
4. Finally, cover the scion with a small plastic bag, tying the bag opening below the joint, so you can often check through the film. After it survives, remove the binding material. As the buds grow, the rootstock buds also sprout, so remove the buds early.