Detailed Explanation of Pear Tree Grafting Methods and Technical Points
Pear tree grafting in July and August mainly refers to bud grafting. First, grafting for pear nursery seedling raising and after rootstock orchard establishment. Second, grafting when renewing varieties. That is, when renewing inferior variety trees with good branching ability in a one-year-old pear orchard, the high bud grafting method is used to change the top. The grafting of pear tree rootstocks uses "T"-shaped bud grafting; for thicker root suckers, side grafting or cut grafting can be used.
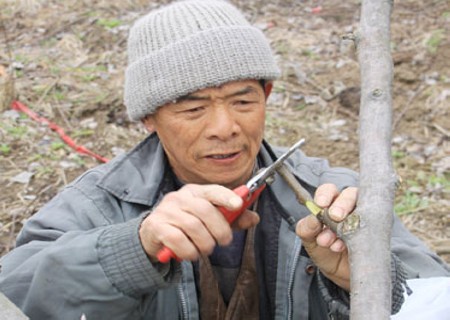
For transplanted grafted pear seedlings, because the density in the sowing nursery is relatively high, growth is often uneven. It is best to separately plant the successfully grafted semi-finished seedlings in the spring of the following year before growth begins, so as to expand the nutrient area for the young seedlings. At the same time, cutting the root system also solves the problem of the rootstock main root being too long. After separate planting, the dug-up seedlings should be planted and managed separately according to whether they have successfully grafted or not, and whether they are thick and strong or thin and weak.
I. Grafting Methods for Pear Seedlings
As shown in the figure:
II. Grafting Methods and Applications for Replacing with New Varieties
1. Grafting Method on Branch Tips
(1) Cleft grafting: Cleft grafting is an ancient grafting method. When top grafting to change varieties, it is mostly used for grafting on branch tips when the sap has not yet begun to flow and the bark has not yet separated from the wood. After sawing the top-grafted tree according to the principle of retaining or removing the framework, smooth the rough saw cuts with a knife, make a vertical cleft in the center of the saw cut, gently pry open the cleft, and insert the scion gently into the rootstock so that the thick side of the scion faces outward and the thin side faces inward. Be careful to align the cambium of the rootstock and scion. When inserting the scion, do not insert the cut surface completely; leave 0.5 cm exposed. One joint takes two scions. After joining, tie tightly and wrap securely with plastic strips; not even a small wound should be exposed outside.
(2) Bark grafting: When the sap is active and the bark begins to slip, bark grafting can be carried out. The advantage of this method is that the technique is simple, the operation is easy, and the cut is convenient. The method for cutting the scion is: hold the scion in the left hand, support the scion with the index finger, and hold the grafting knife in the right hand to cut the scion. The cut surface should be long, flat, and thin. The length of the cut surface depends on the thickness of the scion, generally 3-6 cm. The tip on the back side of the large slanted surface is cut into two small slanted surfaces of 0.5-1 cm, forming an arrow shape. After the scion is cut, use the grafting knife to smooth the saw cut, cut a vertical slit in the bark, with the slit length being 1/2 of the length of the large slanted surface of the scion. Gently pry with the knife tip to slightly separate the bark. If the bark does not slip well, insert a pry tool to pry the bark open. Align the scion with the slit, with the large slanted surface against the xylem and the small arrow against the bark, and insert slowly while pressing the vertical slit with the left hand. Prevent inserting it crookedly or inserting the scion outside. Insert until the large slanted surface is slightly exposed above the rootstock slit. Generally, 2 scions are inserted on one branch tip, arranged left and right; 1 scion is inserted on a thinner branch tip. For branch tips with excessively large wounds, 3-4 scions can be inserted, which helps wound healing. Finally, wrap tightly and securely with plastic strips.
2. Grafting Method for Producing Branches on Bare Zones
(1) Bark side grafting: Used to insert branches and fill gaps in bare areas inside the canopy of top-grafted trees. Because pear trees can be grafted when the bark slips, first scrape off the old bark on the upper part of the branch or trunk to be grafted, and cut a "T"-shaped slit. The direction of the vertical slit forms a 45-degree angle with the branch or trunk, the horizontal slit reaches the xylem, and the vertical slit is not cut through. On the horizontal slit, dig out a semicircular slanted surface. The cutting method of the scion is the same as for bark grafting. Be careful to make use of the curvature between the scion nodes to cut a large slanted surface. When grafting, first pry up the opening with a pry tool, insert the already cut scion into the slit, and then tie tightly with plastic strips.
(2) Bud grafting with wood: Bud grafting with wood
is actually a type of bark side grafting with a shortened scion, used to produce branches on bare areas of large branches or trunks. Large trees can be grafted when the bark slips. When grafting, first scrape off the old bark at the grafting site to expose the white bark, then cut a "T"-shaped slit. On the back side of the scion where buds are to be retained, cut a slanted surface about 4 cm long, and cut 2 small arrows at the tip on the other side. Hold the cut scion and insert it into the "T"-shaped slit. When the bud is about 1 cm from the horizontal slit of the "T" shape, use a grafting knife to cut down along the horizontal slit, cut off the scion, and the bud with wood enters the "T"-shaped bark. Then tie tightly with plastic strips.
3. Grafting Method on Thin Branches
(1) Side cleft grafting: Mostly used before the tree's bark slips, for grafting fruit-bearing branch groups with a diameter of less than 2 cm inside the canopy of top-grafted trees. Branch grafting is carried out on the side of thin branches of top-grafted trees. Cut a slanted surface about 3 cm long at the base of the scion, and cut a short slanted surface 1 cm long on the opposite side. At a smooth grafting site on the rootstock, cut downward at a 20-30 degree angle to a depth of more than 3 cm. Insert the cut scion into the rootstock with the cut surface facing inward, align the cambium, and leave slightly exposed white. Tie tightly and wrap securely.
(2) High bud grafting: Used for supplementary grafting on sprouting branches and new shoots on scaffold branches after top grafting. In areas inside the canopy of top-grafted trees where grafting did not survive or branches are missing, retain the sprouted branches that grow out, and in July-August use the "T"-shaped bud grafting method to bud-graft at the base of the sprouting branches.