How do you bend and shape a mountain pine bonsai? Master these practical techniques
The mountain pine tree is tall and slender, upright and unyielding, found everywhere across the mountains, and is excellent timber for construction. Its fine qualities are known to all. Therefore, bonsai enthusiasts break with conventional styling and seek out unusual, special and bizarre material in pursuit of innovation.
In principle, the styling of mountain pine bonsai takes the display of strength and elegance as its theme, but because its branches are supple and highly pliable, while collected stumps from the wild are mostly short, thick and crooked, with few being upright and clean, and most lacking branch pads, one should not stick to one formula but work according to the material, relying on the creator's artistic sensibility and understanding of natural beauty, following aesthetic principles, capturing the most prominent features and the most beautiful aspects of the stump, expressing them fully, and turning the material at hand into a living work of art. Mountain pine bonsai takes a long time to take shape; without ten or eight years, or even longer, of continuous creation, it is very difficult to complete a reasonably satisfactory masterpiece.
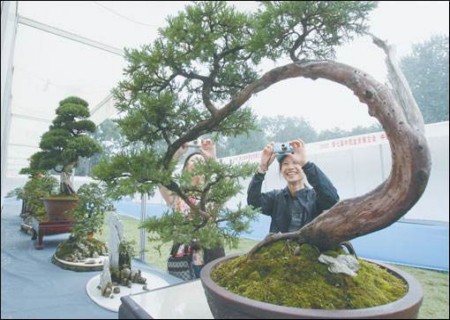
Because pines have weak regenerative sprouting ability, they cannot be shaped using the methods used for deciduous trees. Even less should one use excessive force or pull and twist hard. What cannot be done in one go must be done in stages and at different times. Usually a combination of pruning and wire bending, together with grafting, is adopted. Pay attention to forcing buds during the growing season and pinching the tips during the budding period.
Forcing buds: pruning to force buds can be done up to four times a year. From February to September, roughly every two months, a new flush of buds will break. This is relative to a strong tree; weak branches need to be built up. The main focus can be placing weak branches toward the sun [due south] and spraying fertilizer on the foliage and lateral roots. The characteristic of the tree is that whichever side has roots, that side's branches are nourished. The safest method is to destroy the apical dominance of the branch to force buds. That is, use a needle to prick the growth point at the branch tip many times to achieve the effect of destroying the growth point and forcing buds.
1. Determine the viewing side
For an old stump dug up from the wild, during the process of cultivating the raw material one can carefully observe the direction of change of the trunk, the thickness and distribution of the root flare, and the outward direction and placement of the grafted branch pads, repeatedly weighing them and considering overall coordination. Do not rush to work; be sure to find its most prominent, most distinctive viewing side that can express the most beauty while avoiding the ugliest parts, so that you have a well-thought-out plan, and wait until the tree's vigor has recovered before starting the shaping and working.
2. Trunk treatment
The trunk is the main line of a stump bonsai; whether the trunk is processed well or not is the key to whether the potential beauty of a work can be fully expressed. Broadly speaking, it can be divided into straight trunk, slanting trunk, curved trunk, lying trunk, as well as single trunk and multiple trunks. Apart from the multi-trunk forest-style stump being extremely rare, mountain pine exists in all these forms, and there are also many bizarre and unusual stumps, which are conducive to innovation in styling.
3. Trunk chopping and branch growing
After selecting the trunk according to the best viewing side for a mountain pine stump, the method of chopping the trunk and growing branches can be used, and the cut must be made just right. Because mountain pine branches and trunk do not sprout new buds without needles, the upper end of the cut must retain a side branch with needles, and once it is grown thick it will extend the trunk and branches. If the cut on the old trunk does not have side branches on both sides, leave about 5 cm and seal the cut with grafting sealant or plant ash to prevent shrinkage or loss of sap, and wait until the side branches grow vigorously before doing further shaping and trimming.
4. Strong bending
The styling of mountain pine bonsai should take the viewing side as the standard, so that the trunk bends and changes at different angles while being natural and relaxed, balanced and coordinated, presenting as much as possible the beauty of curves with a sense of movement and power, and avoiding being too balanced and mechanical. Practice has proved that branches and trunks about 12 cm in diameter can likewise be strongly bent without the need to carve grooves or make wedge-shaped cuts.
5. Branch pad styling
The styling of branch pads in mountain pine bonsai requires that the style of the pine be expressed according to its growth patterns in nature; whatever the tree form, it must be crooked to a proper degree, with a powerful and smooth direction of growth, the main branches and trunk slightly drooping, and with graded branching, clear veins, forming branch pads. One may appropriately create hard angles, dead angles and soft angles that show strength, combining arcs, straight lines and curves, achieving both strength and suppleness, beautiful and pleasing to look at.
8. Branch styling
The branch styling of mountain pine differs in its operational requirements from the usual method for pines of mainly tying, pulling and hanging; it must emphasize the word "prune", with pruning and twisting, forcing buds and controlling needles, combined with tying, pulling and hanging.
9. Flat-plane effect
In the styling of mountain pine bonsai, one must also pay attention to the flat-plane effect. Some bonsai differ greatly in viewing effect between the real scene and a photograph; this is the question of whether it is photogenic, that is, the question of the flat-plane effect. At different stages of each creative process, photographs should be taken accordingly for comparison, and a simple album file should be established for convenient reference, appreciation and application at any time.
In addition, once a mountain pine bonsai has taken shape, a relatively shallow pot is mostly used, and a purple clay pot is preferable, to set off its vigorous and rustic quality; the shape and specifications of the pot should match the styling effect and the posture of the stump scene. Ornaments on the pot surface should be simple and avoid bright colors; companion stones should have blunt or coarse veining, and intricacy and fragmentation should be avoided.
Notes:
1. Frequently clean away old needles and dead needles, and maintain an appropriate amount of needles to facilitate ventilation and light.
2. Pruning and grafting wounds must be sealed promptly to prevent the loss of pine resin.
3. When a mountain pine branch has no foliage, it easily shrinks at the node and dies.
4. In the early stage, pay attention to sheltering from wind and preventing shaking, so as to avoid shaking the tree and pulling the roots. Small trees should be fixed with stakes, and large trees should be fixed with supports.