Illustrated Guide to the T-shaped Bud Grafting Method for Bonsai, Step-by-Step Grafting Tutorial
Bud grafting refers to a grafting method in which a single bud with a cambium layer is used as the scion. With this method, you must ensure that the scion is the only robust, pest-free one. Note that after grafting is complete, you should record the plant's survival rate at all times. If you find the bud sprouting, promptly release the bud from the wrapping film, otherwise survival will be affected. The "T"-shaped shield bud insertion method is usually used, that is, the scion bud is cut into a shield shape, while the rootstock is cut into a T shape to insert the scion into.
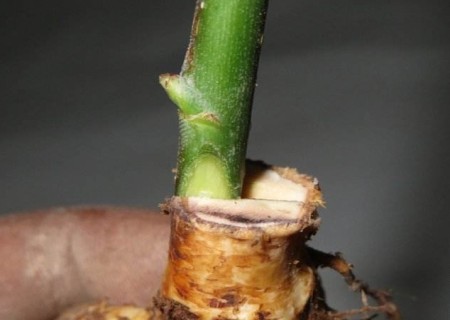
When grafting, a "T"-shaped incision is cut on the rootstock, hence it is called "T"-shaped bud grafting, also known as ""-shaped bud grafting. This method is simple to perform, fast, and has a high grafting survival rate. The rootstock is generally a 1-2 year old sapling, and it can also be grafted onto the current-year new shoot of a large rootstock. Old bark is not suitable for this method.
I. Key Points of Operation
"T"-shaped bud grafting is carried out during the growing season. Graft at about 4 cm above the ground on the rootstock. First remove the leaves, then cut a "T"-shaped opening. First make a horizontal cut, with a width of about half the circumference of the rootstock. In the middle of the horizontal cut, make a vertical cut downward, about 1 cm long. For the scion, use the two-cut bud removal method. That is, one cut is made horizontally about 0.5 cm above the bud, with a width of about nearly half the thickness of the scion. The other cut starts about 0.5 cm below the petiole. Cut from bottom to top, going deep into the xylem and upward to the horizontal cut. Then hold the petiole and move it to one side to remove the bud piece. The xylem remains on the scion.
When grafting, hold the bud piece with your left hand, and use the tip of the knife with your right hand to pry open the bark on both sides of the "T"-shaped opening on the rootstock. Place the lower end of the bud piece into the incision, hold the petiole and insert it downward, so that the upper edge of the bud piece aligns with the horizontal cut of the "T"-shaped opening. Then use a plastic strip about 30 cm long and 1.5 cm wide to wrap tightly and securely from bottom to top. There are 2 wrapping methods:
One is to wrap both the bud and the petiole. This method is fast to perform and has a good rainproof effect. However, because the bud cannot sprout and grow, it is suitable for bud grafting that does not sprout in the same year after grafting. The other is to expose the bud when wrapping, but the surroundings must be tied tightly. This method is suitable for bud grafting that sprouts in the same year. In addition, tree species prone to gummosis should also use the exposed-bud wrapping method.
II. Specific Techniques
1. Choose the plant variety and rootstock you want to graft
In order to graft successfully, you must cut a piece of scion (a small piece, for grafting use) from a healthy, disease-free plant variety (source tree) and a suitable growing tree (rootstock). In order to perform T-shaped bud grafting, the bark of both trees must be smooth. This means the bark can be easily peeled off, and the green layer beneath is moist. This method is usually carried out in spring. Try to water them well to help them grow together. T-shaped bud grafting is usually used for propagating fruit trees.
2. Cut a piece of scion
To do T-shaped bud grafting, you must make the cut 1.3 cm below the branch and 1.8 cm above the bud. The depth of the cut should cover the soft green layer beneath the bark, but not deeper. In order to graft successfully, the green layer must be exposed on your scion. If you must store your scion, wrap it in a wet paper towel, put it in a plastic bag, and store it in the refrigerator.
3. Make a T-shaped incision on your rootstock
Choose a place on a branch or sapling where the diameter is between 0.6-2.5 cm. This place must not have any buds, and it is even better if it can be far away from any other buds. Make a vertical cut in the bark, deep enough to expose about 2.5 cm of the green layer. At a position about one third of the distance from the rootstock, make a horizontal cut of about the same depth. Place the knife at the junction of the cuts and turn it so that it moves up and down, making the green layer visible.
4. Use the scion
Slide the scion containing the bud below the incision you just made on the rootstock, being careful not to bring any dust or bacteria with it. If part of the scion's bark sticks out above the T-shaped incision, cut it off so that all parts fit closely together properly.
5. Tie the scion to the rootstock
Use an elastic rubber material (such as grafting rubber) to wrap around the rootstock, holding the bud in the proper position. Be careful not to squeeze or cover the bud.
6. Remove the binding tape
After about one month, the rubber you wrapped around the rootstock may loosen and fall off. If it does not, gently unwrap it yourself, so that this area will not be constricted too tightly.
7. Follow up on the condition of the bud
If the bud looks plump and healthy, it has most likely survived. If it is withered, then it is dead, and you will need to start over.
8. Remove other material
The following spring, once the scion begins to sprout, make a diagonal cut of 1.3 cm on the successfully sprouted scion. Other buds growing below the scion must all be removed in order to promote healthy growth of the grafted scion.