Detailed Guide to Plum Blossom Cutting Propagation Technology, Easily Master the Cutting Method
Plum blossom is a very common flowering tree in China, and many flower enthusiasts now make plum blossoms into bonsai to display at home. Plum blossom bonsai, with its sparse shadows slanting across and its ancient, vigorous air, is full of poetic charm. The plum, blooming alone to herald spring across the land, has been regarded by Chinese people since ancient times as a symbol of good fortune, bringing tidings of spring and auspicious celebration. Plum blossoms have a delicate fragrance, and the plum tree has an elegant posture with ancient, gnarled branches; appreciating a plum tree is not only about admiring its flowers. As a bonsai or cut flower, it is especially rich in ornamental value.
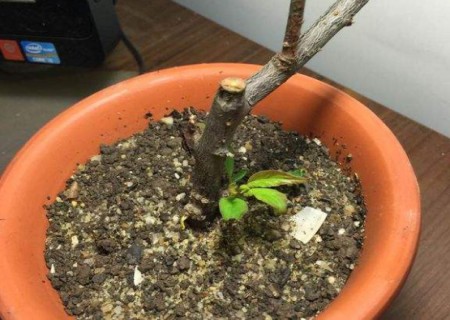
Propagating plum blossoms by cuttings is simple to carry out, and the technique is not complicated either; at the same time, it can fully preserve the excellent characteristics of the original variety. As long as plum blossoms are cut properly, the survival rate can reach 60%-70%. After leaf fall in November-December or after flowering in early spring, cut one-year-old thick, strong branches (without flower buds), 10-18 cm long, and insert them into a sandy loam seedbed, with the buried portion about 1/2, at a spacing of 10 cm × 20 cm. After insertion, keep the soil at half moisture and pay attention to watering and other management work. Cuttings made in spring must be given a shade shed during the summer.
The specific technical points are as follows:
1. Time: Carry it out in early spring or late autumn in combination with pruning. In the middle and lower reaches of the Yangtze River, the cutting time should be a few days before the Beginning of Spring.
2. Environment: It is best to take cuttings in a semi-shaded, moist place, that is, under conditions with scattered light. If these conditions are not available, take care to keep it constantly moist, so that the cuttings do not dry out from lack of water.
3. Material: Choose vigorous one-year-old branches, and cut the middle and lower parts of the branches into 15 cm long cuttings. For the cuttings, you can also choose vigorous branches of the current year (two-year-old ones are also acceptable), 25-30 cm long, with a thickness similar to the small end of a chopstick, neither too thick nor too thin.
4. Medium: Perlite; the best soil is unfertilized sandy soil.
5. Operation:
Dip the cut surface in woody plant rooting powder and insert it into a flowerpot with a diameter of 15 cm, 5 plants per pot, water thoroughly, and place it in a low-light spot indoors; when taking cuttings in autumn, the outside of the flowerpot should be wrapped with a plastic bag to achieve the purpose of keeping it warm.
The insertion depth should preferably be 15-20 cm. If frosty weather occurs, it is also necessary to cover with grass to keep it warm. After insertion, water thoroughly, and afterward keep the soil moist; water before the surface soil turns white. If after several waterings the soil surface becomes compacted, loosen the surface first and then water, making sure that each watering can soak down to the bottom of the cuttings. But also note that you must not water too much, so as to prevent the lower part of the cuttings from rotting.
Wait until April-May of the second year, after sprouting, then move them out of the room and carry out routine maintenance and management. Water once a week with nutrient solution, 100 ml each time; watering should follow the principle of "see wet, see dry," and in the spring of the third year they can be transplanted and planted out.