How to Propagate Honeysuckle by Cuttings? A Detailed Guide to Cutting Propagation Techniques
Cutting propagation for seedling production can be divided into short-branch cuttings and long-branch cuttings according to the length of the cuttings selected; short-branch cuttings are commonly used for mass propagation of seedlings, while long-branch cuttings are usually used for direct planting to establish a garden or for propagating semi-formed large seedlings.
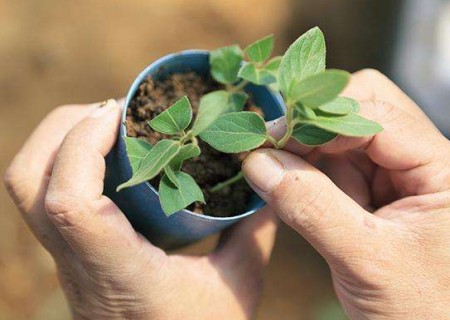
Honeysuckle can be propagated by cuttings, layering, division and seed, but the cutting method is the simplest and easiest, with a high survival rate and early flowering. When taking cuttings, use 1-year-old vigorous branches (or branches after flowering) as cuttings; each cutting should retain 3 to 4 pairs of buds (or leaves). Remove the lower leaves and insert the cutting into the seedbed. NAA can also be used as a rooting agent to promote rooting of the cuttings. After cutting, be sure to spray water frequently; roots will form 2 to 3 weeks after cutting. Spring cuttings can be transplanted in the autumn of the same year, while summer and autumn cuttings can be transplanted in the spring of the following year.
Autumn is the best time for propagating honeysuckle, with a relatively high survival rate. Below is an introduction to the honeysuckle cutting method.
Cutting time:
It is best to take cuttings in the rainy season of summer and autumn, when soil and air humidity are relatively high. This is because after cutting, autumn temperatures drop, providing a period of root growth, which ensures that the branches will sprout when spring arrives.
Method/Steps:
1. Honeysuckle is easy to grow and can survive from cuttings; it can be propagated in both spring and autumn. When out in the wild or visiting a friend's home, you can break off a section of branch to bring back.
2. Break off several thick, pest- and disease-free branches. To improve the cutting survival rate, it is recommended to take several more branches; do not use ones that are too tender.
3. Remove the leaves at the very bottom of the branch and prepare a flower pot and soil. For the soil, you can use ordinary soil for growing flowers and vegetables, plus some sand.
4. Leave the branch for 24 hours, and once the wound has dried, insert it into the potting soil.
5. Next, place the flower pot in a cool, ventilated place. To reduce the risk of failure, you can insert several more branches. The best time to take cuttings is spring or autumn.
6. Keep the potting soil moist at all times, but do not water too much. In short, do not wait until the soil dries out and turns white before watering. Generally, if the temperature is suitable, roots and small leaves will grow in half a month.
7. Once new leaves have grown, you can fertilize and so on. If the flower pot is too small, you can switch to a larger one. Believe me, in less than two years, if the soil is fertile enough and the pot is large enough, covering the entire railing will not be difficult. And it will also produce fragrant, beautiful flowers!